Voice-services - SIP
The document describes the SIP page of the Teliqon Portal, including SIP endpoint management, filtering, search, endpoint editing, pagination, and SIP gateway information. It explains how users create and manage SIP endpoints and where gateway-related connection details are displayed.
General information
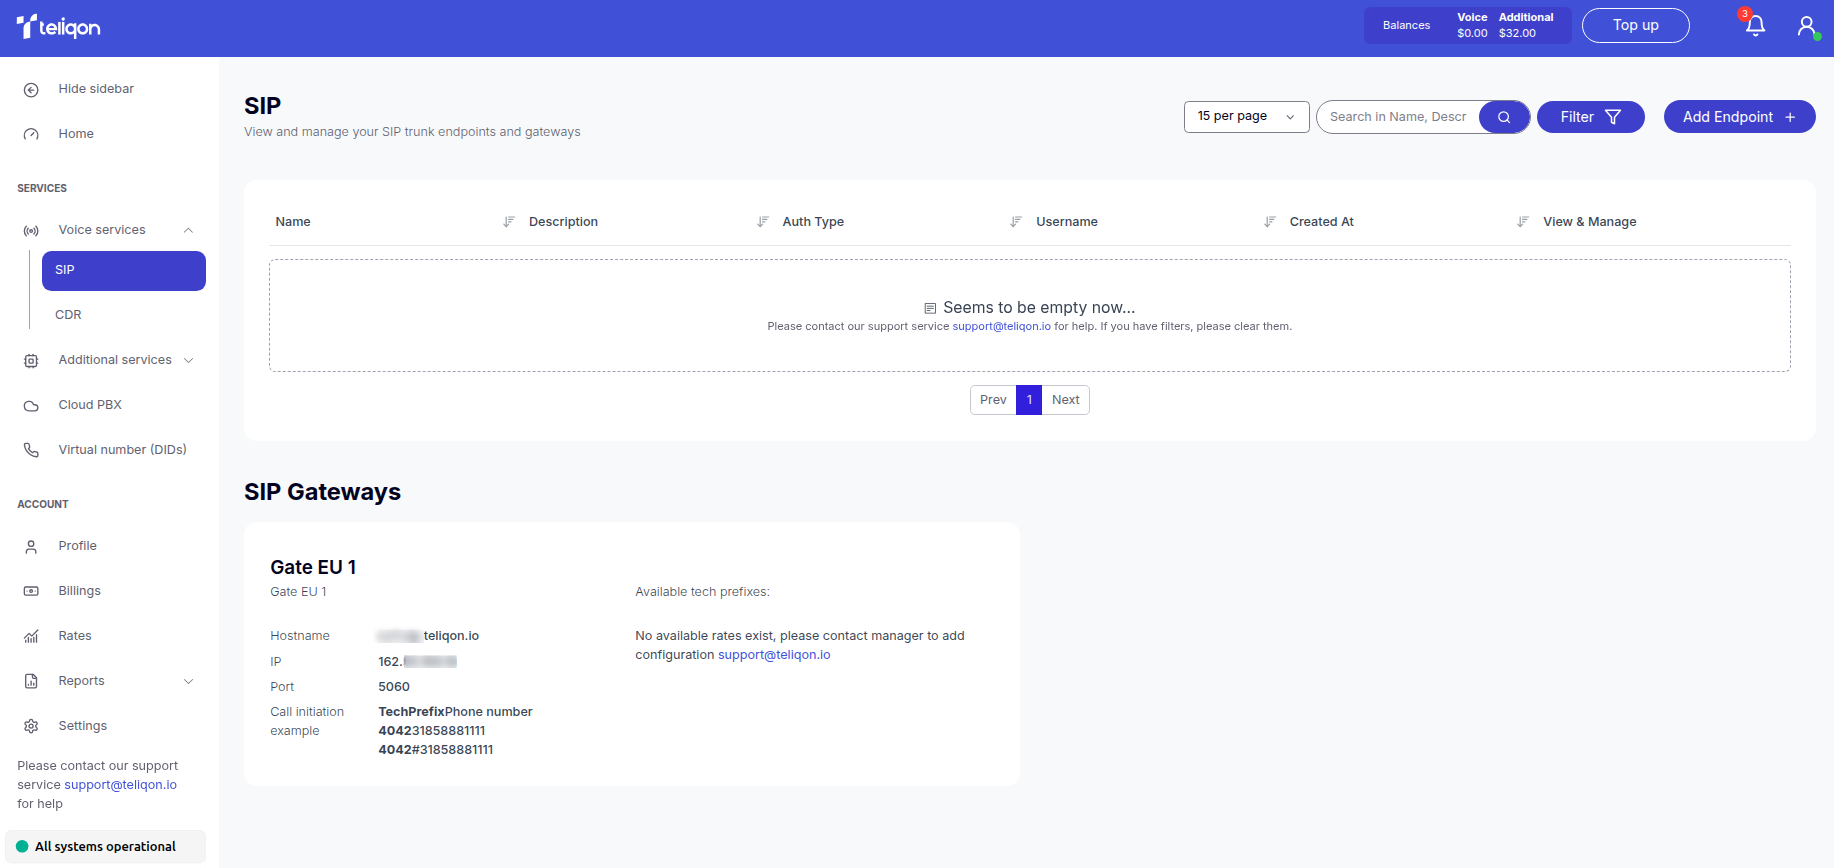
The SIP page displays your SIP Endpoints - the devices or applications used for internet telephony. These can include hardware IP phones or specialized software (softphones) installed on a computer or smartphone.
Additionally, if you already have a server or a PBX system, you can use the endpoints to enable both outgoing and incoming calls through the cloud service by establishing a connection via SIP.
You can access this page from the side menu:
The page contains the following elements:
-
Top toolbar;
-
SIP list;
-
Bottom toolbar;
-
Information about SIP Gateways.
Top toolbar
The top toolbar consists of the following elements:

-
Filter button;
-
Search field for SIP trunks;
-
Add Endpoint button.
Filter
Using the Filter button, you can filter data by the following parameters:
a. Created At - a filter by the creation date of the SIP trunks. To set a date range, use one of the following methods:
-
Click on the dates in the calendar, selecting the start and end dates;
-
Select one of the preset options (“Today”, “Yesterday”, “This week”, “This month”, “This year”).
To apply the changes, click the Apply button.
If you change your mind, you can close the calendar by clicking on the empty space outside of it or reset the selected dates using the Clear button.

b. Auth Type - a filter by authorization type. You can choose between two options: Username + Password or IP.
You can combine these parameters to obtain more detailed data.
Once you have selected the required filtering parameters - you need to click the Apply filters button.
If you want to reset all filter values - click Clear all.
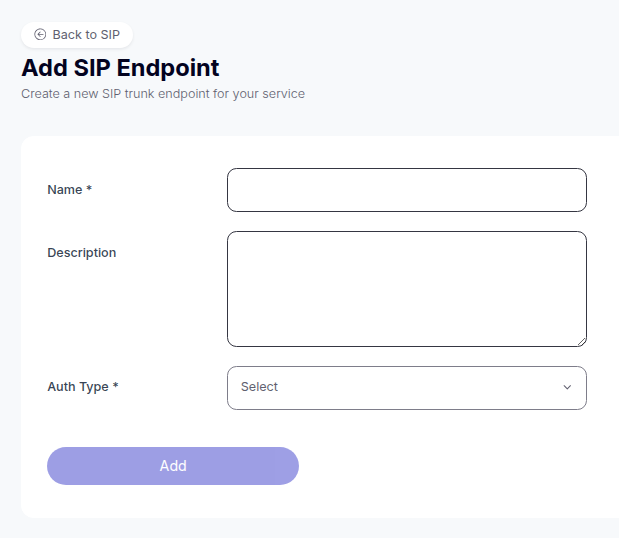
Add Endpoint
Once you click this button, the window for adding a SIP trunk endpoint will pop up:

In this window, please fill in the following parameters:
-
SIP Name. Type in the name of your SIP trunk.
-
Description. Enter a short description for your SIP.
-
Auth type. Choose your preferred authentication method:
-
If you select IP auth, you'll need to provide the IP address of your server or PBX.
-
If you select Username + password, the system will generate a login and password for your SIP. Use these credentials to connect the trunk to other systems. Important: Please save these details immediately. For security reasons, the password is only displayed once and is not stored in the system.
Once you’ve entered the required details, click Add to save them. The newly created endpoint will show up in the list on the main page.
If you decide not to create a new SIP Endpoint, simply click the Cancel button or the X in the top corner of the window.
Search field
To find a specific SIP Endpoint on the page, just type one or more characters into the search bar and hit Enter on your keyboard or click the Search button.
The search looks through the following fields:
-
SIP Name;
-
Description;
-
Username;
SIP Endpoints List
All endpoints added to the project are displayed in the list. It looks as follows:
A value sorting function is available in the table. To activate this option, click the arrow next to the column name, and the data will be automatically sorted in ascending order. To change the order to descending, click the same arrow again.

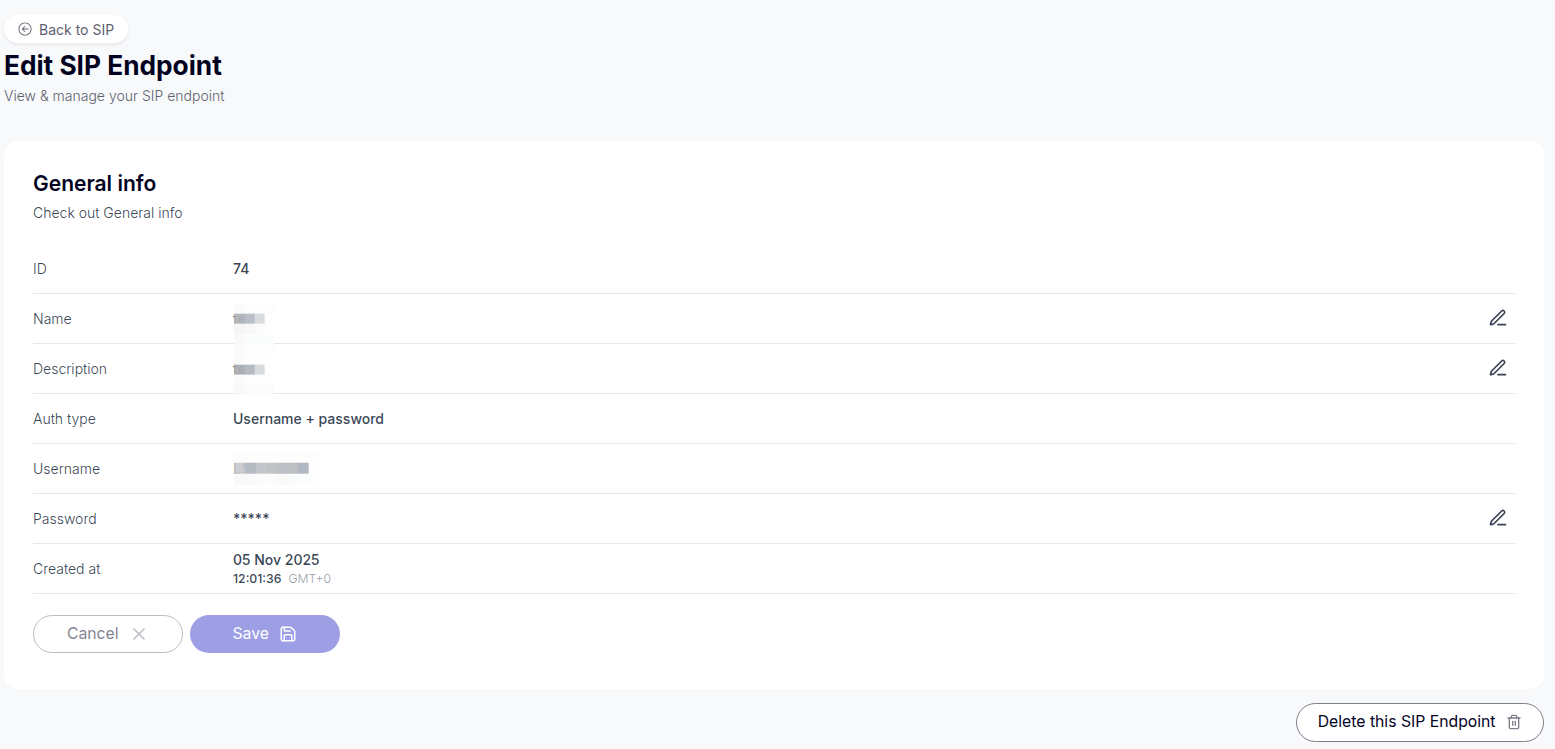
To access the settings for a specific SIP Endpoint, click the view button (the Eye icon) located on the right side of the row:
Once clicked, the SIP Endpoint editing page will open:
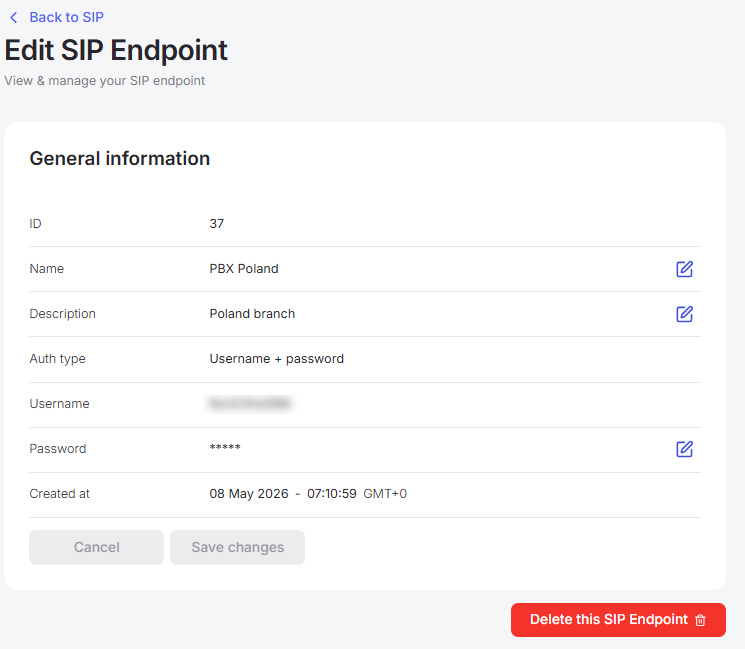
On this page, you have the flexibility to:
-
Edit the SIP name and description by clicking the pencil icon next to the corresponding field.
-
Update the password by clicking the pencil icon. You also have the option to automatically create a strong one using the Regenerate password checkbox.
-
Remove the SIP Endpoint from the system permanently by clicking the red Delete this SIP Endpoint button.
Bottom toolbar
The bottom toolbar looks as follows:

It provides the following options:
-
Use page pagination;
-
Select the number of rows per page. The following options are available:
a. 10 per page;
b. 15 per page;
c. 25 per page;
d. 50 per page;
e. 100 per page;
f. 250 per page.
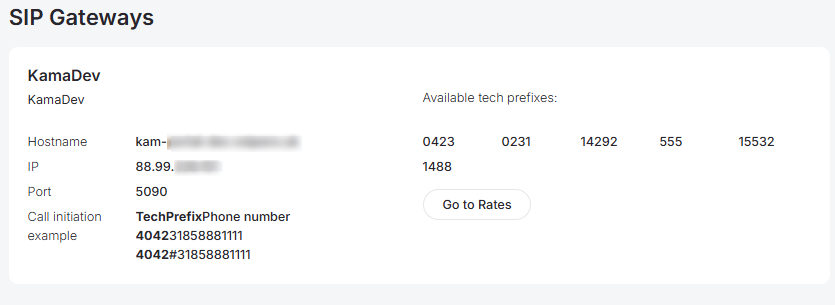
Information about SIP Gateways
In SIP Gateways, you can view your connected network gateways. This section looks as follows:
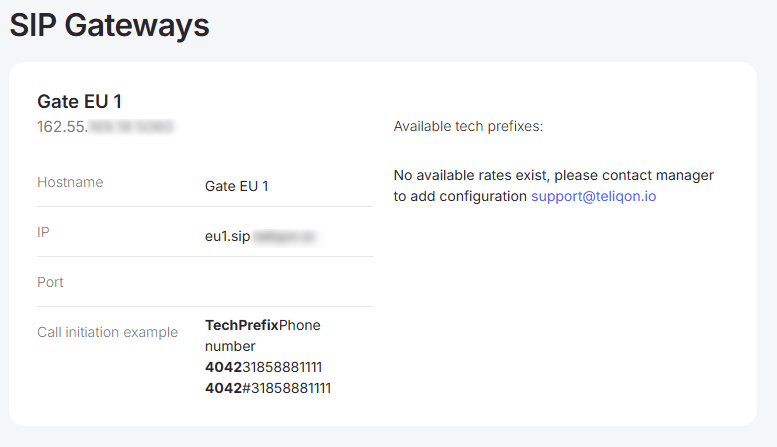
Settings are handled on the Teliqon Portal support side. If your settings aren't ready yet, please reach out to support for assistance.
Once everything is set up, you'll be able to see the technical addresses and access ports for our network, which connect your internet calls to subscribers worldwide.
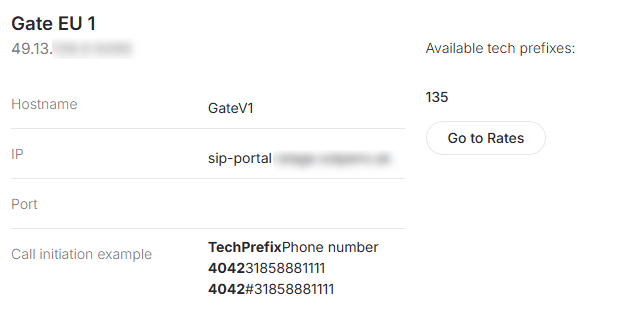
Additionally, Teliqon Portal managers configure technical prefixes that define the terms and cost of voice traffic. You can quickly jump to the tariff settings by clicking the Go to rates button:
Dashboard
This document describes the Dashboard page of the Teliqon Portal, including Calls and SMS overview statistics, balance notifications, traffic charts, top destinations, and related account actions. It also explains top-up, billing, rates, transfer balance, and filtering tools available from the dashboard.
Voice services - CDRs
This document describes the Call Detail Record page in the Teliqon Portal and explains how to review detailed outbound call information. It covers filters, CSV export, the call list table, sorting, pagination, and row-per-page controls.
