Account Billings Guide
This page describes the Billings section in the Teliqon portal. It explains how to view voice and additional service billing transactions, filter records, export data, and use the table controls.
General information
On the Billings page, you can view information regarding top-ups or deductions from your Teliqon portal project balances. This page is accessible via the sidebar menu on the left:
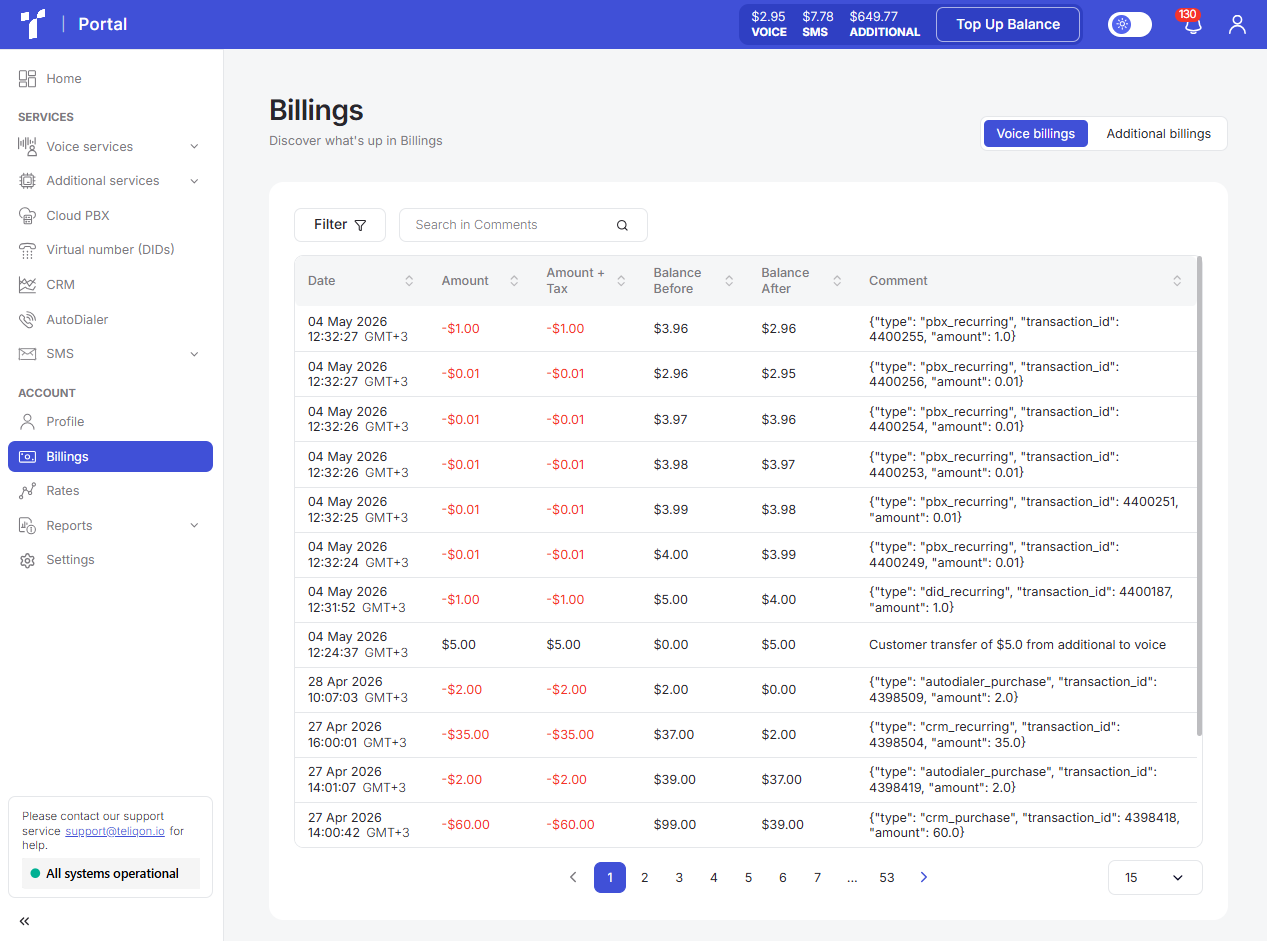
The Billings page is structured into three functional blocks:
- Top toolbar.
- Transaction history table.
- Bottom toolbar.
Top toolbar
The top toolbar consists of the following elements:

- Page switch toggle. Using the page switch toggle, you can select which list you want to view: telephony charges (Voice billings) or charges for additional services (Additional billings);
- Filter. Depending on the selected page, clicking the Filter button will open a pop-up window. For Voice billings:
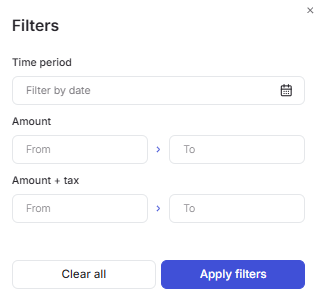
In this window, you can:
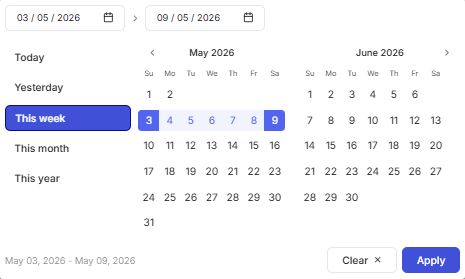
a. Filter data by transaction creation date. After clicking the calendar icon, a pop-up window will appear to select the desired period. To set a date range, use one of the following methods:
- Click on the dates in the calendar, selecting the start and end dates;
- Select one of the preset options (“Today”, “Yesterday”, “This week”, “This month”, “This year”). To apply the changes, click the Apply button.
If you change your mind, you can close the calendar by clicking on the empty space outside of it or reset the selected dates using the Clear button.
b. Filter by Amount and filter by Amount + tax. To do this, use your keyboard to enter values in the From and To fields, either individually or together.
For Additional billings tab, additional filters are added:
a. Filter by additional service type. You can select one or multiple values from the list.
b. Filter by transaction status. In this field, you can choose one of the available options (“Done”, “Pending”, “Rejected”, “Refunded”).
Additionally, you can combine all filters to narrow down your search.
- The Search field is designed to quickly find data based on full or partial text matches exclusively within the “Comment” column. To start searching the values in the list, simply enter more than one character in the input field and click the Search icon or press Enter on your keyboard.
- CSV Download button on the Additional billings tab. This button allows you to save all or filtered records to your computer in .csv format. To export a specific selection of data, simply configure the filter parameters first and then click the button.
Transaction history table
All project transactions are displayed in this list:
Depending on which of the two available tabs is selected (Voice billings or Additional billings), the corresponding transaction table will be displayed.
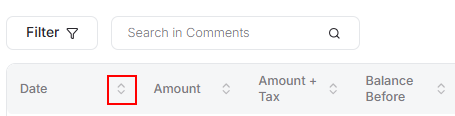
A value sorting function is available in the table. To activate this option, click the arrow next to the column name, and the data will be automatically sorted in ascending order. To change the order to descending, click the same arrow again.
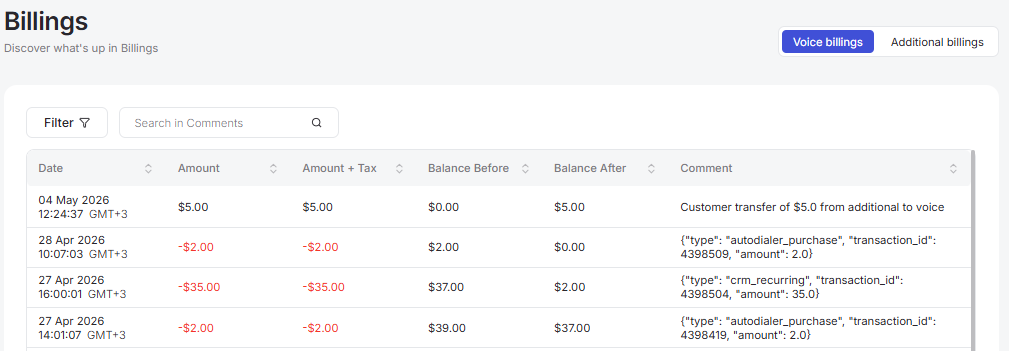
Voice billings
The following data is displayed in the voice billings table:
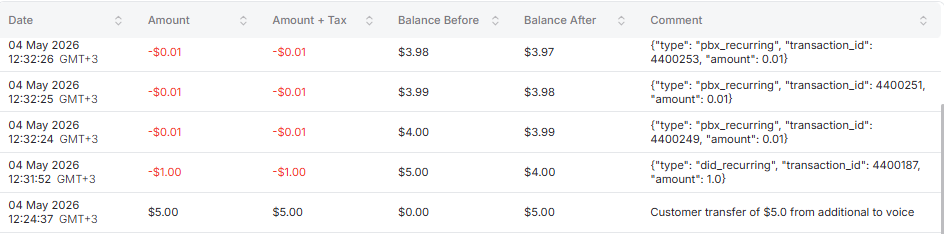
The table contains the following columns:
- Date: the date the transaction occurred;
- Amount: the net transaction amount;
- Amount + Tax: the transaction amount including tax;
- Balance before: the account balance before the deduction;
- Balance after: the account balance after the deduction;
- Comment: the Teliqon portal system comment for this transaction.
Additional billings
The following data is displayed in the additional services billings table:
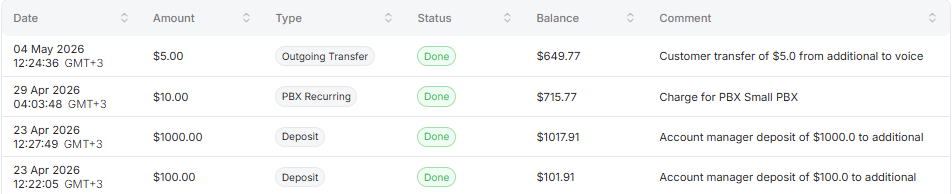
The table contains the following columns:
- Date: the date the transaction occurred;
- Amount: the net transaction amount;
- Type: the transaction type (e.g., service purchase or service renewal, etc.);
- Status: the current transaction status;
- Balance: the account balance after the deduction;
- Comment: the Teliqon portal system comment for this transaction. Above the table, there is information about total expenditures. This information is dynamic and changes depending on the selected filters.
Bottom toolbar
The bottom toolbar looks as follows:

It provides the following options:
- Use page pagination;
- Select the number of rows per page. The following options are available:
a. 10 per page;
b. 15 per page;
c. 25 per page;
d. 50 per page;
e. 100 per page;
f. 250 per page.
Account Profile Guide
This page describes the Profile section in the Teliqon portal. It explains how to view and configure profile information, other settings, balance notifications, and login history.
Account Rates Guide
This page describes the Rates section in the Teliqon portal. It explains how to view tariffs, use filters, sort rate data, and manage pagination options.
