Cloud PBX
This document describes the Cloud PBX page in the Teliqon Portal, including monitoring information, virtual PBX settings, purchased Cloud PBX solutions, toolbars, tariff plan actions, and statistics pages. It explains the available controls, table columns, filtering, sorting, and pagination options for managing Cloud PBX solutions.
General Information
On the Cloud PBX page, you can monitor information and configure your virtual PBX settings within the Teliqon Portal. To reach this page, simply navigate to the sidebar menu on the left:
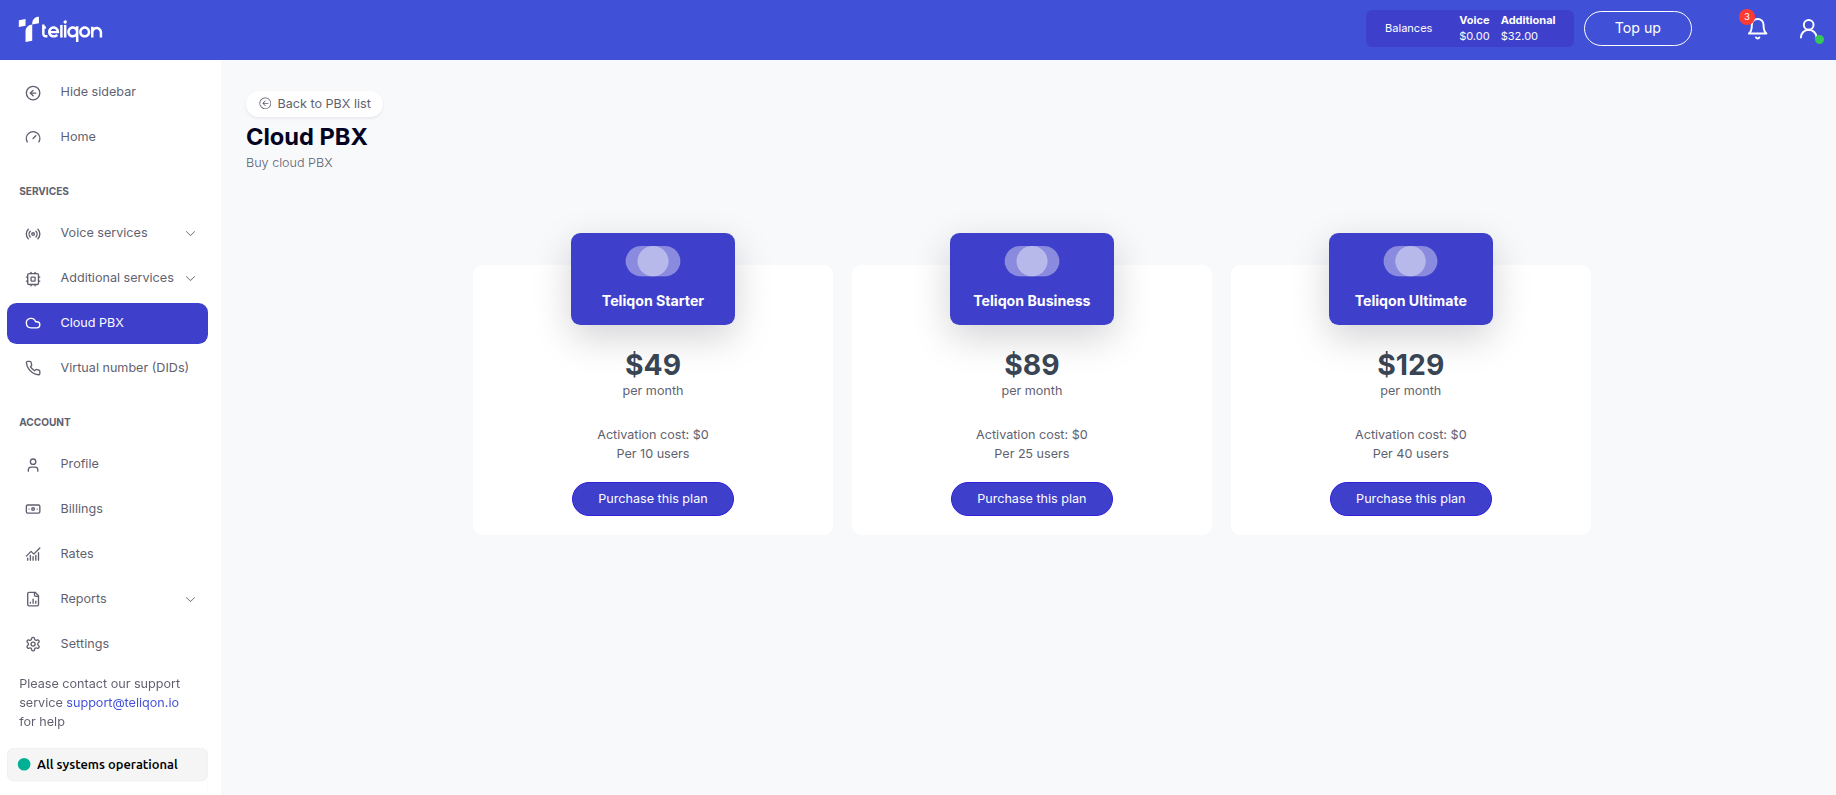
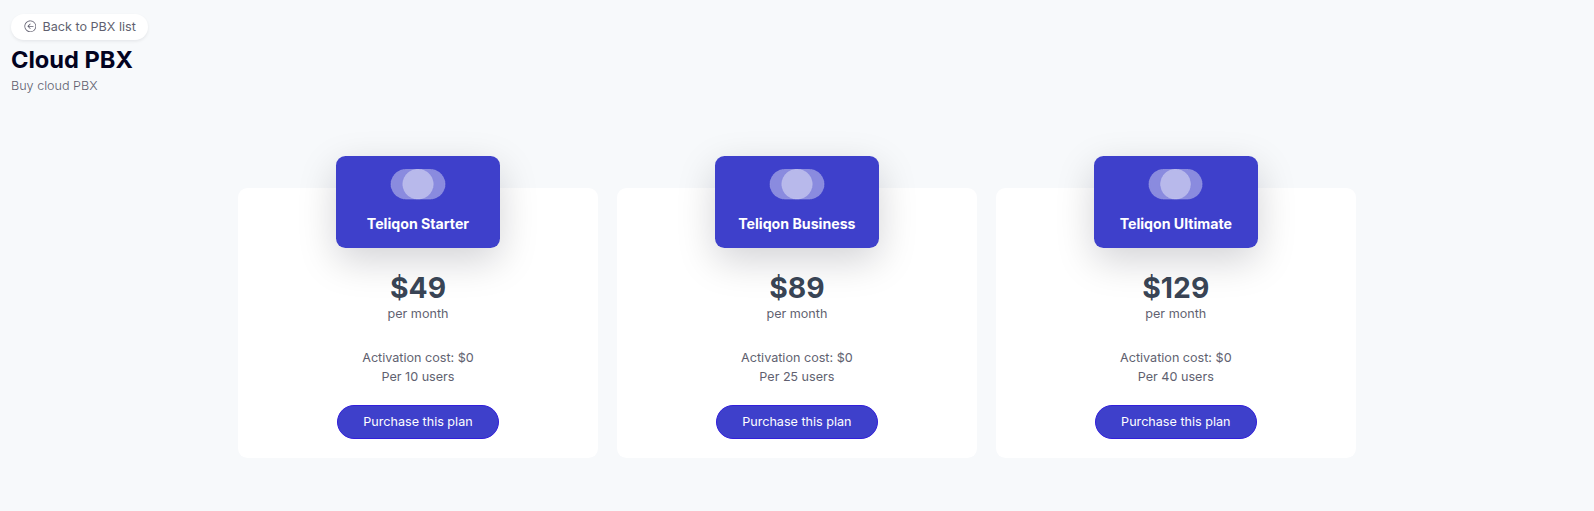
If the Cloud PBX solution isn't set up on your portal yet, you will see a page displaying our available tariff plans. Simply choose a plan that fits your business needs and select your subscription type (monthly or yearly).
If you need help deciding, feel free to reach out to Teliqon Portal technical support for advice by using the Get a consultation form or by clicking the link provided here.
If your project on the portal already includes a purchased Cloud PBX solution, it will appear in the list of active solutions.
Cloud PBX List
The list of purchased Cloud PBX solutions is displayed as follows:
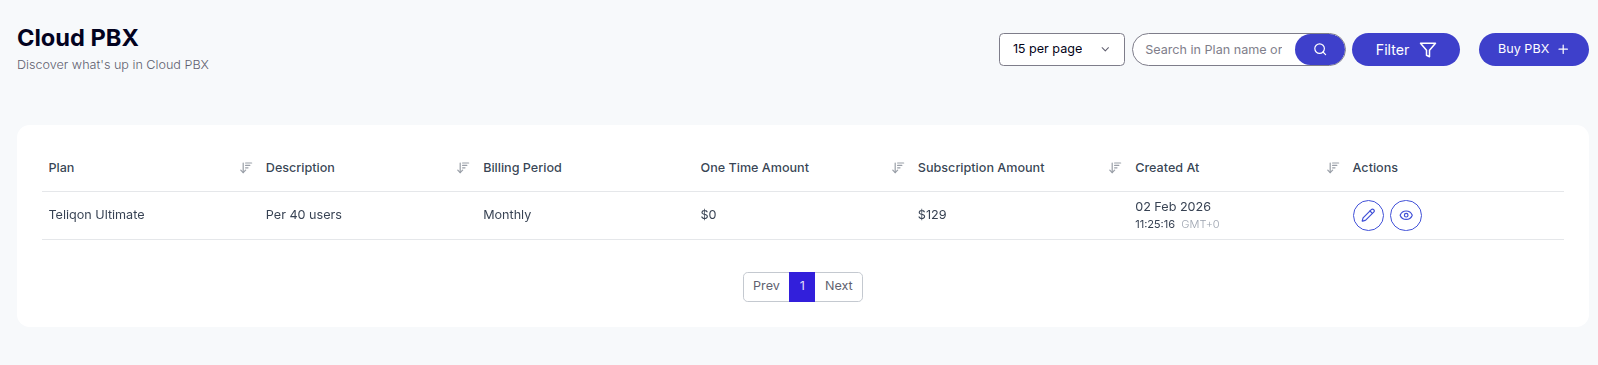
It consists of the following sections:
-
Top toolbar;
-
Purchased Cloud PBX plans;
-
Bottom toolbar.
Top toolbar
The top toolbar consists of the following elements:

- Filter. You can filter data by the following parameters:
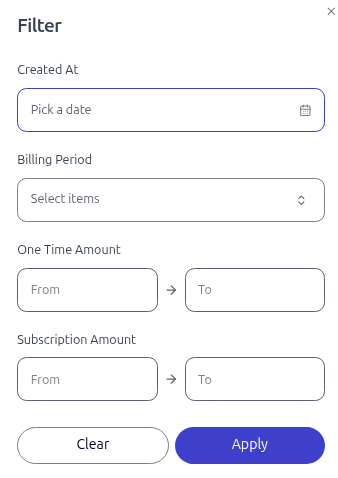
-
Created At - using the calendar by the Teliqon Cloud PBX creation date;
-
Billing Period - using the dropdown list by the payment period;
-
One Time Amount and Subscription Amount - using the keyboard by the one-time or monthly fee amount.
-
Search field. To start searching among the purchased tariffs in the list, simply enter more than one character into the input field and press Enter on the keyboard or the Search button in the search bar.
-
Button for purchasing a new Cloud PBX tariff.
Cloud PBX Solutions List
All Teliqon Cloud PBX solutions available in your project are displayed in the table list.
A value sorting function is available in the table. To activate this option, click the arrow next to the column name, and the data will be automatically sorted in ascending order. To change the order to descending, click the same arrow again.
The table contains the following columns:
-
Name and Plan (tariff plan name);
-
Description;
-
Billing Period (the paid period);
-
One Time Amount (one-time payment upon connection);
-
Subscription Amount (subscription cost);
-
Created At (the date the tariff plan was purchased);
-
Actions.
You can edit and view the connected tariff plan.
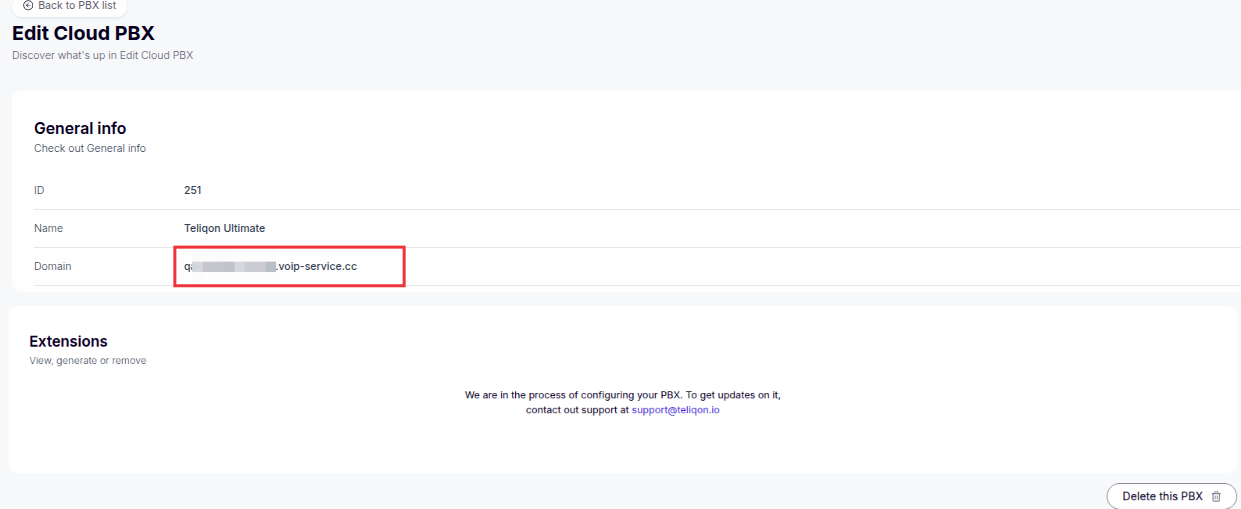
Clicking the “pencil” icon will open the tariff plan editing page:

This section contains the main information about your Cloud PBX:
-
System login: the domain you can follow to access the personal account of your purchased Teliqon Cloud PBX solution.
-
Technical status: if any issues occur with the PBX or “Extensions”, a notification will be displayed here.
-
Management: you can change the subscription type or delete the solution by clicking the Delete Cloud PBX button.
Clicking the “eye” icon will open the statistics viewing page:
This page displays the number of online agents, active calls, registered extensions, and available SIP trunks. Additionally, there are dedicated blocks for current calls and extension details.
Bottom toolbar
The bottom toolbar looks as follows:

It provides the following options:
-
Use page pagination;
-
Select the number of rows per page. The following options are available:
a. 10 per page;
b. 15 per page;
c. 25 per page;
d. 50 per page;
e. 100 per page;
f. 250 per page.
Reputation Checker
This document describes the DID Reputation Check functionality in the Teliqon Portal. It explains verification types, history, filtering, and detailed reputation check results.
Virtual Number (DIDs)
This document describes the Virtual Number (DIDs) page in the Teliqon Portal, including available virtual numbers, filtering, searching, CSV download, table columns, spam status tooltip, sorting, and pagination controls. It explains how users can review DID information for their project and understand the controls available on the page.
