Dashboard
This document describes the Dashboard page of the Teliqon Portal, including Calls and SMS overview statistics, balance notifications, traffic charts, top destinations, and related account actions. It also explains top-up, billing, rates, transfer balance, and filtering tools available from the dashboard.
General Information
On the Dashboard page, you can view the statistics for your project on the Teliqon portal.
The Dashboard is divided into two views that you can switch between:

-
Calls overview;
-
SMS overview.
Calls
You can access this page from the left sidebar by clicking the Home section:
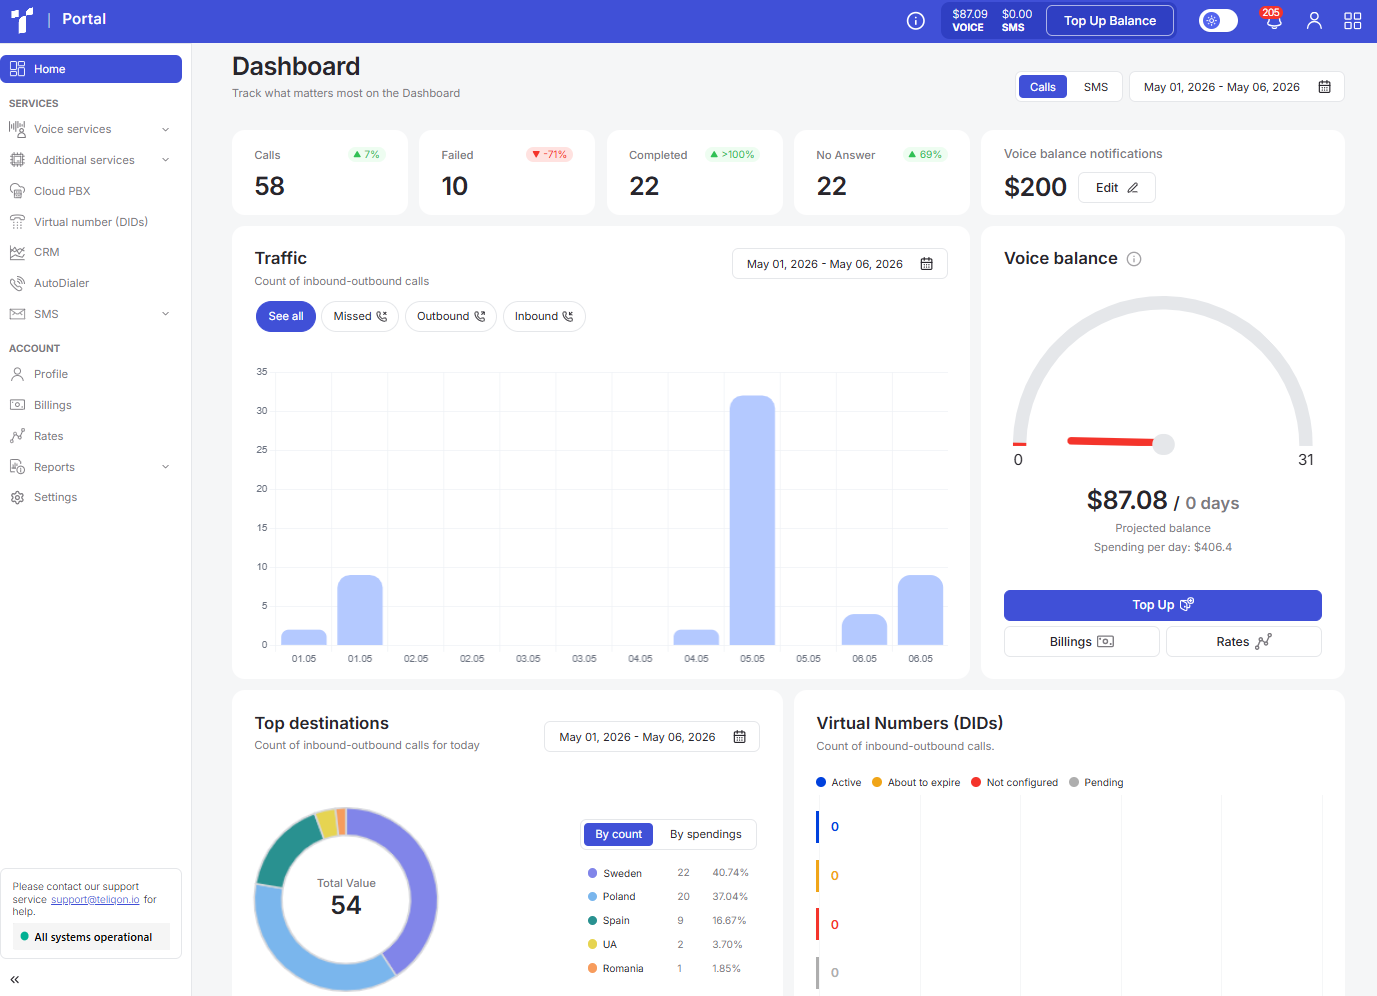
The Calls page features the following charts:
-
Call summary statistics: Calls, Failed, Completed, No Answer;
-
Voice balance notifications - Notifications about balance drop to a specific threshold;
-
Traffic - number of inbound, outbound, and missed calls for the month;
-
Voice balance;
-
Top destinations;
-
Virtual Numbers.
Each of these metrics provides valuable insights into your project.
Voice balance notifications (calls)
The Voice balance notifications block appears as follows:
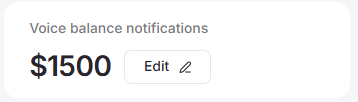
This section displays the threshold amount at which you will receive a low balance notification for your account.
You can update this amount by clicking the Edit button and entering a new preferred value in the field.
After making changes, you can save or discard them by clicking Save or Cancel.
Traffic
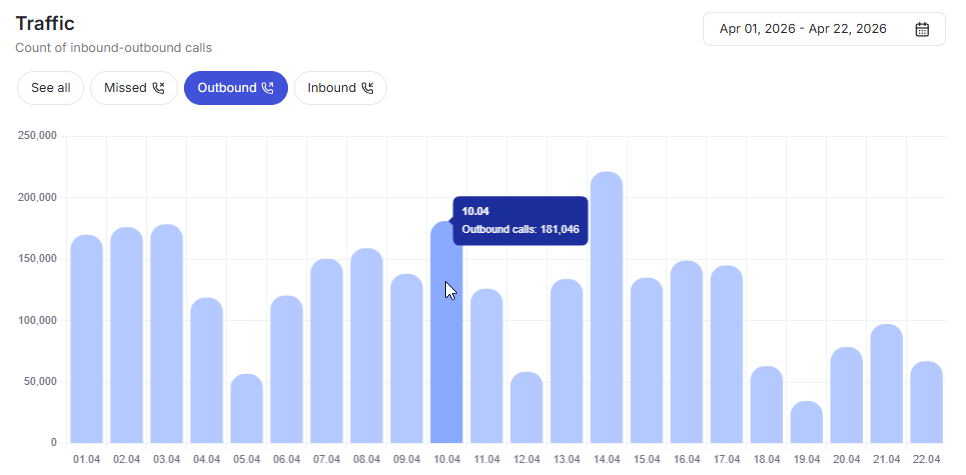
The Traffic block displays the number of calls for the selected period.
The following elements are located at the top of the block:

-
Data filters for sorting calls: See all (all calls), Missed, Outbound, and Inbound;
-
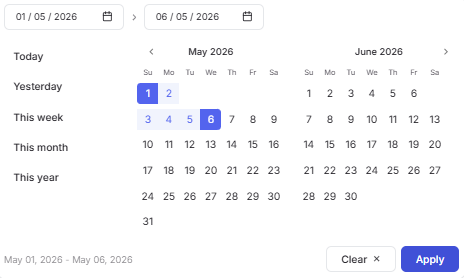
A calendar for selecting a specific time interval. To set a date range, use one of the following methods:
-
Click the dates on the calendar to select a start and end date;
-
Select one of the preset options (“Today”, “Yesterday”, “This week”, “This month”, “This year”).
To apply the changes, click the Apply button.
If you change your mind, you can close the calendar by clicking anywhere outside of it or reset the selected dates by clicking Clear.
Hovering over a specific bar in the chart displays the exact date and the number of calls for that day:
Voice balance
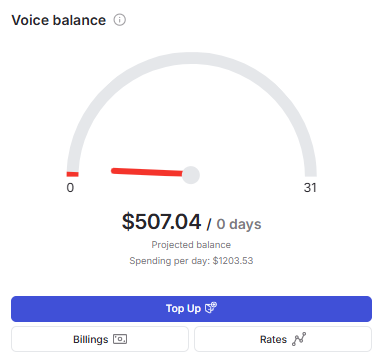
This section contains the following data and tools:
-
A calculation of how many days the project’s funds will last based on daily expenses;
-
A Top Up button for account replenishment;
-
A Billing button to navigate to the billing page;
-
A Rates button to navigate to the rates page.
Top up
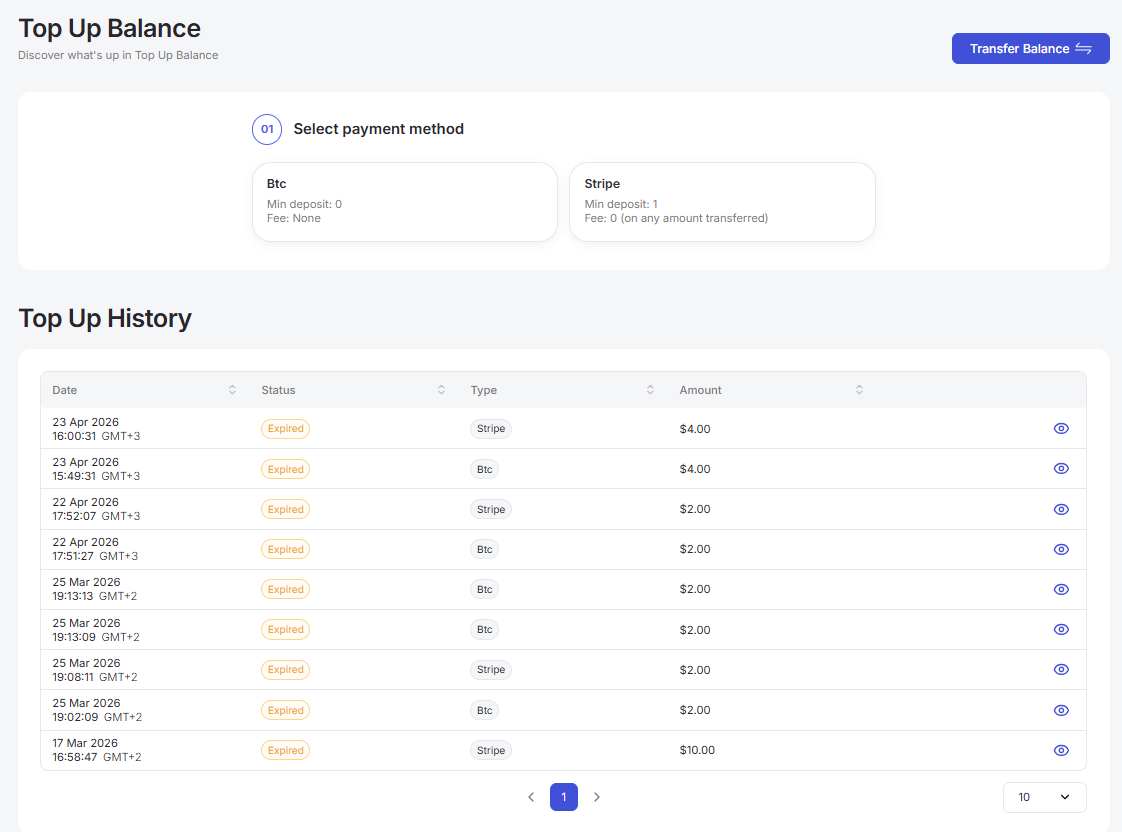
After clicking the Top Up button, the following service top-up page opens:
The system currently supports the following payment methods:
- Via crypto wallets: Btc (Bitcoin), Trc20 (USDT - TRC20), Erc20 usdc (USDC - ERC20), Erc20 usdt (USDT - ERC20), Erc20 eth (Ethereum - ERC20);
- By credit/debit card: through the Stripe payment gateway.
If you don’t have any of the types, contact Teliqon Portal technical support.
Depending on your selected payment type, after clicking this block, an additional section of the form will appear. Here, you will need to choose the balance you wish to top up, as well as the top-up amount:
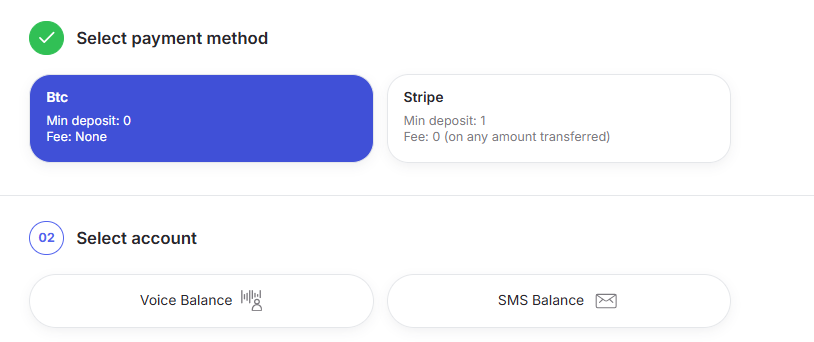
- Payment via crypto wallets. After selecting the desired cryptocurrency, enter the top-up amount in the corresponding field (below is an example for BTC):
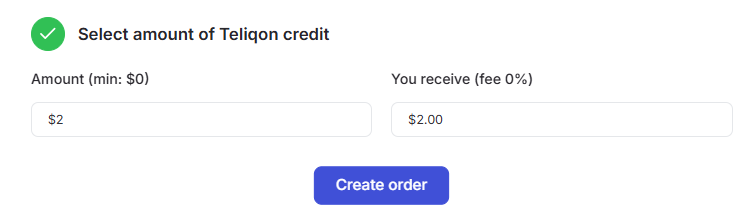
Then click the Create order button; a window containing the details will open:
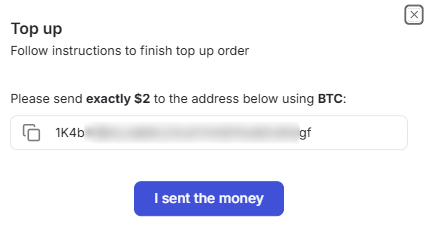
To complete your top-up:
- Copy the address: Click the copy icon next to the wallet address.
- Send funds: Transfer the exact amount using the corresponding selected network (e.g., the BTC network for Bitcoin or TRC20 for USDT).
- Confirm: After completing the transfer in your wallet, click the I sent the money button to notify the system.
- Stripe. After selecting this payment method, you will need to enter the desired amount in the input field:
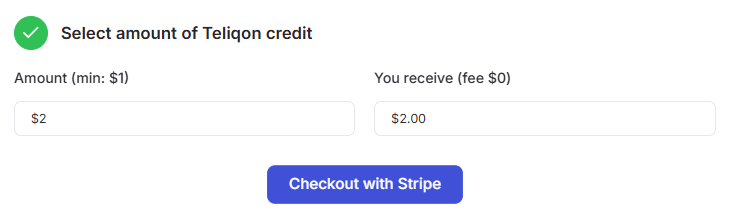
Then click Checkout with Stripe. The following payment confirmation window will open:
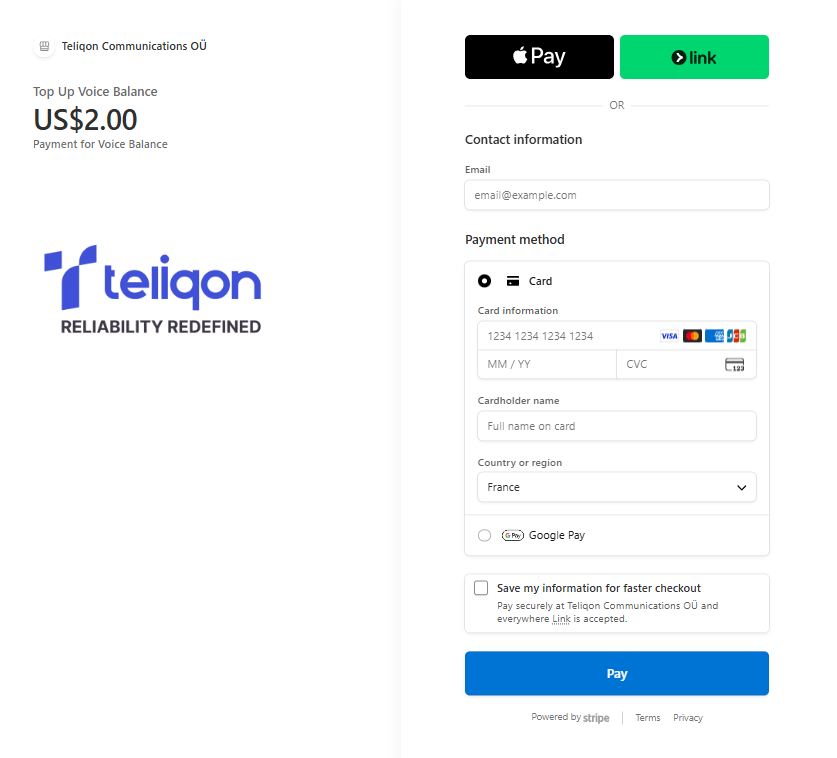
In this window, verify the top-up amount and currency, enter your card details, and click the Pay button.
Once the payment is processed, you will be redirected back to the Top Up Balance page. You can then view your transaction in the payment list, and your balance will reflect the updated amount:
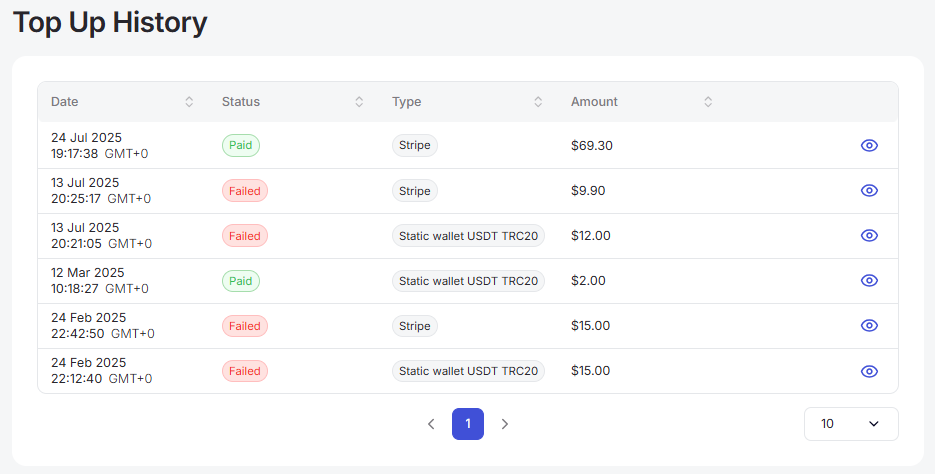
Transfer Balance
On the account top-up page, you have the option to transfer funds from one balance to another:

After clicking the Transfer Balance button, the following page will open:
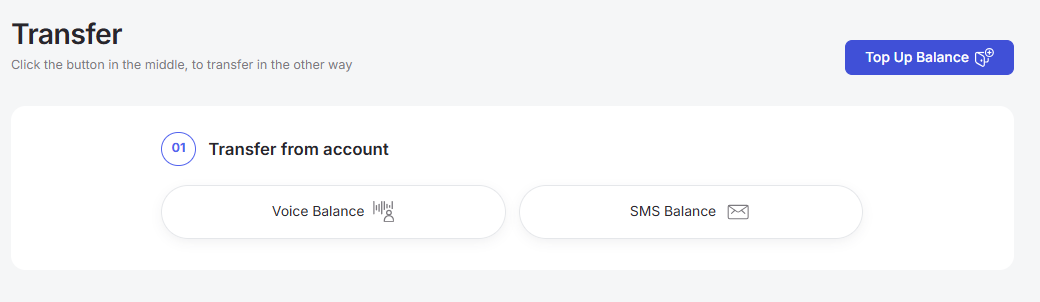
Once you select which balance you are transferring from and where to, you will be able to see the maximum amount available for the transaction:
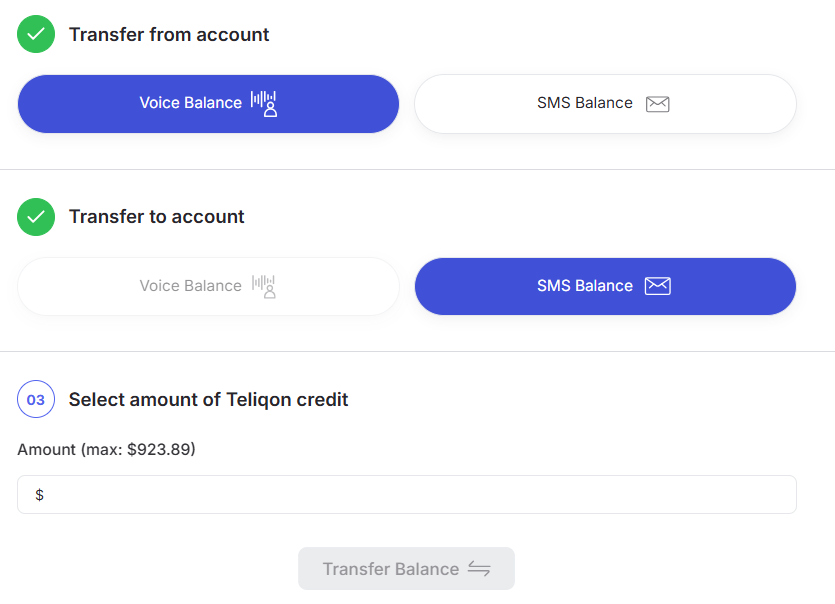
To transfer funds from one balance to another, enter the amount in the Amount field and click the Transfer Balance button. The specified amount will then be transferred between your balances.
If you wish to return to the top-up section, click the Top Up Balance button:

Billing
After clicking the Billing button, the transaction history page will open:
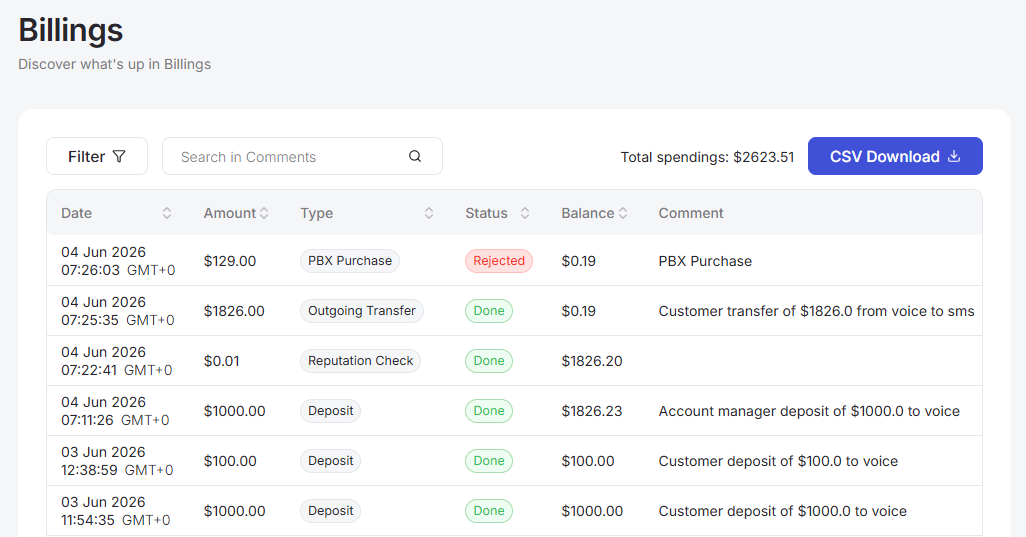
This section is described in more detail here.
Rates
After clicking the Rates button, the rates overview page will open:
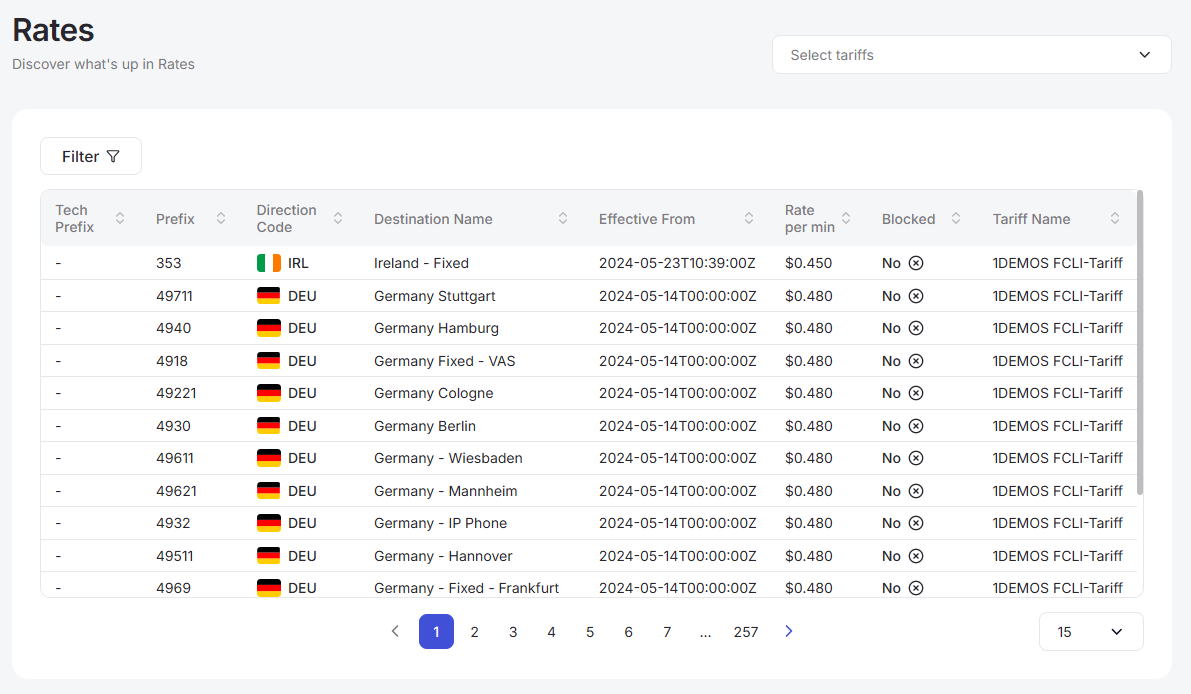
The tariff viewing page is described in more detail in this section.
Top destinations
The Top destinations block displays statistics for inbound and outbound calls by country.
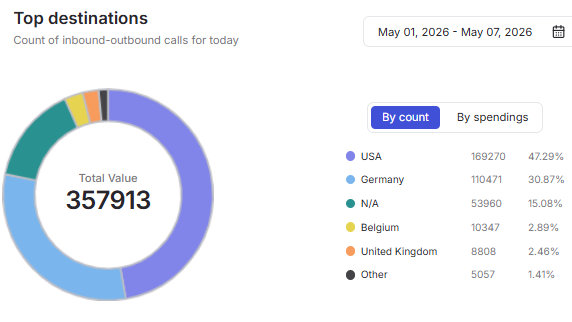
You can configure the data display in two ways:
-
By number of calls (By count);
-
By expenses (By spending).
The center of the donut chart displays the Total Value. To the right is a list of countries with a breakdown of costs or call volume, along with their percentage share. At the top of the block, you can select a time period using the calendar.
Virtual Numbers (DIDs)
This block displays information regarding numbers and their statuses. The chart is presented as follows:
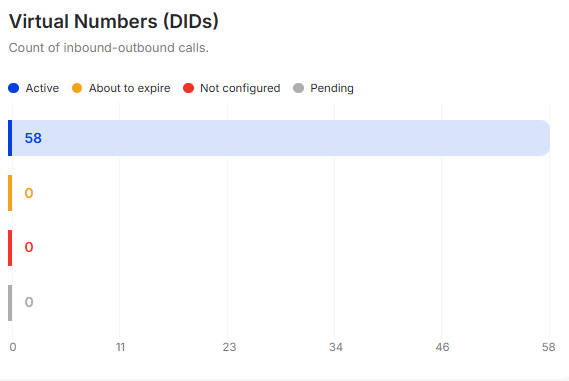
The numbers on this chart are categorized according to their statuses in the system. There are four general statuses:
-
Active;
-
About to expire;
-
Not configured;
-
Pending regulations.
SMS
The SMS page features the following charts:
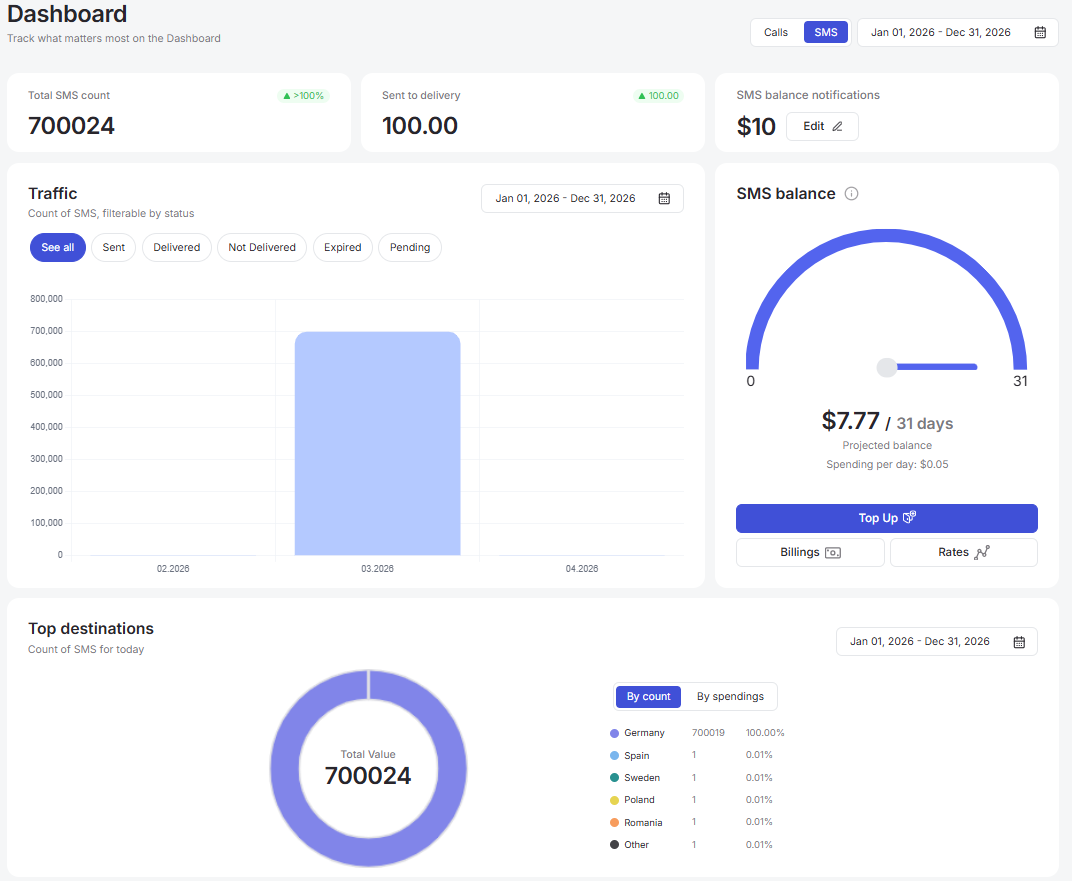
-
SMS summary statistics - includes Total SMS count and Sent to delivery;
-
SMS balance notifications - alerts for when the balance drops below a specific value;
-
Traffic - displays the number of SMS messages, filterable by various statuses;
-
SMS Balance - current SMS balance overview;
-
Top destinations - statistics on the most frequently used destinations.
SMS balance notifications
A configuration block, identical to the one in the Calls section, allows you to define the limit at which SMS low balance notifications are sent.
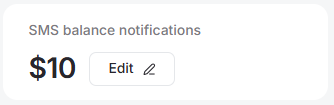
The amount configuration process is identical to the Voice balance notifications section. For more details, click here.
Traffic
This chart allows you to visualize the SMS count and filter messages by various statuses.
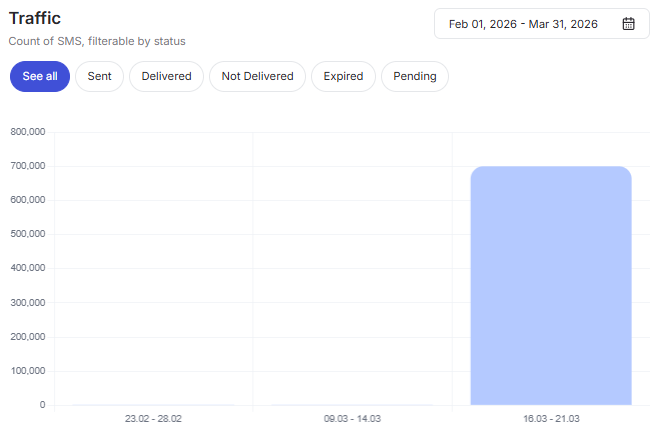
By default, all statuses are selected, and the chart displays the total SMS count for the chosen period. To view the number of SMS messages for a specific day, hover over the corresponding bar:
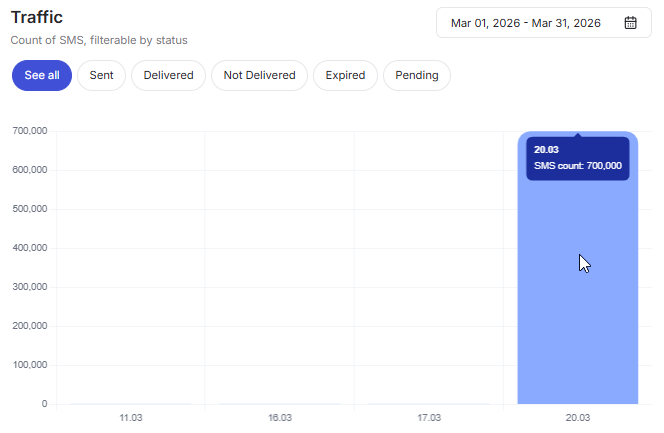
To view statistics for a specific status, use the filter and select the desired option:
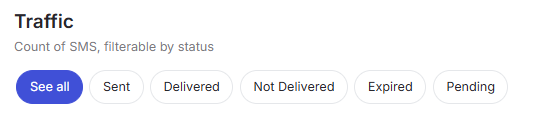
The following statuses are available:
-
See all (all statuses);
-
Sent;
-
Delivered;
-
Not Delivered;
-
Expired;
-
Pending.
To change the period, click the calendar button and select the required time range on the calendar.
For more information on how to use the calendar, please refer to this section.
SMS balance
This section is identical to Voice balance, but it contains financial statistics specifically for your SMS balance.
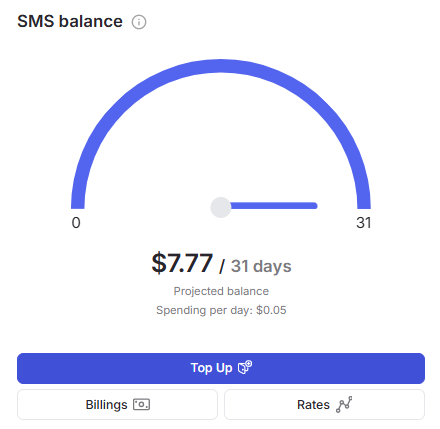
This section includes the following data and tools:
-
A calculation of how many days the project’s funds will last based on daily expenses;
-
A Top up button for account replenishment;
-
A Billing button to navigate to the billing page;
-
A Rates button to navigate to the rates page.
Detailed information on all features and capabilities can be found in this section.
Top destinations
This block displays the most popular SMS destinations:
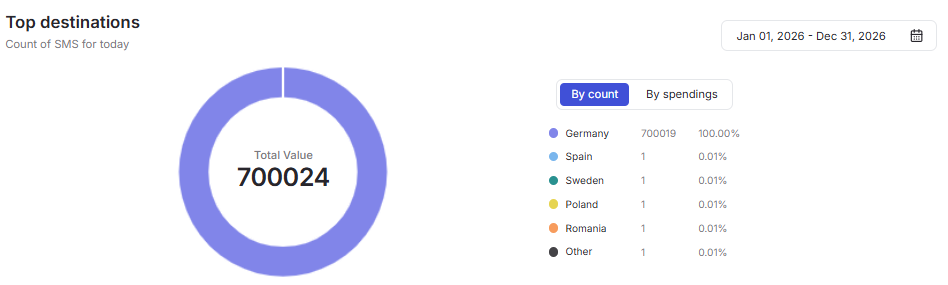
Statistics for popular destinations can be filtered by count or by spend. Additionally, you can select a specific period for analysis using the calendar. Instructions on how to use the calendar are available here.
User menu
This document describes the User menu in the Teliqon Portal, including balance information, notifications, and profile-related actions. It explains how users can access notification history, manage notification states, and navigate to related profile, billing, and settings pages.
Voice-services - SIP
The document describes the SIP page of the Teliqon Portal, including SIP endpoint management, filtering, search, endpoint editing, pagination, and SIP gateway information. It explains how users create and manage SIP endpoints and where gateway-related connection details are displayed.


