SMS - OTP
This document describes the SMS OTP page in the Teliqon Portal and explains how to configure SMS settings, view pricing, calculate SMS costs, and check processed SMS history. It also describes how to work with the SMS OTP API, including request parameters and callback response examples.
General information
On the SMS OTP page, you can view detailed information about the SMS messages for your project in the Teliqon Portal. You can access this page from the left-side navigation menu:
The page contains the following elements:
-
Tab navigation bar:
a. SMS Settings;
b. SMS Price-List;
c. Processed SMS History.
-
Detailed view of the selected tab.
Tabs bar
The panel appears as follows:
The page content changes according to the selected tab - each of them is described in more detail below.
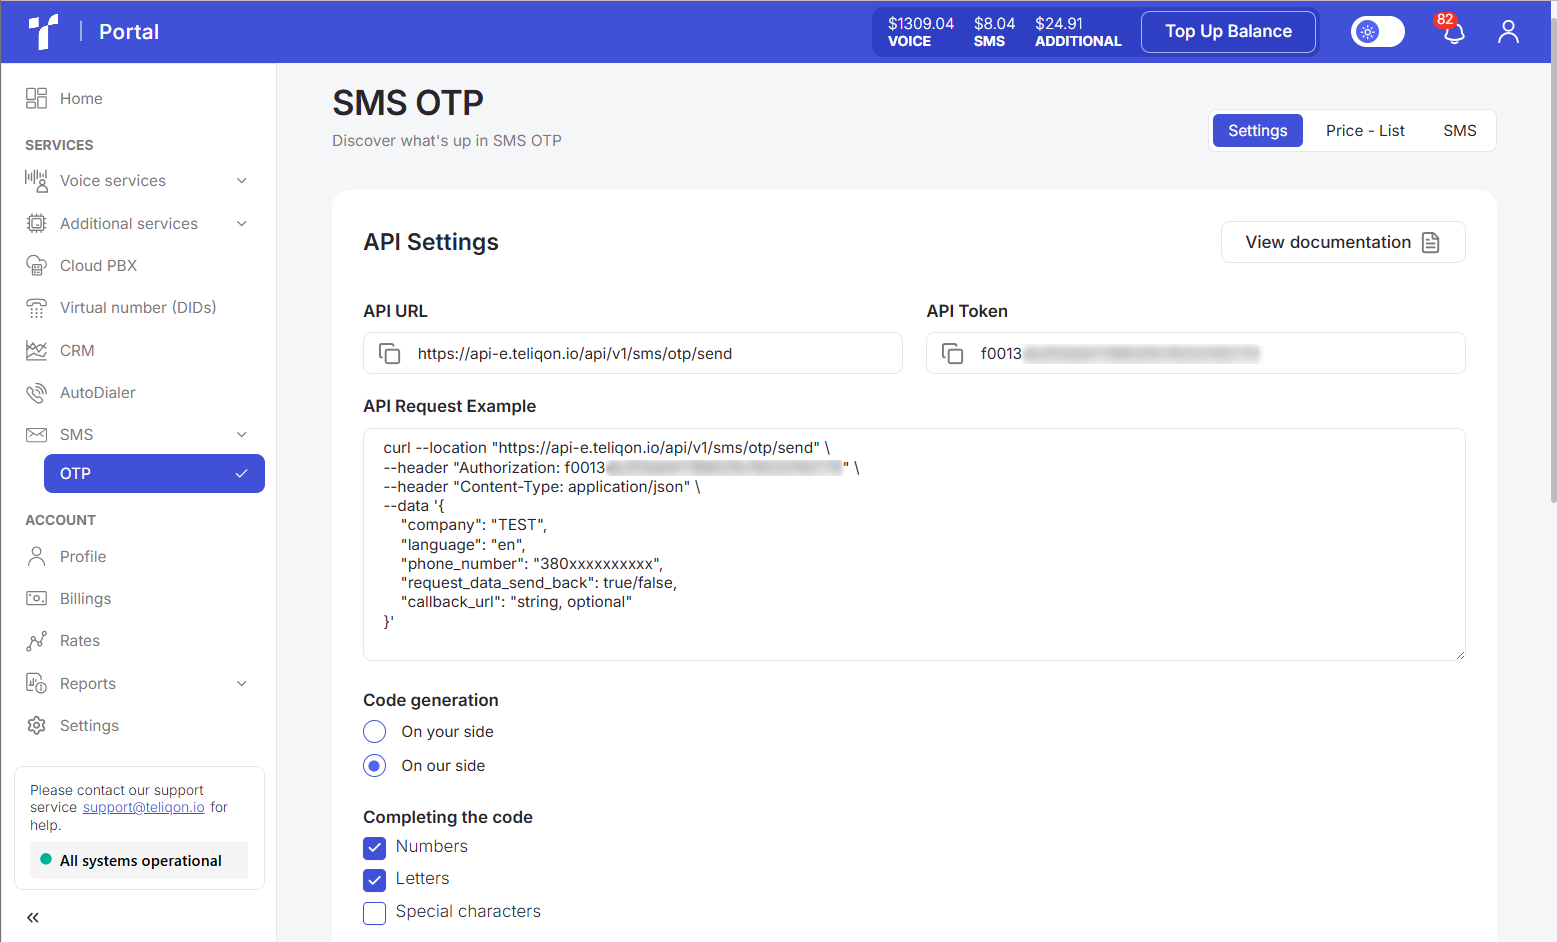
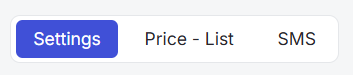
SMS Settings
You can configure SMS settings for your project using this tab:
The following SMS configuration options are available:
- Code generation. You can choose the most convenient way to create confirmation codes:
a. On your side - the code is generated by your system. When using this method, the generated code must be passed in the otp_code parameter during the API call to api/v1/sms/otp/send. You can find a request example in the Working with the SMS API section.
b. On our side (Teliqon Portal) - the service automatically generates and sends the code.
- Completing the code. You can define the code complexity by combining different character types. Select one or more parameters to configure the “OTP” format:
a. Numbers - the code will consist only of numeric digits (e.g., 1234).
b. Letters - the code will include Latin letters (e.g., AbCd).
c. Special characters - adds punctuation marks and symbols (e.g., !@#$%^&*()).
Important: At least one character type must be selected for the system to work correctly.
-
Number of characters. The number of characters (length) used to generate the code.
-
Selection of an SMS template. This parameter allows you to determine the format of the message the customer receives on their phone. The values for the {{ company }} and {{ code }} parameters are automatically pulled from your request. Available message templates (English examples):
a. {{ code }} is your verification code.
b. Your code is {{ code }}. Do not share this code with anyone for account security.
c. The code for {{ company }} is {{ code }}. Do not share the code with anyone.
-
Language. The language in which the SMS message will be generated for the user. To view the message text in a specific language, select it from this dropdown menu. Currently, there are 3 available language options:
a. English;
b. German;
c. Ukrainian.
-
Callback URL. The domain specified in this parameter will receive a set of data based on the settings and the request_data_send_back parameter. If it is set to “true”, the information will be sent to the specified callback_url.
-
Response data. The data set sent to the callback_url specified in section 7. There are 2 options:
a. Only data from our response - sends only the result of the SMS delivery.
b. Data from our response + data from the request - provides a full report combining your request parameters and the SMS delivery status.
Once you have completed the settings and wish to save them, you need to click on “Apply changes”.
If you decide to cancel the changes, click on the “Reset changes” button.
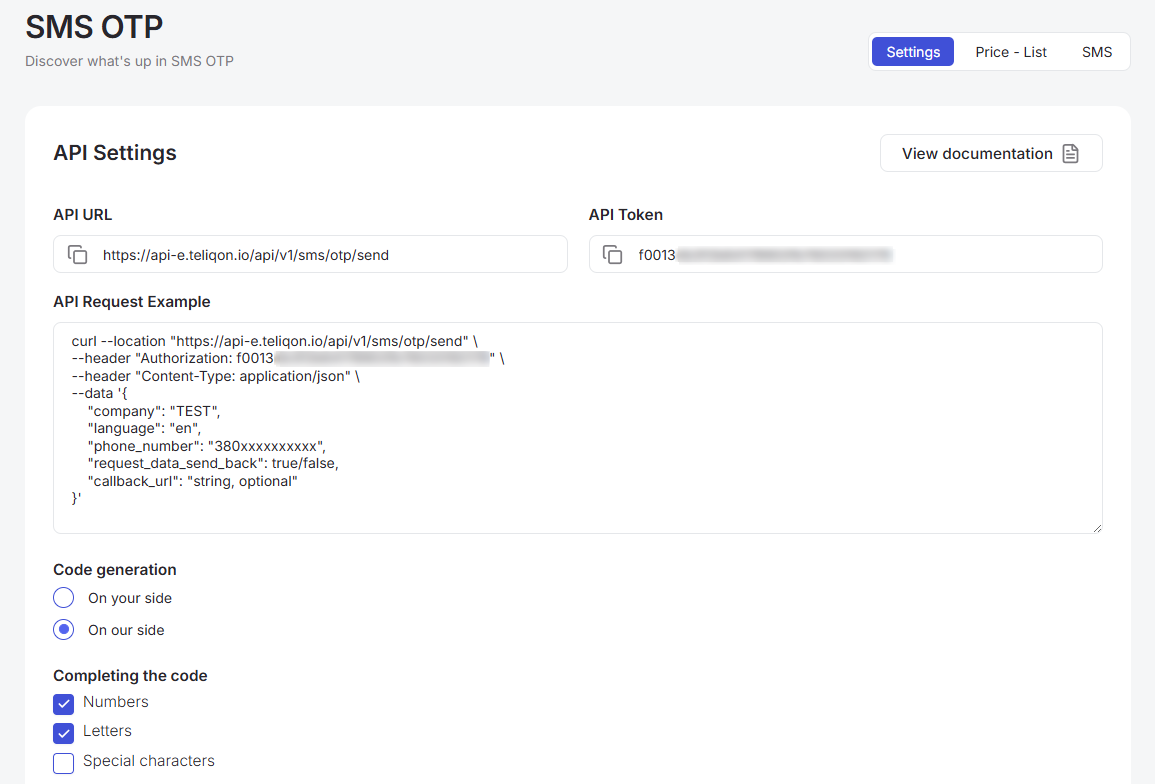
SMS Price - List
You can view and calculate the cost of SMS for your project using this tab:
The page contains the following elements:
-
Pricing list block;
-
Cost calculator block.
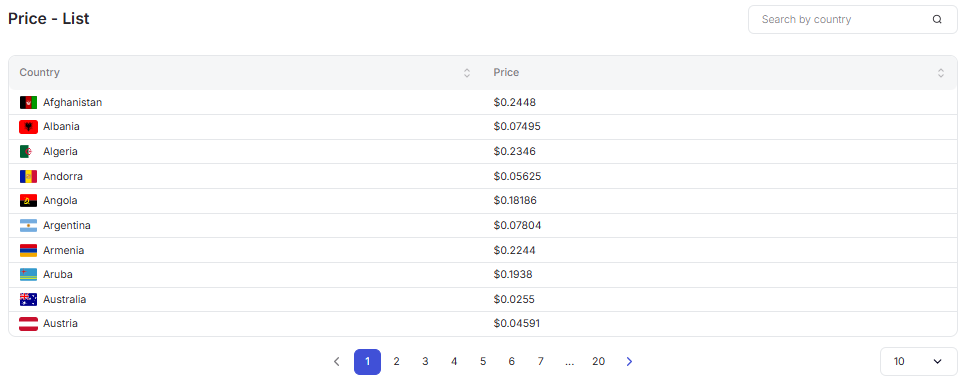
Pricing list block
The pricing list block appears as follow
The page contains the following elements:
-
Search bar - the “Search by country” field allows you to conveniently search price lists by full or partial character matches in the “Country” column. To use the search bar, click on it and start typing, then press “Enter” or click the “Search” button to the right of the field.
-
Data table and sorting buttons - contains a list of countries and current prices. You can sort data alphabetically or by cost by clicking the arrows in the “Country” and “Price” headers. Only one sorting parameter can be active at a time. It has three states, which are toggled by clicking the header:
a. No sorting;
b. Ascending order;
c. Descending order.
-
Page selection (Pagination) - a block at the bottom of the screen that allows you to switch between different price list pages to view the full volume of data.
-
Records per page selection - a dropdown list in the bottom right corner where you can set the number of records displayed simultaneously on the page. Available options:
a. 10 per page;
b. 15 per page;
c. 25 per page;
d. 50 per page;
e. 100 per page;
f. 250 per page.
Cost calculator block
Cost calculator block appears as follows:
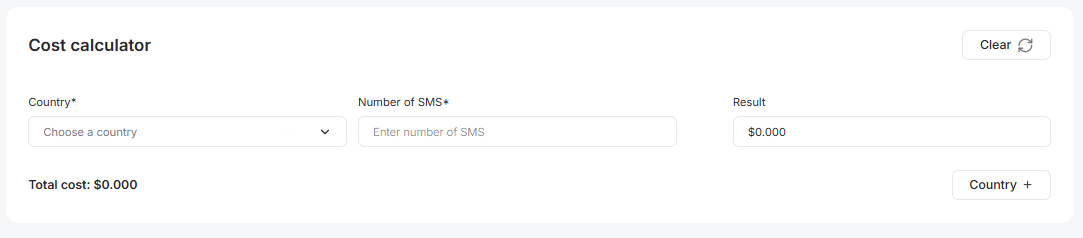
In this block, you can quickly calculate SMS mailing costs based on the selected destinations.
To calculate the cost for a specific number of SMS in a certain country:
-
Select a country. Click the dropdown list in the “Country*” field and find the required region.
-
Specify the number of SMS. In the “Number of SMS*” field, enter the number of messages you plan to send.
-
Additional destinations. If you need to calculate the cost for several countries at once, click the “Country +” button. This adds a new row to the table where you can enter data for another country.
-
Get the result. In the “Result” field, the system automatically displays the total cost for the specified countries and volume.
For example:

If the “Total cost” exceeds your account balance, the system will inform you:
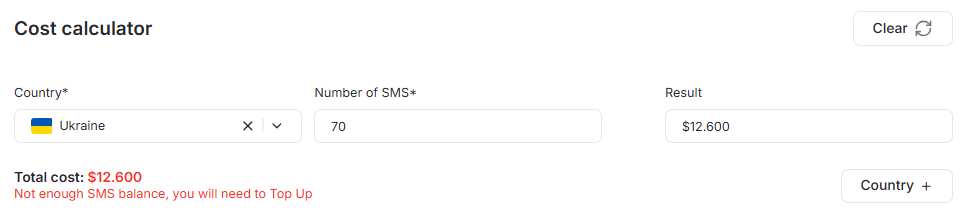
To reset the entered data, click the “Clear” button.
Processed SMS History
The page with the history of processed SMS appears as follows:
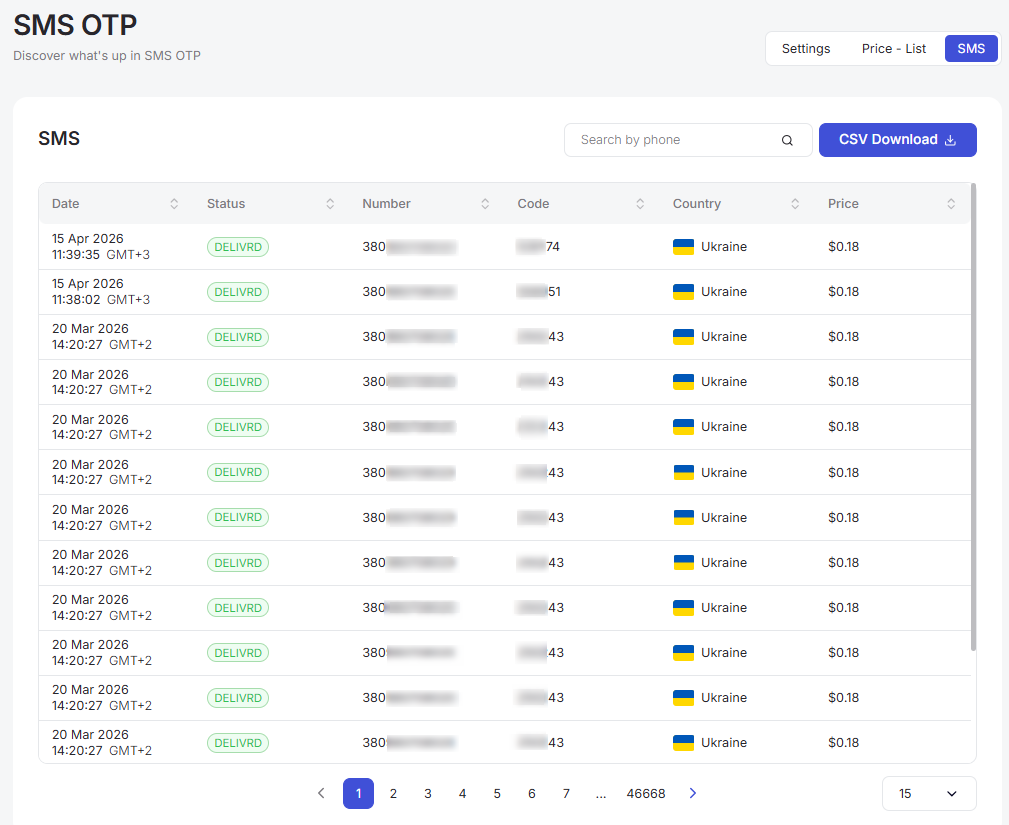
The page contains the following elements:
-
Search bar - the “Search by phone” field allows you to conveniently search processed SMS by full or partial character matches in the “Number” column. To use the search bar, click on it and start typing, then press “Enter” or click the “Search” button to the right of the field.
-
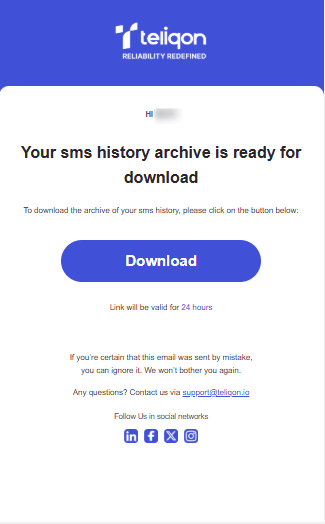
Data export - the “CSV Download” button allows you to download your SMS history. After clicking it, an email with the file will be sent to the address from which the request was made.
Note: the maximum download limit is 700,000 records. The file will remain active for 24 hours, so it must be downloaded before this period expires.
- Data table and sorting buttons - contains a detailed history of sent messages, including “Date”, “Status”, “Number”, “Code”, “Country”, and “Price”. You can sort records by any of these parameters by clicking the arrows in the column headers. Only one sorting parameter can be active at a time. It has three states, which are toggled by clicking the header:
a. No sorting;
b. Ascending order;
c. Descending order.
-
Page selection (Pagination) - a block at the bottom of the screen that allows you to switch between different message history pages to view the full volume of data.
-
Records per page selection - a dropdown list in the bottom right corner where you can set the number of records displayed simultaneously on the page. Available options:
a. 10 per page;
b. 15 per page;
c. 25 per page;
d. 50 per page;
e. 100 per page;
f. 250 per page.
Working with the SMS API
To start sending SMS to your clients, you must first complete all the necessary settings described in the SMS Settings section.
Once SMS is configured for your project on the Teliqon Portal, you will need to send a request to api/v1/sms/otp/send at the moment you need to send an SMS to a user.
Example of a CURL request:
curl --location 'https://api-e.teliqon.io/api/v1/sms/otp/send' \
--header 'Content-Type: application/json' \
--header 'Authorization: Bearer your_user_token' \
--data '{
  'callback_url': 'your_callback_url',
  'company': 'your_company_name',
  'language': 'selected_language',
  'otp_code': 'code_to_be_sent_in_sms',
  'phone_number': 'number_to_send_sms_for',
  'request_data_send_back': true
}'
Here’s a detailed description of the possible values for the parameters:
-
Authorization - can be accessed on the SMS → OTP page → Settings → API Token.
-
callback_url - this is the address where your request result will be sent. This parameter is optional: if it is not specified directly in the request, the system will automatically use the value from the “Callback URL” field on the main settings page. Example of information received at the callback_url after the SMS request is processed:
{
  "id_state": "12363372",
  "sender": "SMS",
  "phone": "380911111111",
  "text": "The code for test1 is 3333. Do not share the code with anyone.",
  "num_parts": 1,
  "part_no": 1,
  "state": "DELIVRD",
  "time": "2026-02-21 20:48:40"
}-
company - a parameter that can be used in the SMS text if “Template C” is selected in the settings.
-
language - in the request, the parameter is specified in the ISO 639-1 two-letter language code format (e.g., “en” or “uk”). This parameter is optional: if it is not specified directly in the request, the system will automatically use the value from the “Language” field located on the main settings page.
-
otp_code - a parameter that should be passed only if you have selected “Code generation: On your side” in the settings. Otherwise, the SMS request should be sent without the otp_code parameter, as the Teliqon Portal will generate the code for you and send the result to your callback_url.
-
phone_number - the recipient's phone number for the SMS message.
-
request_data_send_back - a parameter that accepts true or false values and determines whether the request response will include detailed information. If this parameter is set to false, the following result will be returned in the response (without details):
{
    "status": "success",
    "otp_code": "SD02!&\"08(",
    "creation_date": "2025-02-21T21:57:41.882691107Z",
    "request_id": "7bebca95-ххххх-хххх-хххх-3a00fb022ed8"
}
CRM
This page describes the CRM demo product available in the Teliqon Portal. It explains the trial period, demo access, and where to find related CRM setup instructions.
Account Profile Guide
This page describes the Profile section in the Teliqon portal. It explains how to view and configure profile information, other settings, balance notifications, and login history.
