WebRTC
This guide explains how to use the WebRTC client inside the Teliqon CRM interface. It describes how to initiate calls, manage active call sessions, and interact with CRM entities during a conversation. The document also outlines the available call controls and one-click dialing features.
General information
The User Menu panel contains additional functionality for making calls via IP telephony (over the internet).
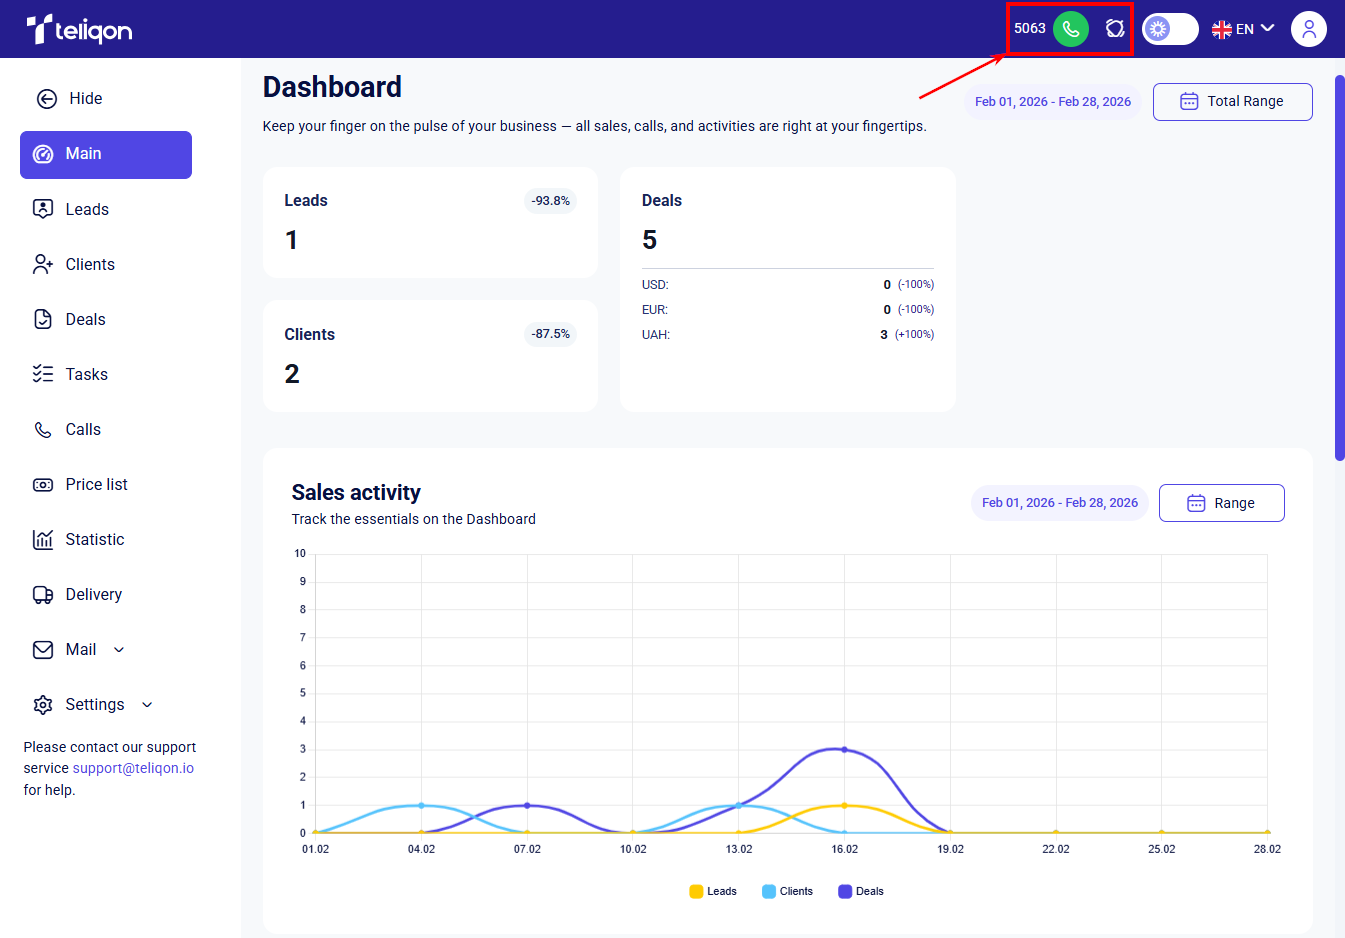
This functionality consists of two elements: your internal extension number and the WebRTC client call button.
-
Internal extension number - used for internal communication between system managers.
-
Call button (phone icon) - opens the WebRTC dialer modal upon interaction.
Below is an overview of the integrated phone window:
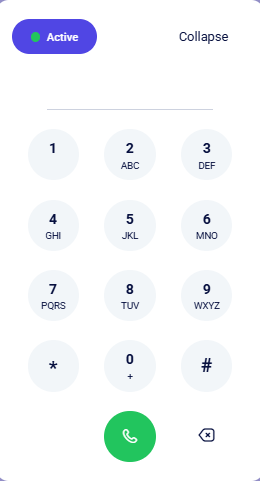
The following elements are available in this pop-up window:
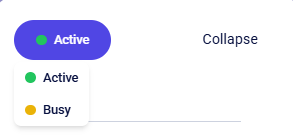
- Availability status button - used to change the current state of the WebRTC client: “Active” or “Busy”.
-
Collapse button;
-
Number input field;
-
Dialpad for entering digits;
-
Call start button;
-
Clear button.
There are several ways to enter a phone number:
-
Using a physical keyboard;
-
Clicking the dialpad buttons with a mouse;
-
Copying and pasting (Ctrl+C / Ctrl+V).
Once the number is entered, initiate the call by clicking Start call or pressing Enter.
To correct an entry, use the Clear button on the dialer interface or the Backspace key on your keyboard to remove incorrect digits.
If you decide not to make the call, close the dialer window using the Collapse button.
Working with the WebRTC client
Initiating Calls
To initiate an outbound call, enter the phone number using your keyboard or the dialer’s numeric keypad in international format: country code, area/operator code, and the subscriber's number.
Example: 380661111111 (38 – country code, 066 – operator code, followed by the subscriber's unique number).
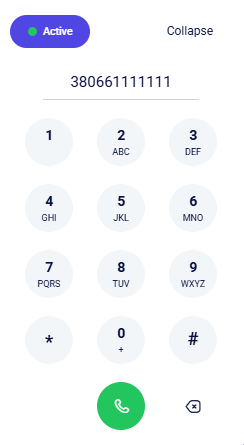
Once the number is entered, initiate the call by clicking the green button or pressing Enter.
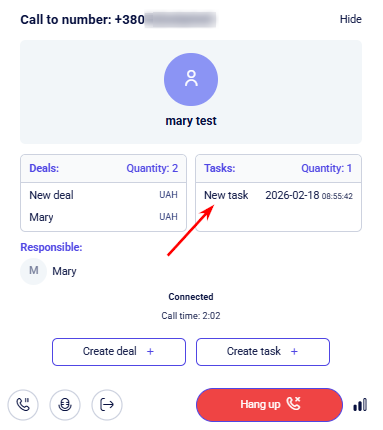
Call Screen
Upon initiating a call, the system automatically displays the active call card. This card provides the client's full name and their communication history, including current deals and tasks associated with the number in Teliqon:
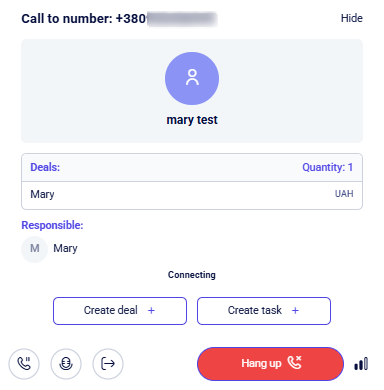
The call pop-up window contains the following interface elements:
-
To/From number;
-
Hide button for the WebRTC client;
-
CRM client info - shown for numbers already registered in the system.
-
Deals, tasks, and the manager responsible for this client;
-
Call status and duration;
-
Create lead +, Converting to client, Create deal +, and Create task + buttons;
-
Hold call, Mute microphone, Transfer call;
-
Hang up button;
-
Network connectivity indicator.
When a call is active, any existing entities (such as deals or tasks) linked to the subscriber's number in Teliqon CRM will automatically be displayed. You also have the flexibility to create new records directly within the interface during the conversation.
If no existing records are found for the subscriber, you can quickly create them using the Create deal + or Create task + buttons directly from the active call window.
If the caller's number is not found in the CRM database, the system identifies them as an Unknown user. You can immediately initialize a new lead record via the Create lead + button directly within the interface during the live session.
Creating a Lead or Deal during an active call
As previously noted, you can quickly capture client data during a call using the following context-sensitive buttons:
-
Create lead + - appears if the phone number is new to your CRM and not yet linked to any record.
-
Converting to client - becomes available if an existing lead is found for this number. This allows you to instantly update their status to “Client” during the conversation.
-
Create deal + - activates when the number belongs to an existing client, enabling you to immediately open a new sale (deal) for them.
Upon clicking Create lead + or Create deal +, the corresponding creation form will appear. Complete the necessary fields, ensuring all mandatory parameters - indicated by an asterisk (*) - are filled. Example of the Create a deal interface:
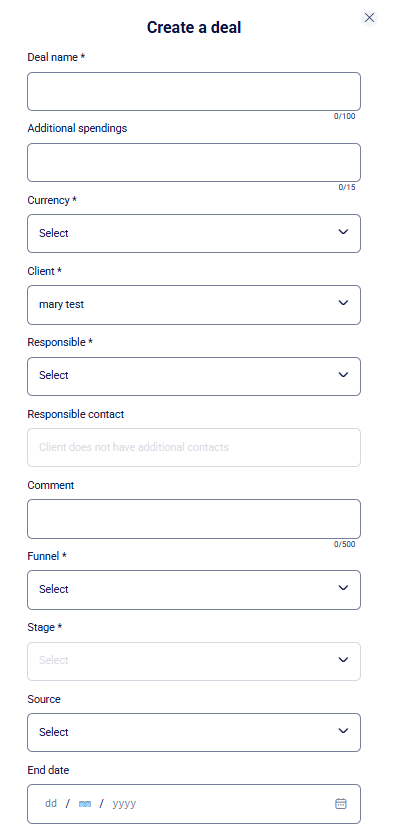
After entering the required details, click Create at the bottom of the form to save the record. To cancel the action, click the X icon in the upper corner of the window.
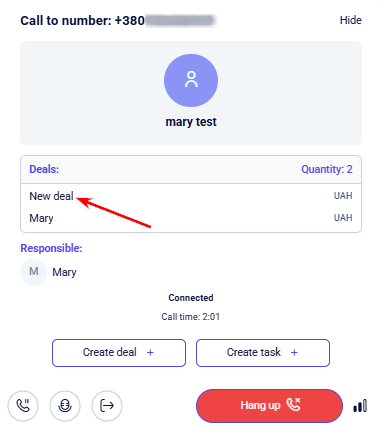
Once saved, the system automatically redirects you to the call interface, where the new deal or new lead will be visible in the list of associated records within the active call window.
Example of a successfully created deal:
Creating a Task from the call screen
Clicking the Create task + button opens a window for quickly scheduling a new task:
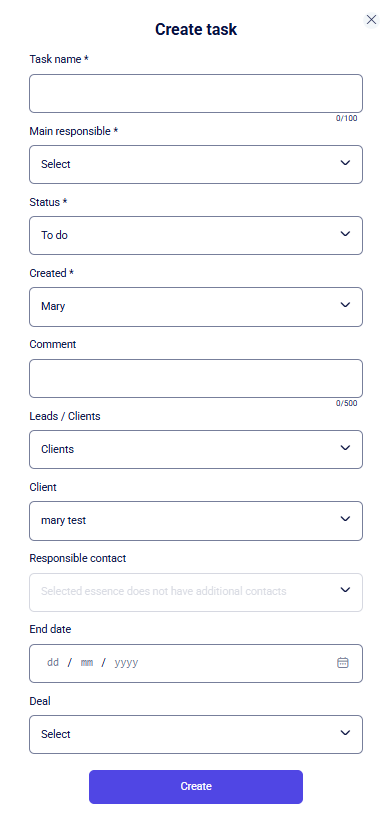
Complete the necessary fields, ensuring all mandatory parameters - indicated by an asterisk (*) - are filled. Detailed instructions on how to create a task are provided in this section.
After entering the required details, click Create at the bottom of the form to save the record. To cancel the action, click the X icon in the upper corner of the window.
Upon saving the task, the system will return you to the call interface, where the newly created record will appear in the activity list:
Call action panel
At the bottom of the pop-up window, you will find the following control panel:

-
Call hold button;
-
Mute microphone button;
-
Call transfer button.
Hold (Phone with pause icon) - сlick to place the call on hold for consultations or data retrieval. The client remains on the line and hears background music while your audio is suppressed. Pressing it again resumes the conversation.
Mute (Microphone icon) - deactivates your microphone if you need to discuss something internally or reduce background noise. You will still be able to hear the caller. Press again to unmute.
Transfer (Arrow icon) - redirects the call to another specialist or department. This allows you to quickly connect the client with the appropriate manager. Clicking this opens an agent selection window:
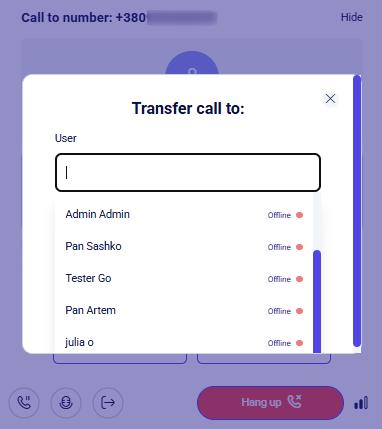
In this window, you can either select a user to redirect the call to and click Transfer, or cancel the redirection by closing the window via the X button.
To end the current call, click the red Hang up button.
One-click calling from CRM sections
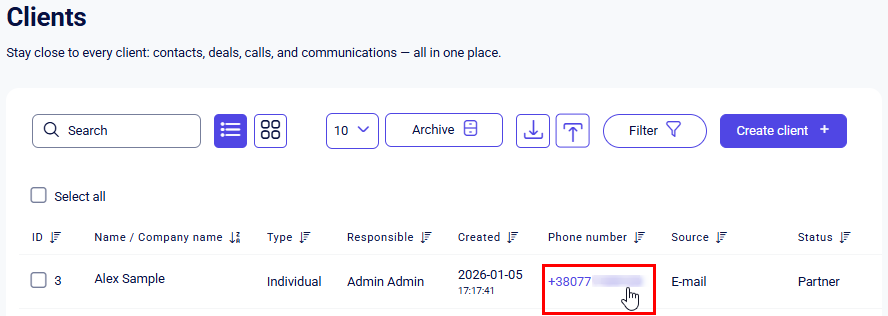
The Teliqon CRM system allows you to connect with clients as quickly as possible, eliminating the need for manual copying or dialing. You can initiate a call directly from the client card you are currently working on.
All phone numbers across the CRM are interactive links. Clicking a number automatically populates the dialer and launches the call interface, allowing you to initiate the outbound session instantly.
Currently, the one-click quick dial function is implemented and available in the following main sections of the system:
-
“Leads” (including from the individual lead card) - for prompt communication with new potential customers;
-
“Clients” (including from the individual client card) - for managing your current contact database;
-
“Calls” - for quickly returning calls based on previous conversations or missed calls.
Visual example from the Clients module:
User menu
User menu documentation. This file was converted from DOCX to MDX with extracted screenshots. Review headings, lists, links, images, and formatting against the source document before publishing.
Main
This document describes the Main dashboard in Teliqon CRM and explains the statistical charts available on the page. It covers how to configure date ranges for all charts and how to work with Sales activity, Activity distribution, and Calls count widgets.
