User Menu
This document describes the User Menu in Teliqon CRM, including call controls, reminders, notifications, language/theme switching, SSO services, and personal account access.
General Information
The User Menu is located at the top of the screen, on the bar with the Teliqon logo in the right corner:

The User Menu includes:
- Your personal number - other system users can call you at this number using the call button via the WebRTC client (web phone).
- Call button - clicking this button opens the built-in phone window for making and receiving calls.
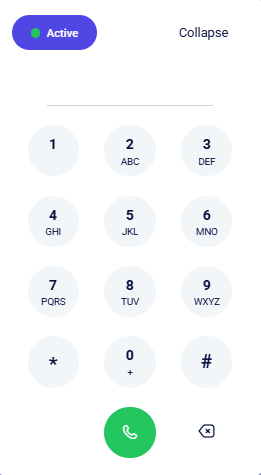
During an active call, the user panel interface changes, providing access to additional call management tools:

- The “Reminders” icon - opens a page for managing reminders and their settings.
- Notification icon (“Bell”) - notifications will be sent here in the following instances:
- Changes in cards (clients, leads, tasks, deals, etc.) - notifications for all edits (made by you or your managers) in entities where you are the assignee or have previously made changes;
- New email notifications - provided that your email is integrated with Teliqon CRM. Detailed setup instructions are available atthis link.
- Theme Switcher - allows you to choose your preferred display mode:
- Light Theme;
- Dark Theme.
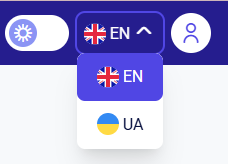
- Language Switcher - allows you to change the interface language to Ukrainian or English at any time:
- The Teliqon Products and Services (SSO) icon - clicking this button in the top right corner opens a modal window featuring all available Teliqon solutions.
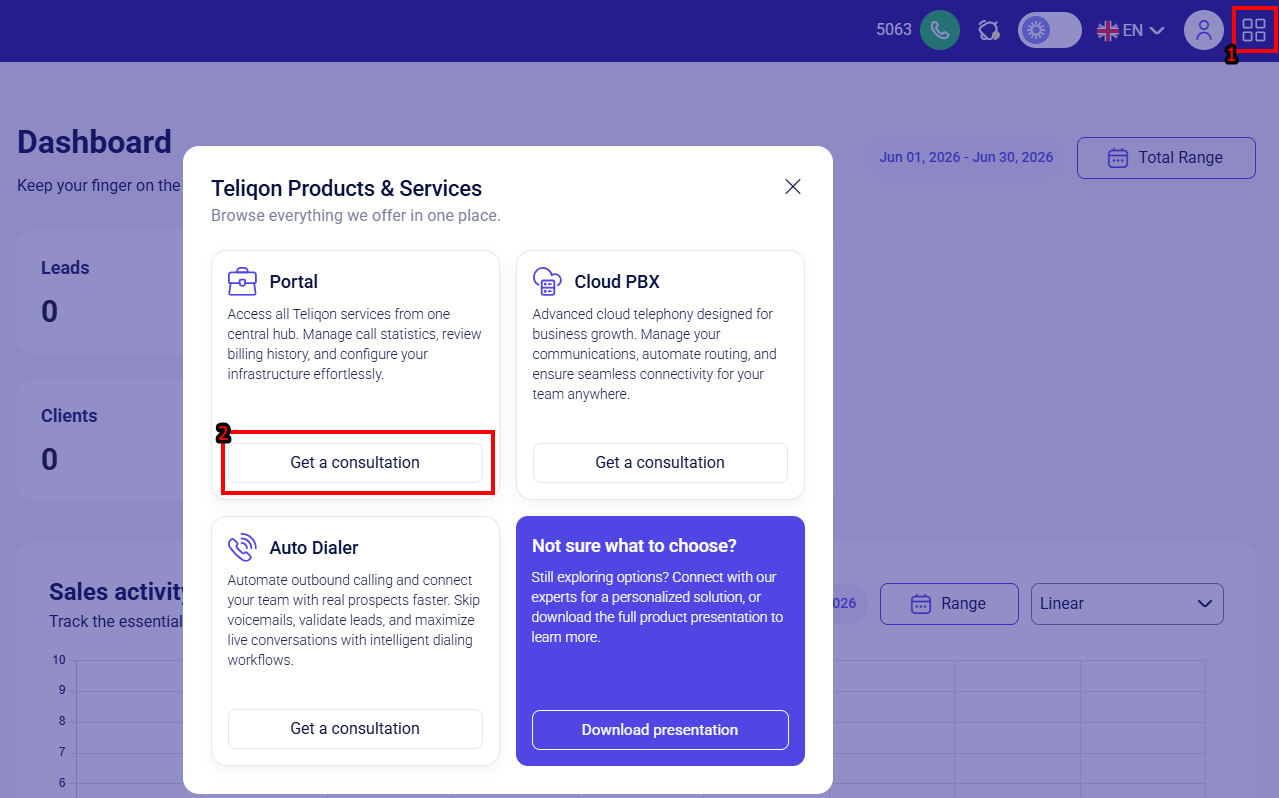
With Single Sign-On (SSO) technology, you can switch between different services with a single click (for example, quickly navigate to the “Portal” or “Auto Dialer” from the CRM interface) without having to log in again.
Additionally, in this same window, you can request a consultation by clicking the “Get a consultation” button - this will open a window where you can select an available time slot to connect with a manager. You can also download a product presentation by clicking the “Download presentation” button.
- Profile Avatar - provides quick access to your Personal Account settings. You can find a detailed guide on these settings in this section.
Reminders
You can quickly view your reminders on the user panel without leaving your current page. To do this, click the corresponding icon to open a pop-up window with notifications:
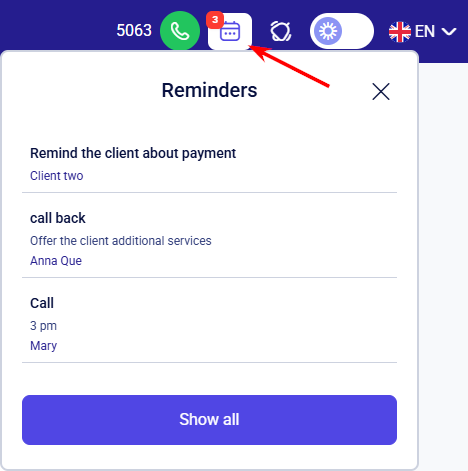
To view all reminders and their configurations, click the Show all button. This will open a dedicated page where you can easily manage all your notifications:
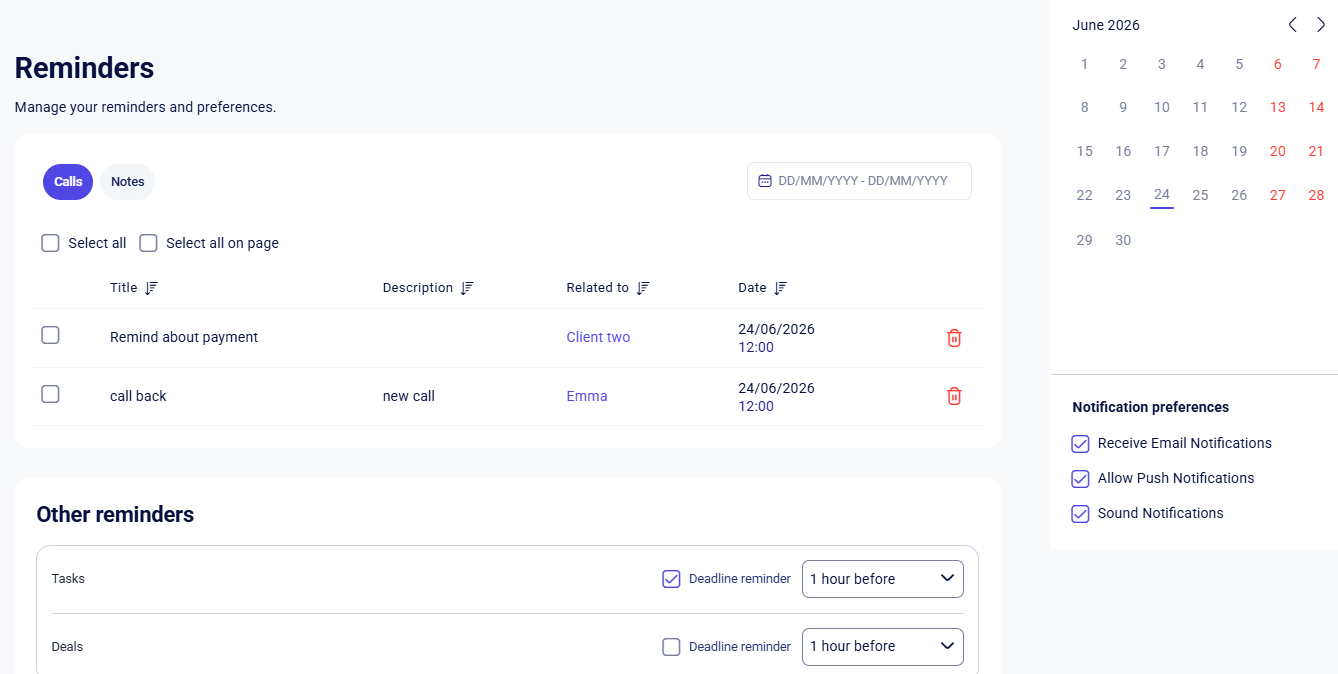
For more details on configuring and managing reminders, see the Settings → Personal → Reminders section.
Notification history
The Quick notifications panel allows you to instantly view recent events (such as missed calls or new emails) without leaving your current page.
New notifications are highlighted with a yellow dot:

To view your full notification history, click the Show all button:
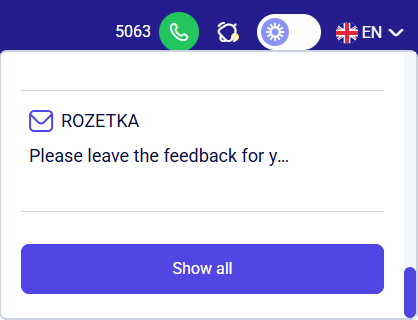
The page containing the notification history of events and emails will open:
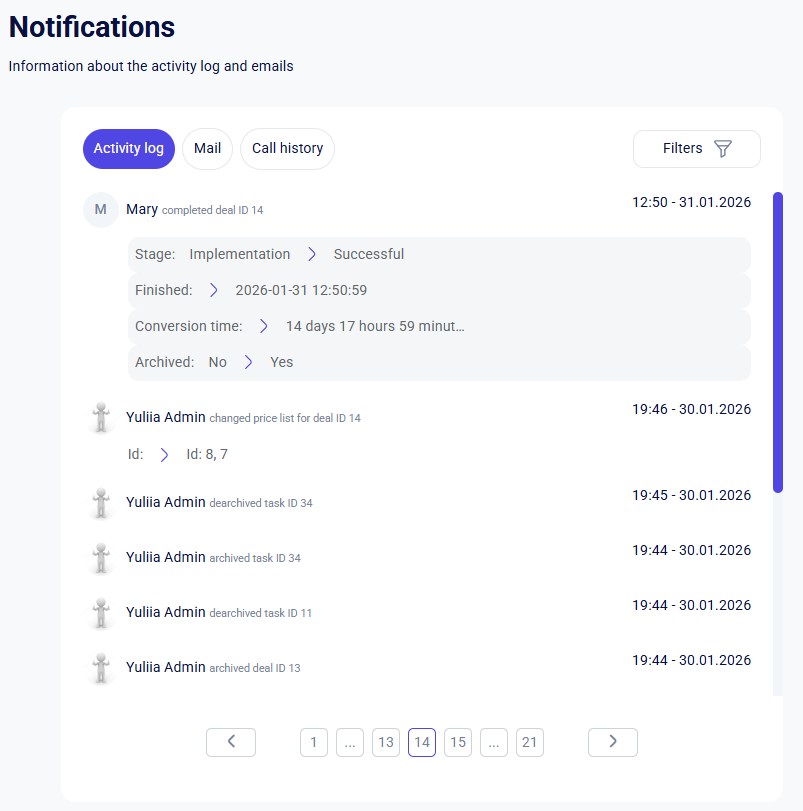
The following tabs are available for easy navigation:
- Activity log;
- Mail;
- Call history.
Activity log and Mail
These sections contain a complete history of actions and events related to all entities (leads, deals, clients, price lists, or tasks) for which you are responsible as a manager or have made changes. To view the general activity log for all system managers, follow the link.
Additionally, this section displays notifications for new emails in your inbox.
For convenient analysis, you can filter activity by entity and the specific action performed on it. To do this, click the Filter button and choose one of the available entities:
- Leads;
- Clients;
- Deals;
- Tasks;
- Price List
If necessary, you can narrow your search by specifying the required operations for the selected entity in the “Actions” field. This combination of parameters allows for flexible filter settings, showing only the information that matters to you.
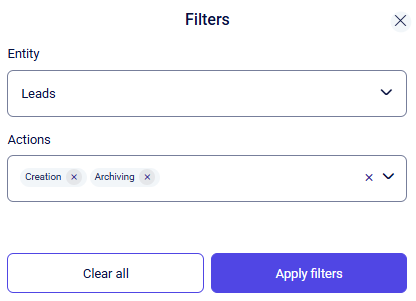
Once your parameters are set, click Apply filters to update the activity log. To return to the full list of events, use the Clear all button. If you wish to exit the filter window without saving changes, select the X icon in the upper right corner.
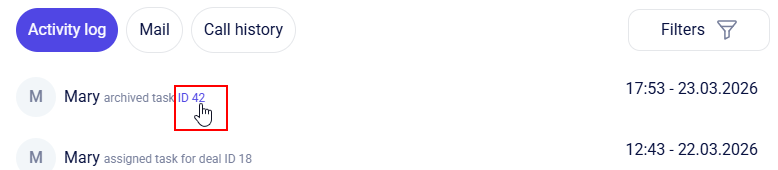
You can quickly navigate to a modified task, lead, client, price list, or deal card by clicking on its ID. This allows you to instantly analyze the changes made:
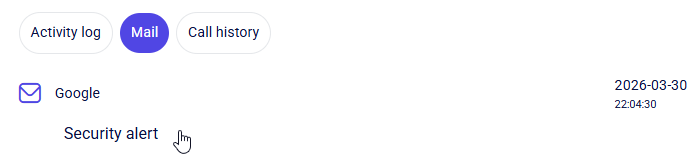
This functionality also extends to emails: click on an email notification, and the system will instantly redirect you to the Mail section for a quick reply.
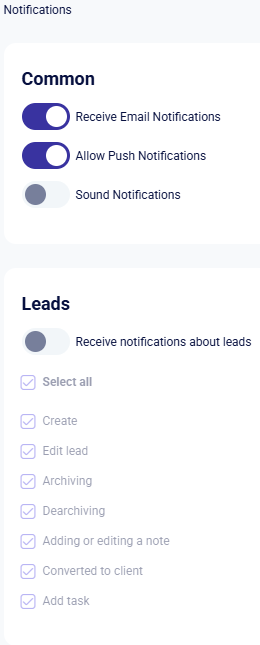
You can also manually customize the notification system by selecting the specific Lead, Deal, Task or Price List events you wish to be notified about. These settings are available under Settings → Personal → Notifications.
Call history
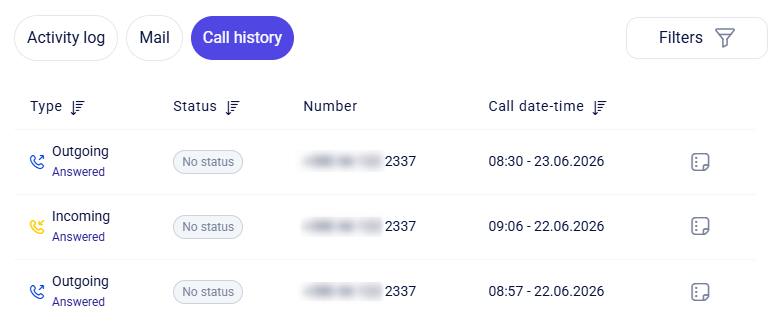
This section displays a detailed history of calls you have made or received as a manager directly from your account. This section tracks your personal activity, providing the date, time, call type, duration, and status for each entry:
For convenient analysis, you can filter calls by their type. To do this, click the Filter button and select one of the available call types:
- Incoming;
- Outgoing;
- Missed;
- Internal.
If needed, you can narrow your search by specifying a call status. Combining these parameters allows you to flexibly customize the filter and view only the information that matters to you:
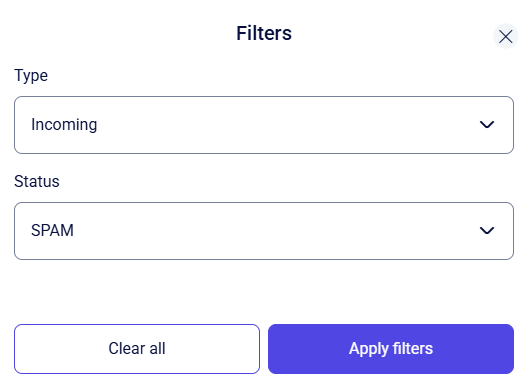
After selecting the parameters, click Apply filters to update the call list. If you wish to return to the full list of calls, use the Clear all button. To close the filtering window without saving changes, click the (X) icon in the upper right corner.
The phone numbers in this section are active - you can quickly call a client simply by clicking their number. You can also add and view call notes.
To do this, click the corresponding icon next to the call and enter your note:

For more details on notes, please refer to the Callssection.
Personal Account
The Personal Account page looks like this:
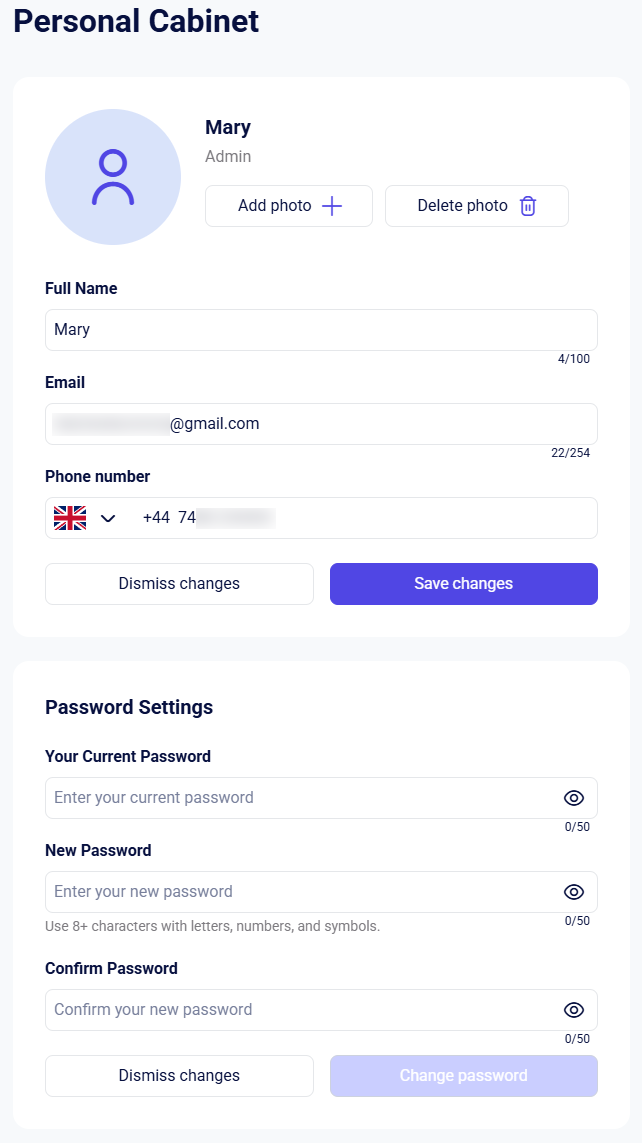
Use this section to manage your personal information and update your password. Detailed information about Personal account features is available here.
Account
This guide explains how to use the personal Account section in Teliqon CRM. It covers profile details, password changes, personal notes, contacts, import options, and one-click calling.
WebRTC client
This guide explains how to use the WebRTC client in Teliqon CRM for incoming and outgoing calls. It covers the dialer, call screen, quick actions during calls, call control buttons, transfer workflow, and one-click calling from CRM sections.


