This document describes the Mail section in Teliqon CRM and explains how to connect and configure email integration. It also covers working with incoming messages, reply and forward actions, and the available mail management tools.
General information
This section contains information regarding your email messages in Teliqon CRM.
If you haven't connected your email integration yet, clicking on the Mail section in the left sidebar menu will take you to the following page:
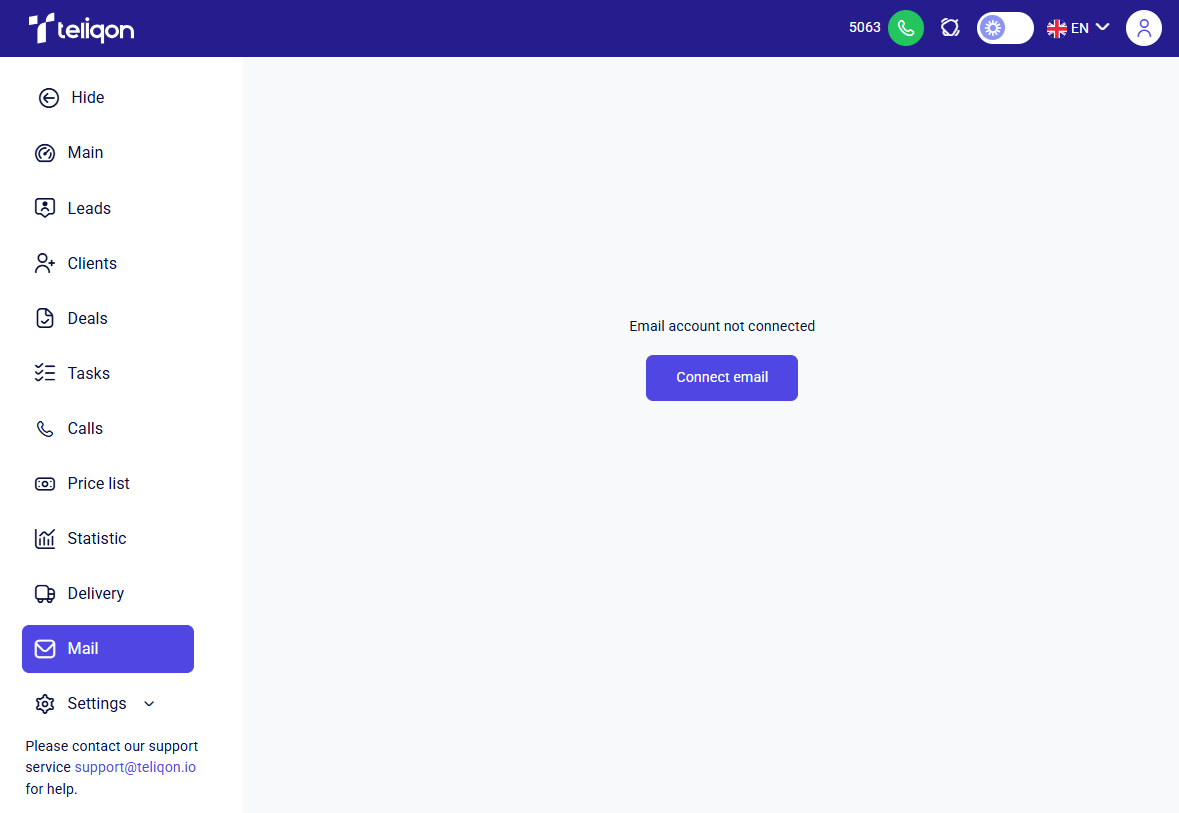
This page allows you to set up your email integration. To get started, simply click the Connect email button.
Connecting email integration
After clicking the Connect email button, the following pop-up window will appear:
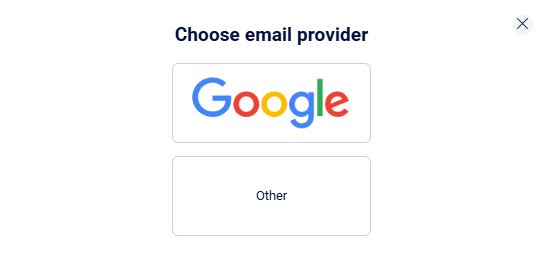
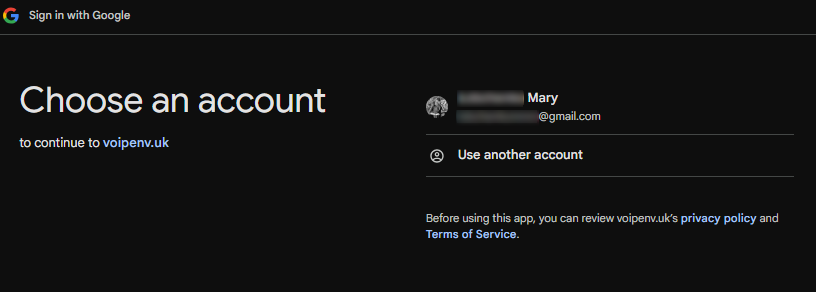
To authorize using your Google account, click the Google button and complete the sign-in process within the application.
If you prefer to authorize using a different method, select the Other option. In the window that appears, enter your email address into the corresponding field.
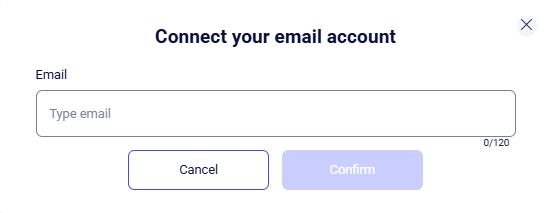
After entering your email, additional configuration settings will be displayed to complete your account connection:
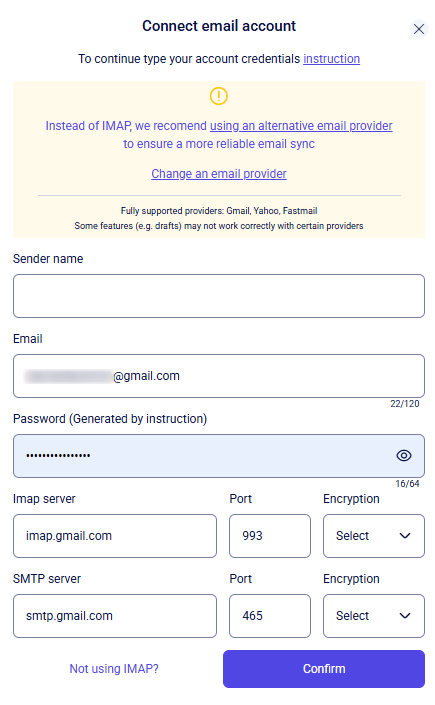
To integrate your email service, please complete the following fields:
-
Sender name;
-
Email;
-
Password;
-
Incoming Mail Server (IMAP) & Port;
-
Outgoing Mail Server (SMTP) & Port.
To do this, click on the input field and enter the required information using your keyboard.
In the Sender name field, enter your login (sender's name). You also need to enter a password in the Password field, but there is an important detail: for security reasons, most modern services (Gmail, Outlook, Ukr.net, etc.) don't allow the use of your primary email password. Instead, you will need to provide a specifically generated App password.
Fields for Email, servers, and ports are typically auto-populated. If they don't appear automatically, you can manually find these details in your email provider's help section or settings.
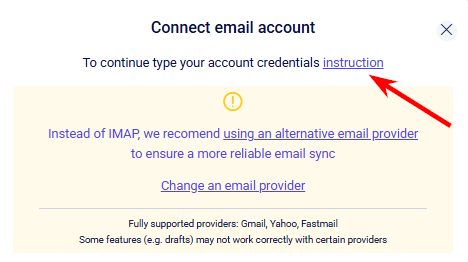
Additionally, the Instructions link provides a detailed guide on setting up the integration. It covers how to connect your email to Teliqon CRM and lists technical parameters (servers and ports) for popular services like Gmail, Outlook, and iCloud.
Once all required fields are complete, click Confirm**.** To exit and cancel the setup, click the **X** icon.
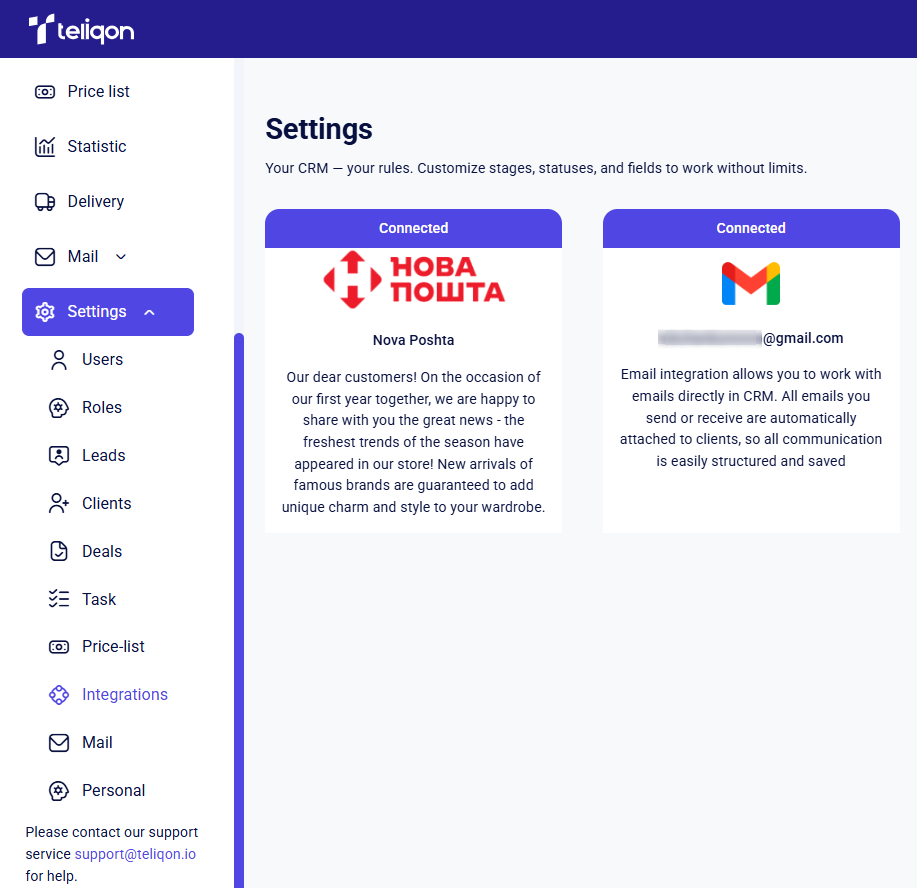
After a successful connection, you will be redirected to the settings page, where the email integration status will appear as Connected.
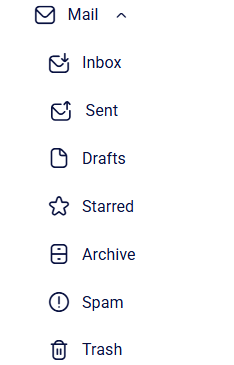
The following sub-menu tabs for Mail will appear in the sidebar:
-
Inbox;
-
Sent;
-
Drafts;
-
Starred;
-
Archive;
-
Spam;
-
Trash.
Before you can manage your emails, you will need to complete the initial setup.
Email integration setup
To configure your email integration, navigate to Settings → Mail in the left sidebar menu.
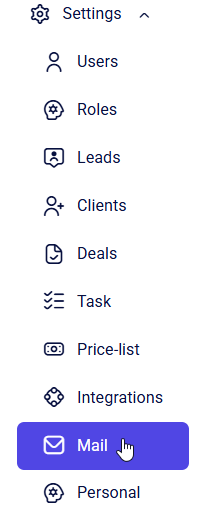
This will open the email integration settings page:

The Mail settings page consists of the following three sections:
-
Account data;
-
Email data synchronization;
-
Account management.
The information in the Account data section is populated automatically and cannot be edited.
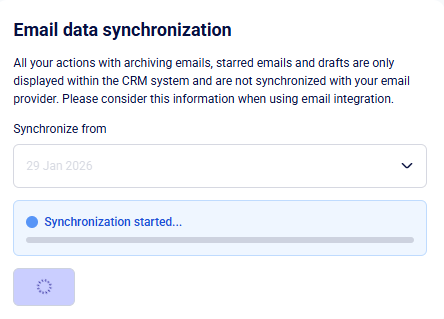
In the Email data synchronization section, you can select one of the available sync periods. The options are:
-
Today;
-
1 Month;
-
3 Months;
-
6 Months.
After selecting your preferred sync period, click Synchronize. You can monitor the progress directly within the form:
Once the sync is finished, a confirmation message will be displayed:
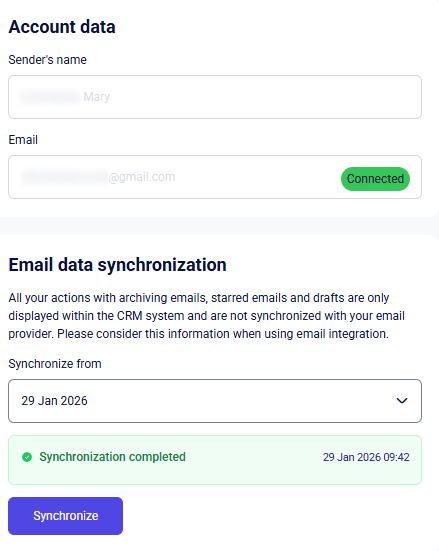
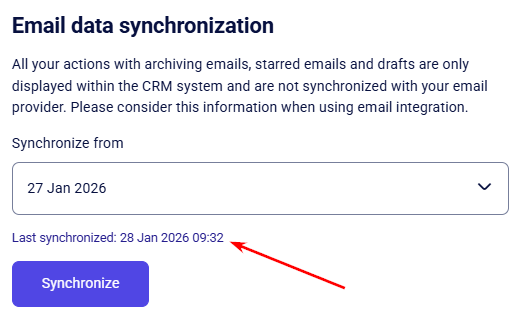
This section also shows the timestamp of the most recent auto-sync with your inbox.
In the Account management section, you can stop the email account synchronization or disconnect the integration between your email account and Teliqon CRM.
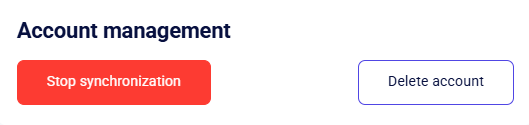
Click Stop synchronization to pause data synchronization, or Delete account to remove the integration entirely.
Managing your email
Once the email integration is connected and configured, you can start using it.
To do this, navigate to Mail → Inbox. You will see a page displaying your incoming messages:
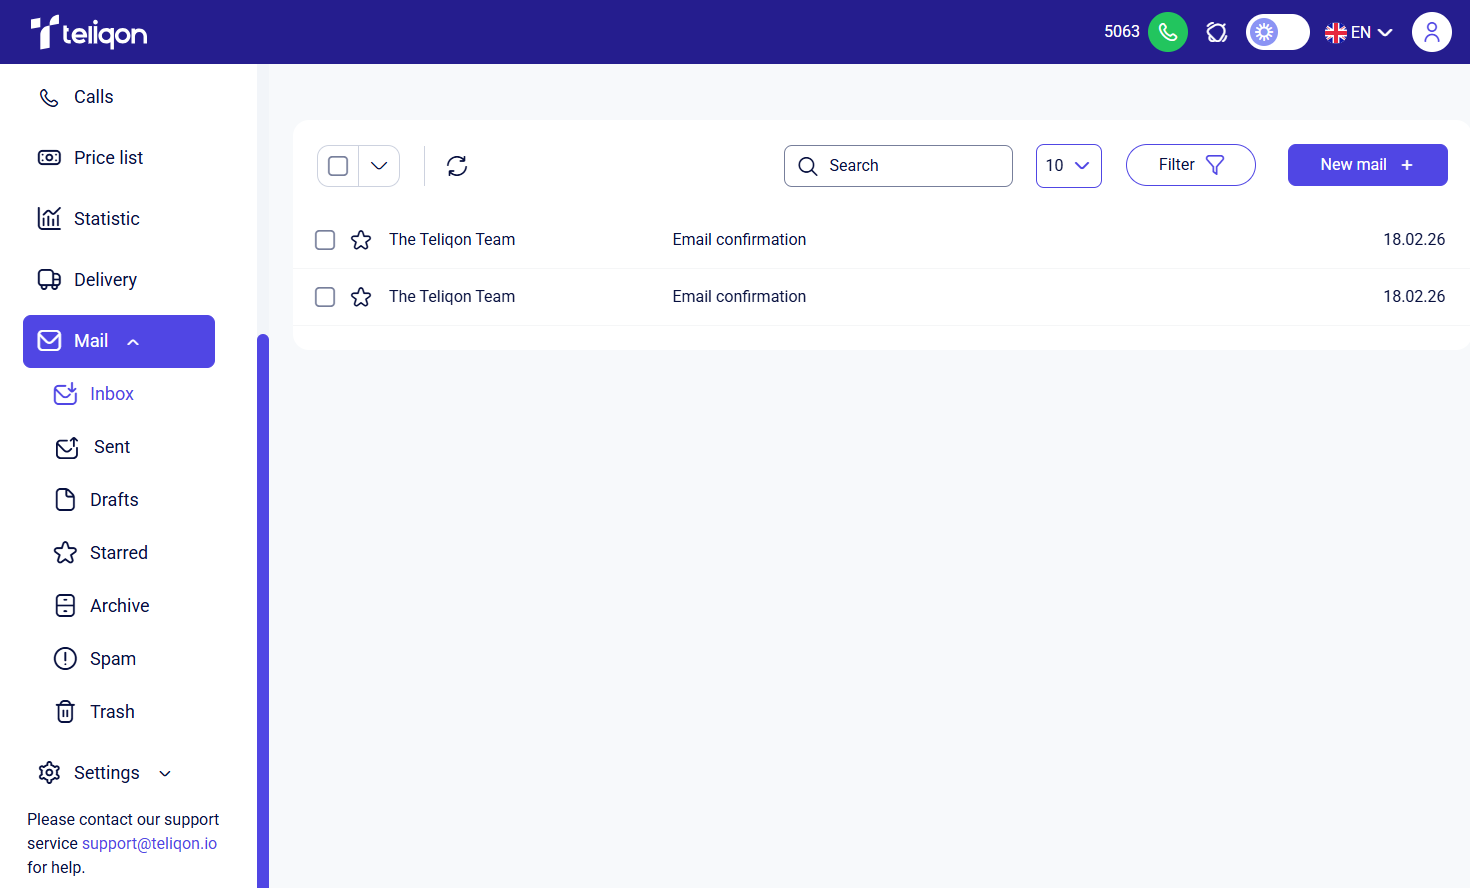
The toolbar on this page allows you to:
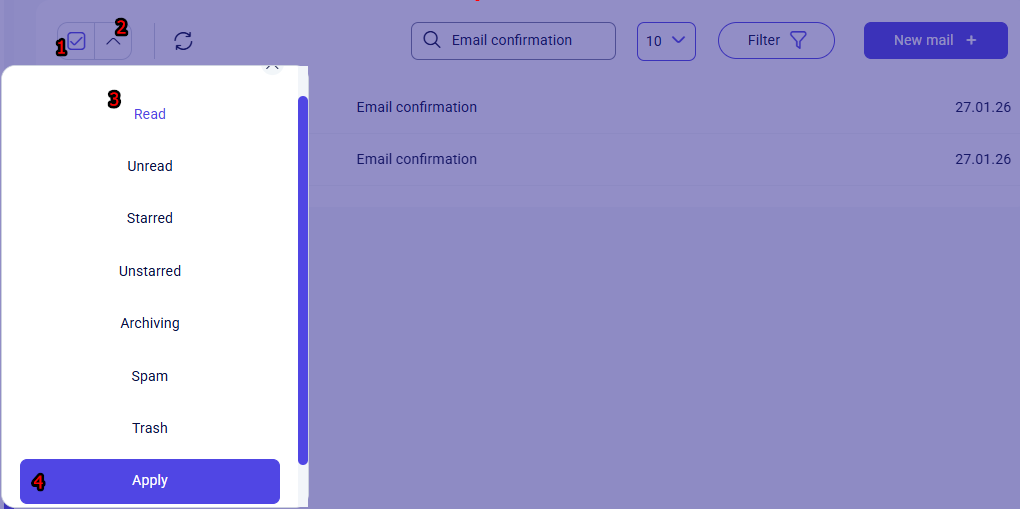
- The Select All button, which lets you select all emails on the page with a single click to perform bulk actions. Clicking this button once will check all empty checkboxes on the page. Clicking it again will deselect them.
Bulk selection allows you to quickly mark emails as read, unread, archive them and more. Click the arrow icon next to Select All, choose the desired action, scroll down, and click Apply.
-
Refresh email data;
-
Use the Search Bar to instantly find emails by keywords in the subject line or body. Simply click into the search field and start typing - the search begins automatically as soon as you enter the first characters.
-
Rows per page. Use this dropdown to adjust your inbox view by changing the number of emails shown on a single page.
Available options:-
5
-
10
-
25
-
50
-
100
-
-
Filter button;
-
New mail + button for composing new email.
Email body
In addition to using the toolbar, you can open an email directly by clicking on its subject. This will take you to the message view page:
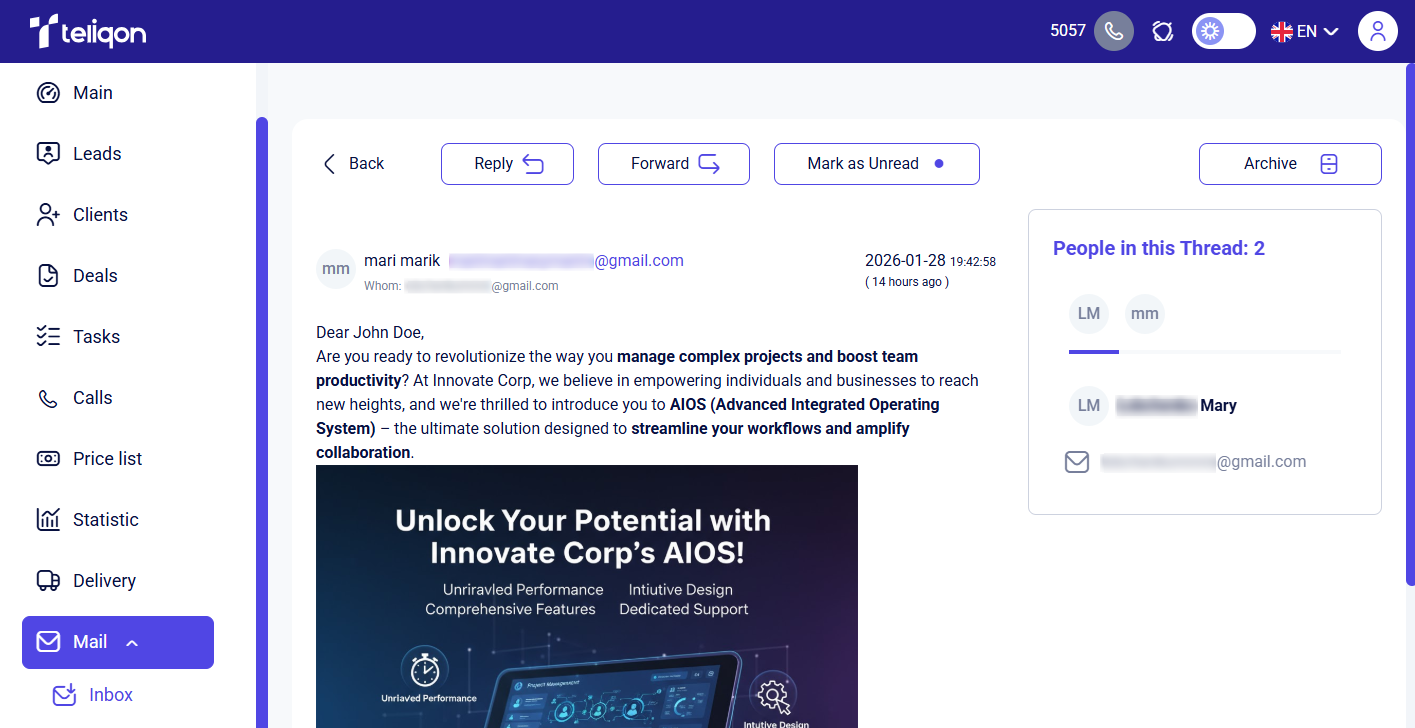
On this page, you can perform the following actions:
-
Return to email list;
-
Reply;
-
Forward;
-
Mark as Unread
-
Archive email.
-
Link this email address to an existing lead/client or create a new lead/deal.
Reply to email
When you click the Reply button, a pop-up window will appear where you can compose and send your message. The window looks as follows:
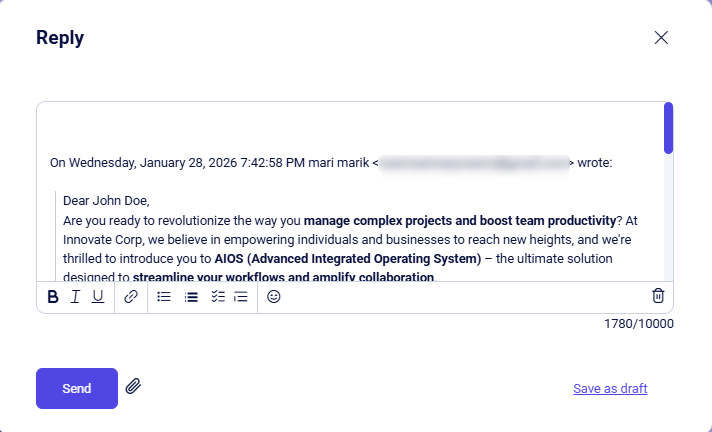
Use the formatting toolbar at the bottom of the window to style your message. The tools are arranged from left to right as follows:
-
Bold text;
-
Italic text;
-
Underlined text;
-
Insert a link.
To do this, enter your text, highlight it with your cursor by holding down the left mouse button, and click the Link button.A pop-up window will appear where you should enter the URL in the format "https://test.site.com".
Then, click Save if you have entered the correct link, Cancel or Delete if you change your mind.
-
Format text as a List view;
-
Format text as an Ordered List;
-
Format text as a Task List;
-
Format text as a Blockquote;
-
Add an Emoji.
To attach a file, click the paperclip icon to the right of the Send button. In the window that opens, select the required document from your device.
If you decide to send the message later, you can save it by clicking Save as draft. Your message will be stored in the Mail → Drafts section.
Forward email
When you click Forward, a pop-up window will appear:

Fill in the To field with one or more email addresses, using commas as separators. Like with replies, you have the option to attach files to your message during preparation.
Next, choose one of the following actions:
-
Send;
-
Save as draft.
If you select Save as draft, the unsent email will appear in the Drafts tab in the sidebar menu on the left.
Once you have entered the recipients' addresses and attached any necessary files, click the Send button to complete the operation and send the email.
Marking as Unread
All incoming unread emails are highlighted with a specific dot icon for easy identification.

To mark an email as unread, check the box to its left, click the arrow icon, and select the corresponding action.
Archive Email
Clicking the Archive button moves the email to your archives. You can view these messages in the Mail → Archive section.
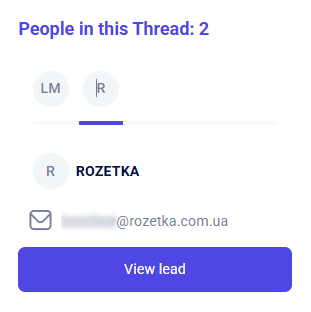
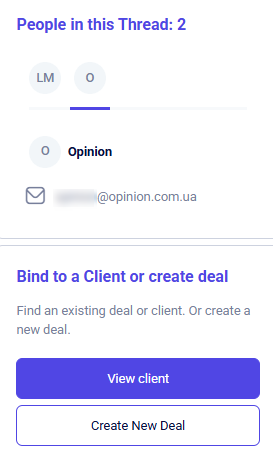
People in this Thread
This section displays everyone involved in the current email thread:
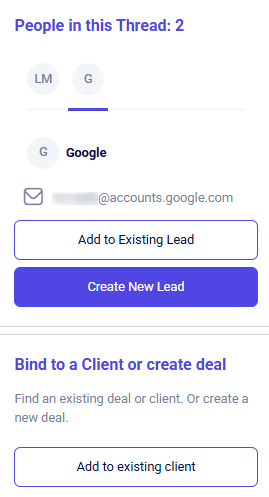
In this section, you can:
-
View participants: see all email addresses involved in the conversation.
-
Link to existing entities: add a participant's email to an existing lead, client, or deal.
-
Create new entities: generate a new lead or deal directly from a participant's contact information.
After linking an email address to an existing client/lead/deal or creating a new lead from it, this block will provide a shortcut for instant navigation to the corresponding card:
To create a deal for an existing client, start by linking the contact's email address to their profile. Once linked, the Create New Deal button will become available:
Delivery
This document describes the Delivery section in Teliqon CRM and explains how shipment records are viewed and managed. It covers TTN handling, search, filtering, bulk actions, and the delivery parameters shown in the main table.
Settings
This document was converted from DOCX to MDX. Review headings, lists, links, and images against the source document. This description should be updated to match the specific content of the document.
