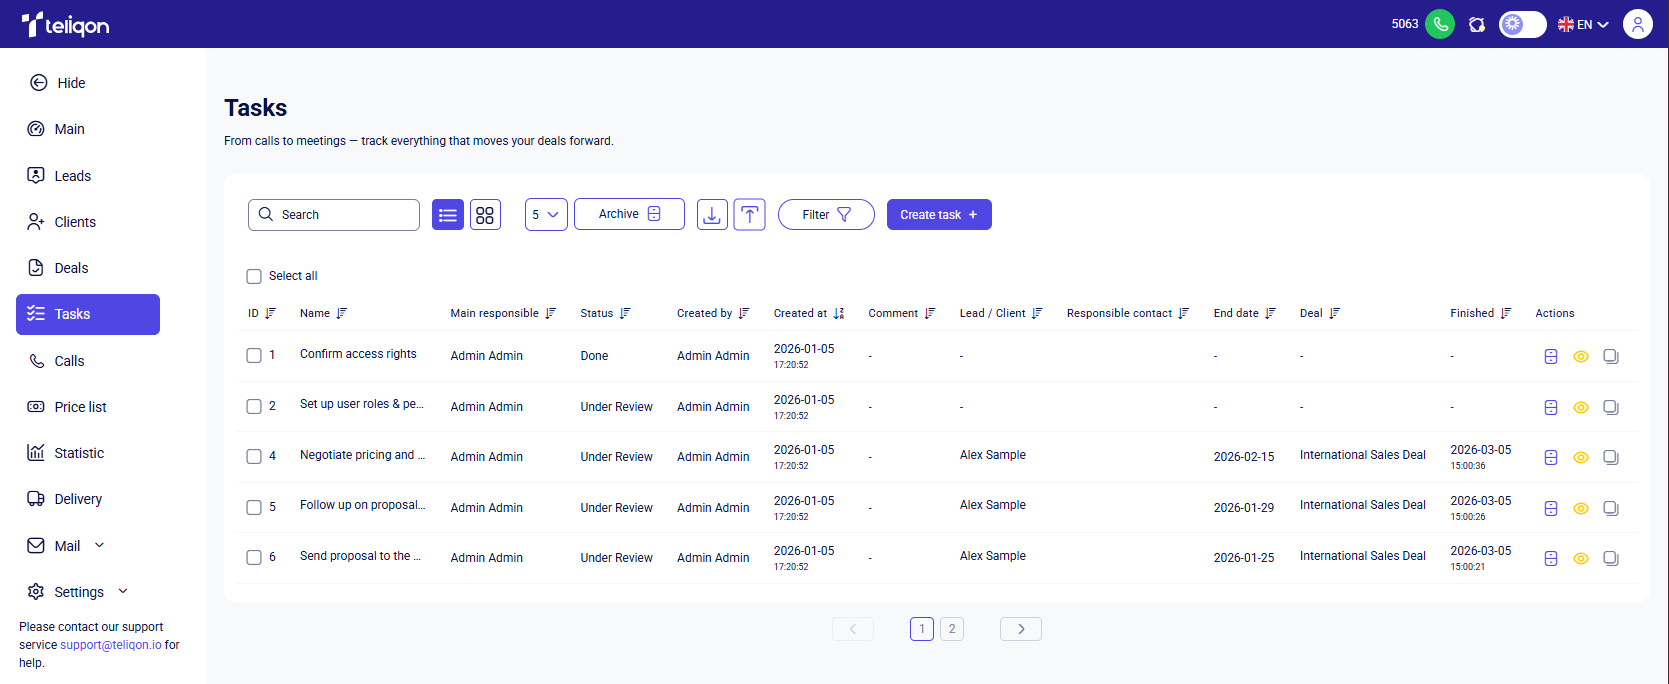
Tasks
Tasks documentation. This file was converted from DOCX to MDX with extracted screenshots. Review headings, lists, links, images, and formatting against the source document before publishing.
General information
This section provides information about your project tasks in Teliqon CRM.
On this page, you can:
- View tasks in your preferred format: as a List or a Board.
- Search for tasks by any field using the search bar (supports full or partial matches).
- View and archive tasks with a single click.
- Create, edit, import, and export task data, and apply filters to any field.
To access this page and view task information, go to the Tasks section in the left sidebar menu.
How to work with tasks
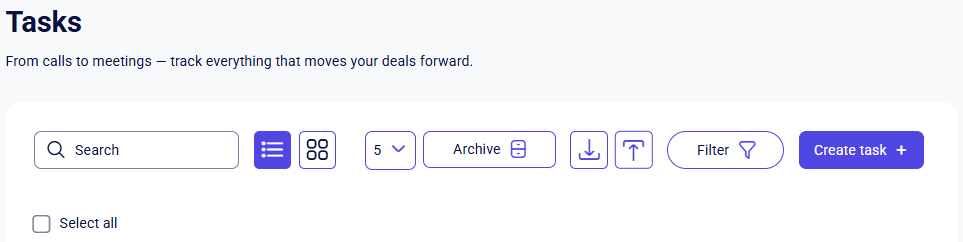
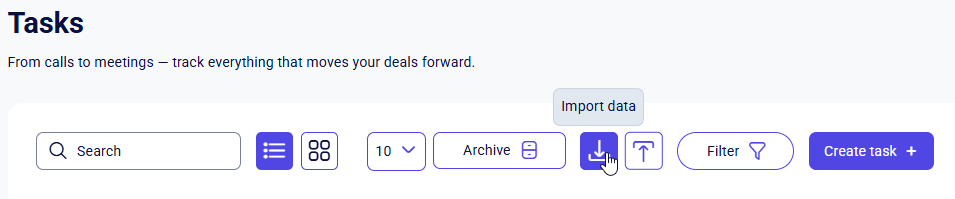
Task toolbar
Using the toolbar on the Tasks page, you can perform actions on tasks quickly and easily.
The following options are available on the toolbar:
-
The search bar provides a convenient way to search for tasks by full or partial matches in any task field. To use it, simply click on the bar and start typing — the search begins automatically as soon as you enter the first characters.
-
Switch task display modes between "List" and "Board". You can toggle between them by clicking the corresponding icon.
The icons represent the following:
a. List view
b. Board view
- The button to limit the number of records displayed on the page.
It has the following options:
a. 5
b. 10
c. 25
d. 50
e. 100
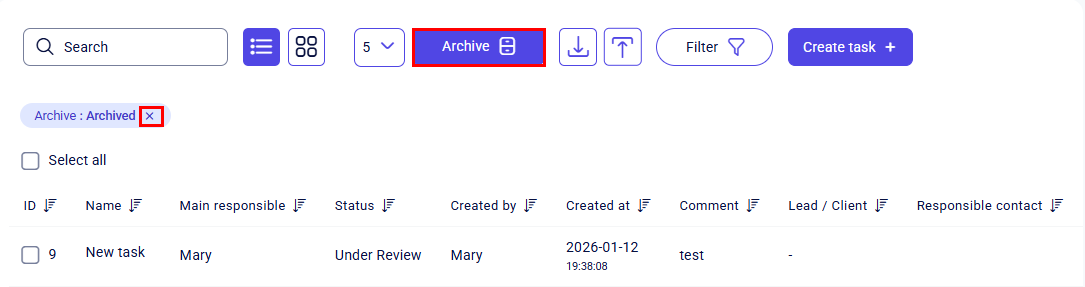
- The Archive button, which helps you switch between active and archived tasks in your project.
The first click on this button takes you to the archived tasks. To return to the active tasks, simply click the button again or click the X next to the newly created filter.
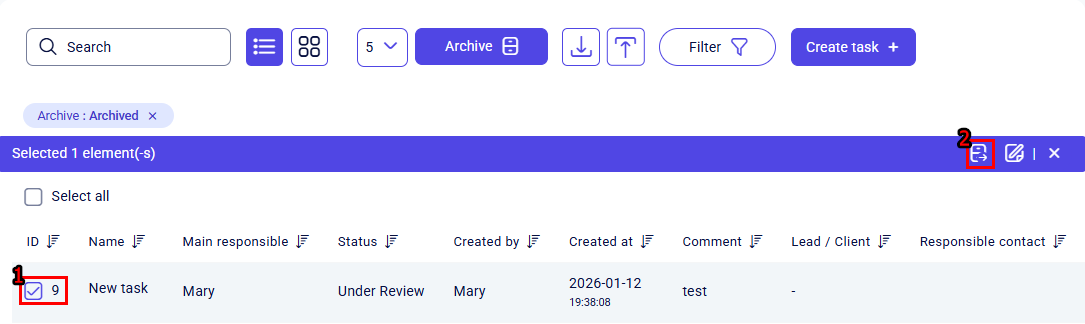
To return a task from the archive to the active list, select it using the checkbox and click Unarchive on the bulk actions toolbar.
Or use the separate button next to the item in the Actions column:

-
The Import data button. This button is described in more detail below .
-
The Export data button. This button is described in more detail below .
-
The Filter button on the "Tasks" page, which helps you filter tasks using a combination of filters across various fields. This button is described in more detail below .
-
The Create task button, which allows you to add a new task to the system. This button is described in more detail below .
-
The Select All button, which allows you to select all tasks on the page with a single click.
The first click on this button will mark all the empty boxes (checkboxes) on the page. Clicking it again will deselect all the checkboxes.
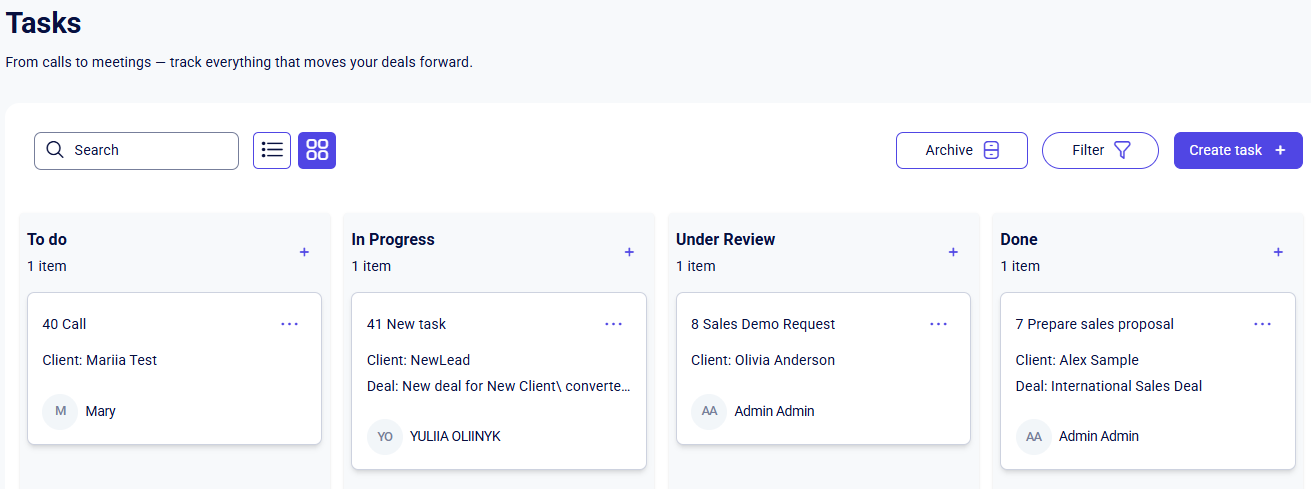
Task list and board management
You can choose between two display options for your task list: List view or Board view. Each option offers its own unique advantages.
List view
List mode allows you to sort data in a single click using quick filters in the column headers.
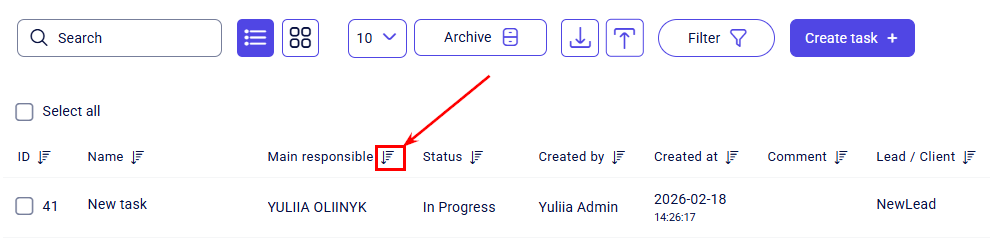
Only one quick filter can be active at a time. It has three states:
- No sorting
- Sort descending
- Sort ascending
Clicking a different quick filter will reset the previously selected filter to its initial state (no sorting).
Additionally, the system supports free column movement in almost every section or block. Simply click and hold the desired column with your left mouse button and move it into your preferred sequence.
On the left, there are checkboxes. Click to select one or multiple records, or click again to deselect them.
After clicking a checkbox, an additional panel will appear where you can see the number of selected items and the available actions:
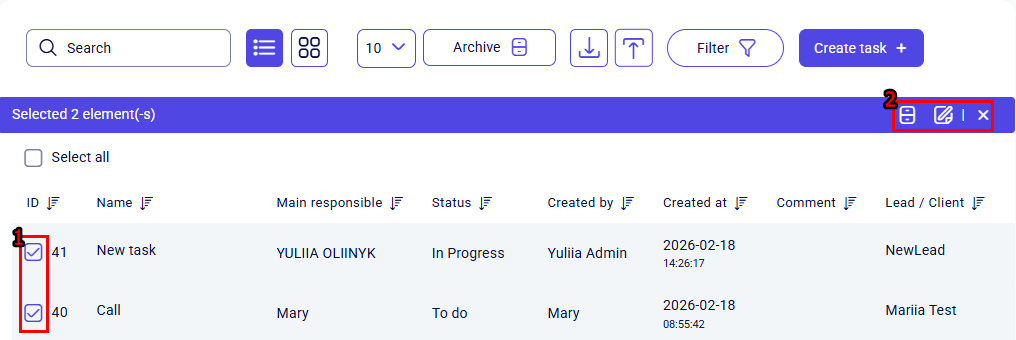
List of elements on the additional panel from left to right:
-
Archive all selected items. This button is used to bulk-move selected tasks into the archived state. They will not disappear from Teliqon CRM but will move to the archived tasks page. Instructions on how to access the archived tasks page can be found in this section.
-
Edit selected items. This button allows you to bulk-edit all selected items (tasks). After clicking the button, a pop-up window will appear with available bulk actions:
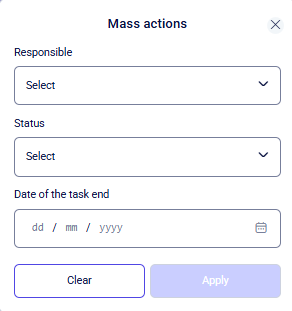
Available bulk actions:
a. Bulk set "Responsible"
b. Bulk set "Status"
c. Bulk set "Date of the task end"
The Clear button cancels bulk actions.
The Apply button saves the settings.
The X button closes the window.
- Cancel selection. Using the X button, you can cancel the selection of items and return all checkboxes to their default empty state.
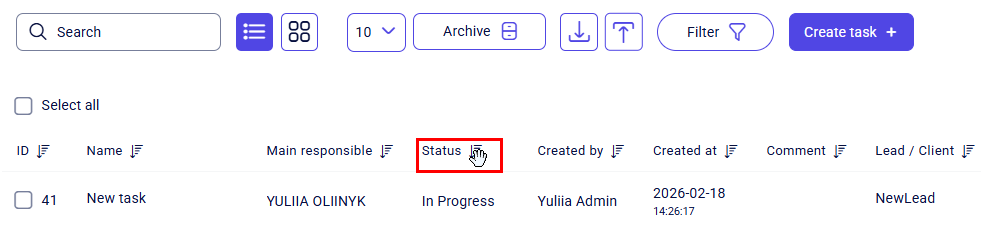
To the right of each task, there are three available actions:
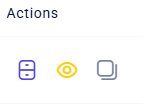
-
Archive task. This button allows you to move a task from "active" to "archived" with a single click. You can view the archived tasks in your project using the button to switch to archived tasks display ;
-
View the task information card. Instructions on how to work with the task details card can be found here ;
- Copy the task link.
Board view
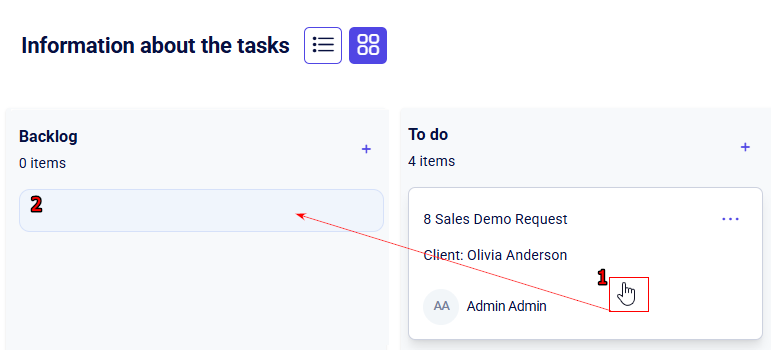
After switching to the board view, the task list will be presented as "cards." The assignment of tasks to specific statuses will also be visualized, and a convenient way to move tasks between statuses using "drag-and-drop" will become available.
To change the task status, press and hold the card with the left mouse button and drag it to the desired column. Once a blank space appears in the new status, release the mouse button.
Unlike the List view, the task Board will not have buttons for exporting, importing, limiting the number of records per page, or bulk selecting tasks.
On the task board, you can create a new task using any of the three corresponding buttons:
- On the toolbar described in this section;
- At the top of the column containing tasks of a specific status, by clicking the plus sign;
- At the bottom of the task column.
The main difference between the general create button and the buttons within columns lies in status automation. When using the general button, the task status is undefined, so you need to select it manually. Conversely, clicking the button directly within a column automatically pre-fills the corresponding status in the pop-up window, significantly speeding up the process — though you can still change this parameter manually if needed.
To edit a specific task on the task board page, click on the task card anywhere except for the three dots "...".
By clicking "...", you can choose one of two options:
- Copy the task link;
- Archive task. This button allows you to move a task from "active" to "archived" with a single click. You can view the archived tasks in your project using the button to switch to the archived tasks display .
Create task
After clicking this button, a Create task pop-up window will open:
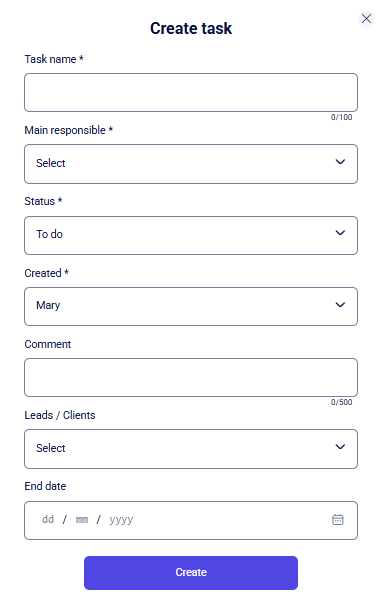
To create a task, the following fields are required:
- Task name *;
- Main responsible *;
- Status *;
- Created *.
And the following parameters, which are optional:
-
Comment;
-
Leads/Clients;
-
End date;
-
Parameters that become available when selecting Leads/Clients in field 2:
- Responsible Contact;
- Customer (lead/client);
- Deal.
- Additional custom parameters.
It is important to note that you can only add leads and clients to the Lead/Client field.
If you need to add an Additional contact, you can select it in the Responsible contact field.
You can also customize the task creation form by adding your own fields in the Task settings.
Complete the mandatory fields and click Create to save the task. To cancel, click the X in the top-right corner of the form. Once saved, the new task will be visible in the task list.
Import data button
To import tasks, click the Import data button located in the List view.
A pop-up window will then appear:
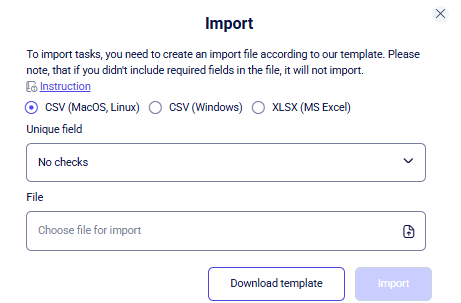
To view the upload guide, click the Instruction link.
You can choose from two available formats: CSV and XLSX.
Depending on your operating system, select one of the following three options:
- CSV (MacOS, Linux)
- CSV (Windows)
- XLSX (MS Excel)
Next, choose one of the following three unique fields:
- No checks
- ID
- Name
Then you need to create a file for upload. Click Download template, fill it with data following the prompts in the instructions, and save the updated file.
Next, in the import window, click on the File field to upload the data. Select the file you prepared from the template in your computer's file explorer and confirm your choice.
Once all settings are configured, click the Import button. The tasks will be uploaded to the system and will appear in your task list.
If you decide not to import the file, click the X icon in the top-right corner of the pop-up window to return to the task management menu.
Export data button
To export tasks, click the task export button.
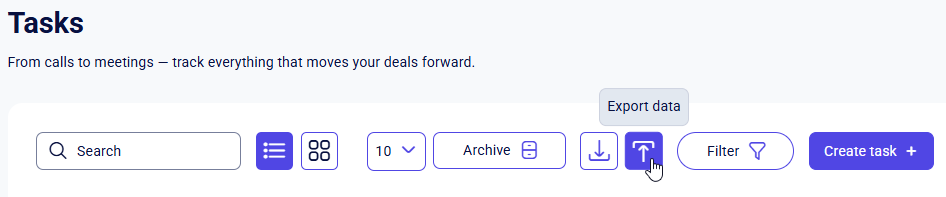
A pop-up window will then appear
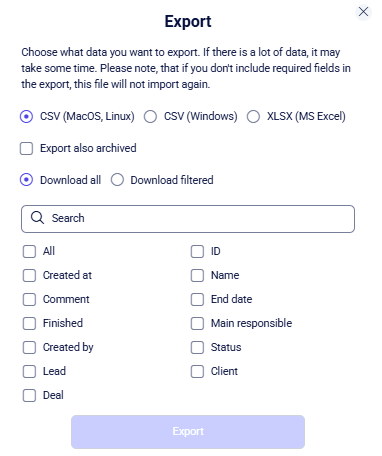
In the export pop-up window, you can configure the following task export conditions:
- Export format. Two formats are available for selection: CSV and XLSX.
Depending on your operating system, select one of the three options:
- CSV (MacOS, Linux)
- CSV (Windows)
- XLSX (MS Excel)
- Export archived tasks
- Download all tasks or only previously filtered tasks
- Select the list of fields to be included in your file
You can quickly find the required export fields by using the search bar, which identifies matches even if you only enter part of the name.
After selecting your settings, click Export. The system will download a file to your computer in the selected format containing the task list and your chosen parameters.
To cancel the export and return to the tasks, click the X in the top-right corner of the window.
Task Filters
The Filter button opens a window for customizing your view based on these default parameters:
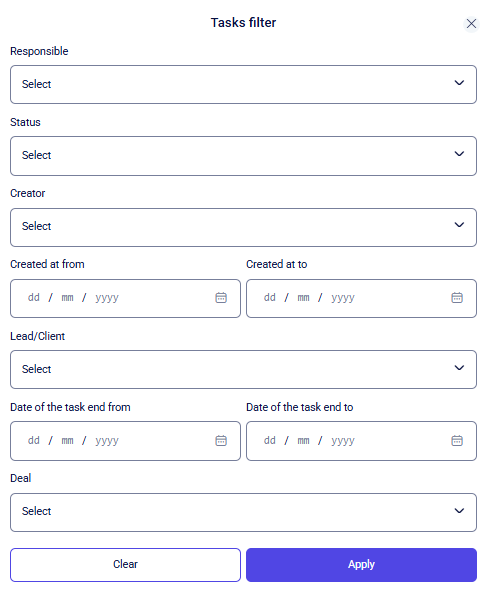
- Responsible
- Status
- Creator
- Created at from | Created at to
- Lead/Client
- Date of the task end from | Date of the task end to
- Deal
You can set the dates in the Created at from | to and Date of the task end from | to fields in two ways:
- Manually: enter the date via the keyboard in the day/month/year format (e.g., 15/06/2024).
- Via Calendar: click on the field and select the desired date from the calendar pop-up.
All other parameters for filtering task information can be configured using a dropdown list of values.
Once you have selected your desired filters, click Apply to update the list.
To clear all selections and return to the default view, click Clear. To exit the filter window without making changes, click the X in the top-right corner.
Viewing task information card
Click the View task card button or the task name to open the task editing page, which looks as follows:
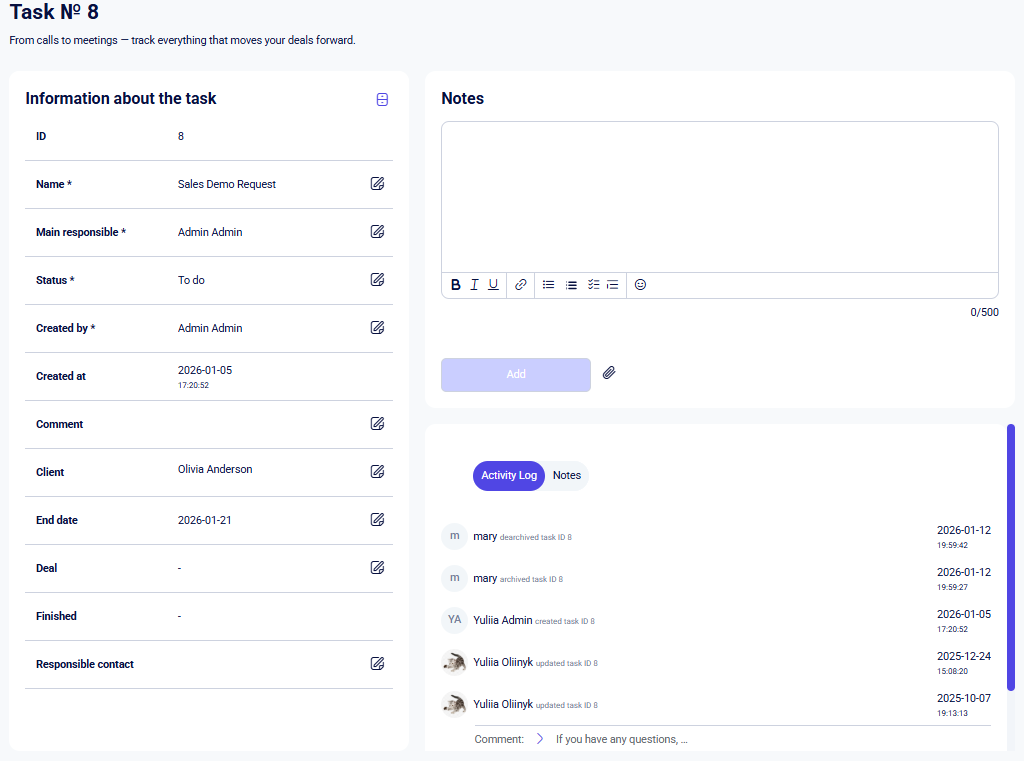
On the Task information card page, you can see the following sections:
- Information about the task
- Notes
- Activity log and notes block
To return to the previous task list page, click the Tasks section again:

Information about the task
In addition to the editable parameters, there is an Archive button at the top of this block. When clicked, the task becomes "archived" and will only be displayed on the archived tasks page. Clicking it again will unarchive the task and return it to active work.
The task parameters are presented below. These include default parameters as well as any additional parameters you have configured.
Parameters are configured in the section Settings → Task.
The following are considered default system parameters:
- ID
- Name *
- Main responsible *
- Status *
- Created by *
- Created at
- Comment
- Leads / Client
- End date
- Deal
- Finished
- Responsible contact
You can modify any system or custom parameters except for ID, Created at, and Finished fields.
The ID and Created at fields are automatically set when a task is created and cannot be edited.
Similarly, the Finished value is automatically set once the task is completed.
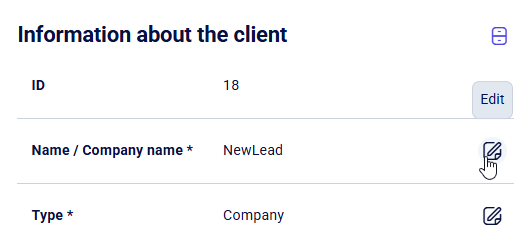
To update a parameter, click the Edit icon to the right of the selected field. For example:
Next, click on the desired field and make your changes.
Once editing is complete, scroll to the bottom of the section and click Save to apply the updates or Cancel to discard them.
Notes
The note creation field allows for text input of up to 500 characters.
To format your note, you can use the tools provided on the bottom toolbar:
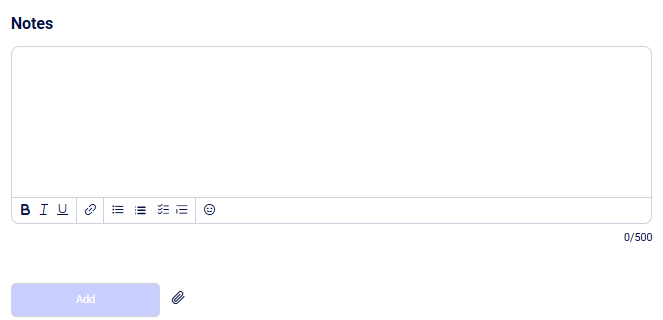
List of tools from left to right:
- Bold text
- Italic text
- Underlined text
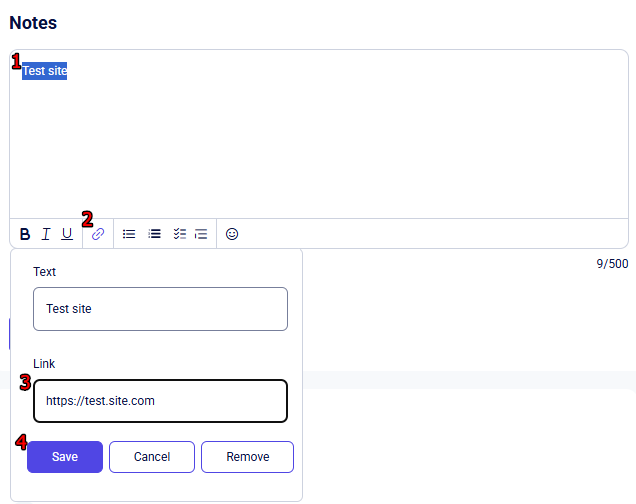
- Insert a link
To do this, enter your text, highlight it with your cursor by holding down the left mouse button, and click the Link button.
A pop-up window will appear where you should enter the URL in the format "https://test.site.com".
Then click:
- Save if you have entered the correct link
- Cancel or Delete if you change your mind
-
Format text as a List view
-
Format text as an Ordered List
-
Format text as a Task List
-
Format text as a Blockquote
-
Add an Emoji
Additionally, you can attach a file to your note. To do this, click the "paperclip" icon to the right of the "Add" button. In the window that opens, select the required document from your device.

After creating your note, click Add to save it.
Activity Log and Notes
This block contains two tabs that allow you to view:
-
Activity Log. You can track changes made to the task by managers. For example: changing the assignee or manually filling in a parameter.
-
Added Notes. All notes attached to the task.
Deals
This document explains how to work with deals in the Teliqon CRM system, including the list and board views, filters, import and export, and the personal deal card. It also covers related blocks such as delivery, tasks, and products or services. The guide describes the available controls, fields, and actions used to manage deal data inside the CRM.
Calls
This guide explains how to view, filter, and manage call records in the Teliqon CRM system. It describes the Calls page interface, including the toolbar, quick filters, call playback, and bulk actions. The document also explains how to create leads or deals directly from call records.
