Delivery
This document describes the Delivery section in Teliqon CRM and explains how shipment records are viewed and managed. It covers TTN handling, search, filtering, bulk actions, and the delivery parameters shown in the main table.
General information
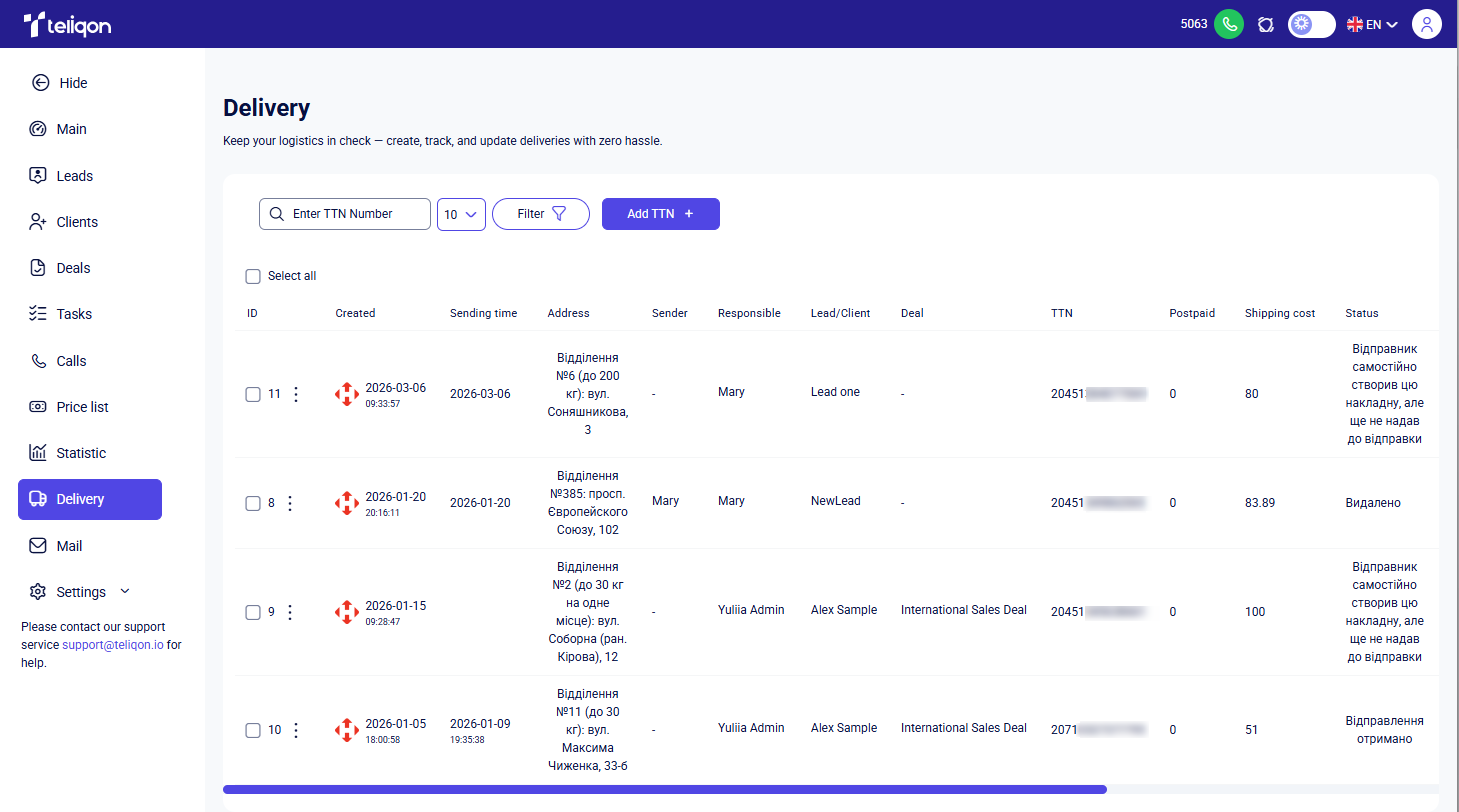
This section displays all deliveries for your project created in Teliqon CRM.
If Nova Poshta integration is active, you can quickly generate TTN for your shipment by clicking the appropriate button.
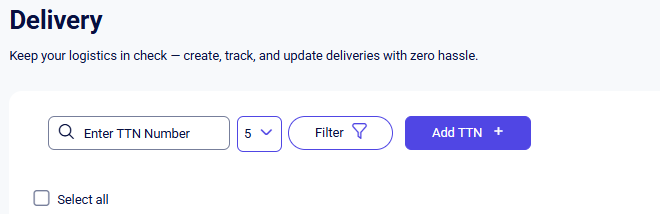
Delivery toolbar
The Delivery page toolbar enables you to manage your shipment records quickly and efficiently. The following options are available:
-
Search bar;
-
Items per page;
-
Filter;
-
Add TTN +.
If Nova Poshta integration is not enabled for your project, clicking the first button (Add TTN) will open a pop-up window prompting you to set up the integration first.
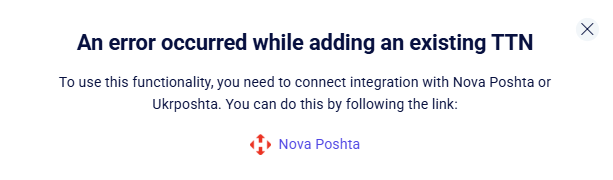
These features will be enabled immediately after the integration is configured. For instructions on how to set up the Nova Poshta integration, please refer to this section:
Toolbar Overview
Add TTN +
In this section, you can add an existing TTN created either in the Nova Poshta personal account or through the Teliqon portal.
After clicking the Add TTN + button, a pop-up window will open where you can add an already existing Nova Poshta TTN:
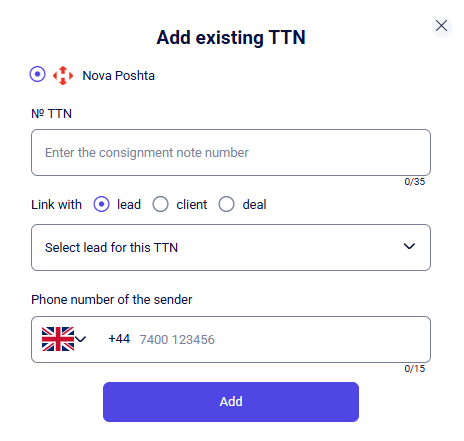
To do this, fill in the following fields:
-
Select the courier service (currently, only Nova Poshta is available);
-
№ TTN.
This field is for an existing consignment note number; -
Select the entity type to link TTN to: lead, client, or deal;
-
Choose the specific entity from the dropdown list;
-
Enter the sender's phone number.
Once all required fields are completed, click Add. The TTN will then be displayed in the general list of the Delivery section.
To cancel the process, click the X icon in the top-right corner of the pop-up window.
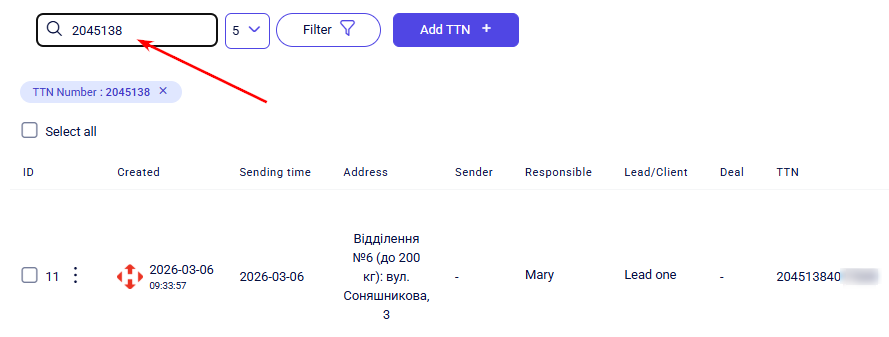
Search
To find a specific shipment, navigate to the Delivery section and enter the TTN number into the Search field. The interface supports partial matching and will automatically trigger the search as you begin typing.
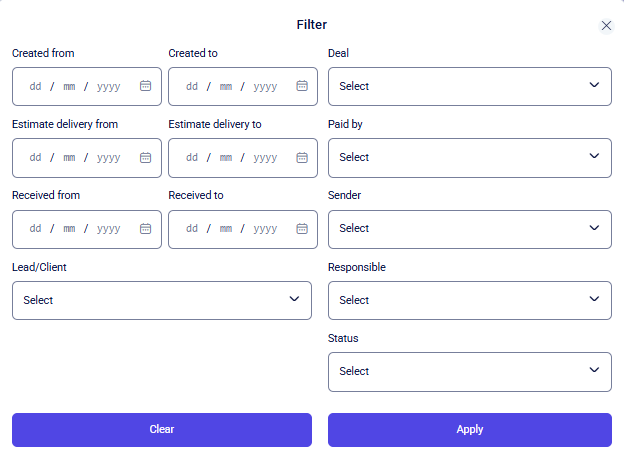
Filter
Clicking the Filter button opens a pop-up menu with the following filtration parameters:
-
Created from - Created to;
-
Estimate delivery from - Estimate delivery to;
-
Received from - Received to;
-
Lead/Client;
-
Deal;
-
Paid by;
-
Sender;
-
Responsible;
-
Status.
Dates in the ‘Created from/to’, ‘Estimate delivery from/to’, and ‘Received from/to’ fields can be set in two ways:
-
Manually: enter the date using the keyboard in the day/month/year format (e.g., 15/06/2024).
-
Via calendar: click the field and select the desired date from the calendar pop-up.
All other parameters for filtering delivery information can be configured using dropdown lists.
Once the desired filtering parameters are selected, click Apply to implement the changes.
To return the field values to their default state, click Clear.
To close the filtering window, click the X icon in the top-right corner.
Select all checkbox
The toolbar features Select all checkbox that enables you to select every scheduled delivery for a specific client to perform the following bulk actions:
-
Print selected delivery registry.
This action generates a delivery list for the courier's convenience. Clicking this button downloads a .pdf file to your computer containing the following delivery details: ID, Tracking Number (TTN), Shipment Information, Delivery Cost, Recipient Details, Additional Information, and Payment Method. -
Print selected invoices.
This action generates a list of deliveries for convenient use by the courier. Printing is available in the following three formats:
-
Labeling;
-
Zebra type making;
-
Making 100×100 type Zebra.
-
-
Remove TTN;
-
Cancel selection.
To cancel the bulk selection of tracking numbers, click the Select all checkbox again or click the X on the bulk actions toolbar.

Column descriptions and characteristics
This section provides detailed information regarding your shipments. For a detailed overview, the main table displays more than ten key delivery parameters.

Specifically:
-
ID - the unique identifier of the delivery within the Teliqon CRM system;
-
Created - the date the delivery was created;
-
Sending time - the time the parcel was sent;
-
Address – the address of the Nova Poshta branch where the parcel was registered or received;
-
Sender – a clickable field. Clicking it opens detailed information about the responsible employee;
-
Responsible – a clickable field. Clicking the name of the responsible person opens their personal profile;
-
Lead/Client – a clickable field. Clicking the lead or client name opens their respective profile in the relevant section;
-
Deal;
-
TTN;
-
Postpaid;
-
Shipping cost;
-
Status;
-
Deal stage;
-
Date of receiving;
-
Paid storage;
-
Estimated delivery date.
Statistic
Statistic documentation. This file was converted from DOCX to MDX with extracted screenshots. Review headings, lists, links, images, and formatting against the source document before publishing. The page describes dashboards, filters, calendar controls, and performance analytics available in the CRM.
This document describes the Mail section in Teliqon CRM and explains how to connect and configure email integration. It also covers working with incoming messages, reply and forward actions, and the available mail management tools.
