Leads
This document describes the Leads section in Teliqon CRM and explains how leads are viewed, created, filtered, imported, exported, and managed. It also covers the lead card, delivery block, additional contacts, and tasks related to a lead.
General Information
This section contains information about the leads in your project within Teliqon CRM.
On this page, you can:
-
View leads in your preferred format - as a list or a board.
-
Search for leads by full or partial character matches across any fields using the search bar.
-
Manage leads with one click - view, archive, or convert them into Clients.
-
Create, edit, import, and export lead data, as well as filter by any field.
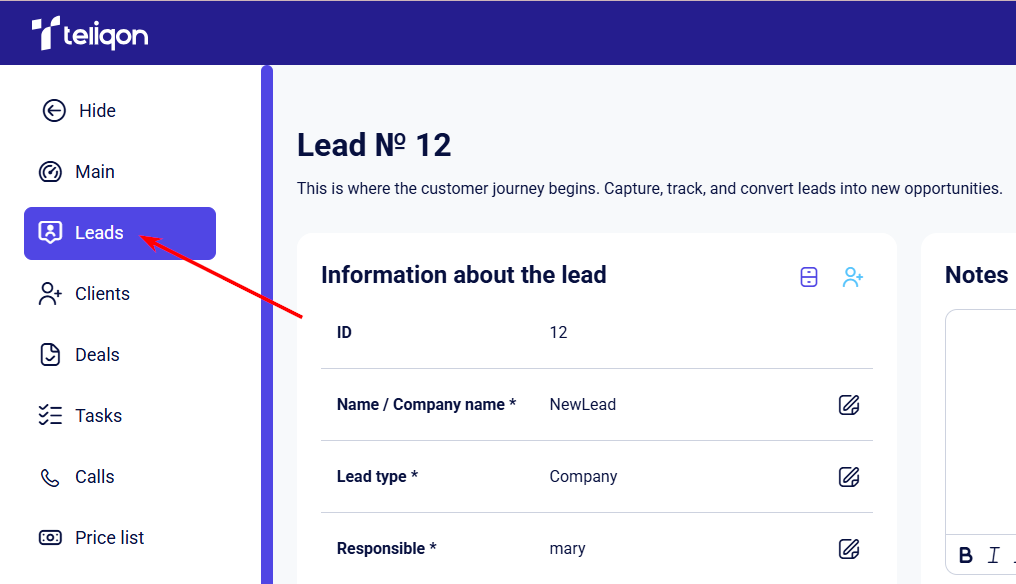
To access this page and view lead information, navigate to the Leads section in the left-side menu.
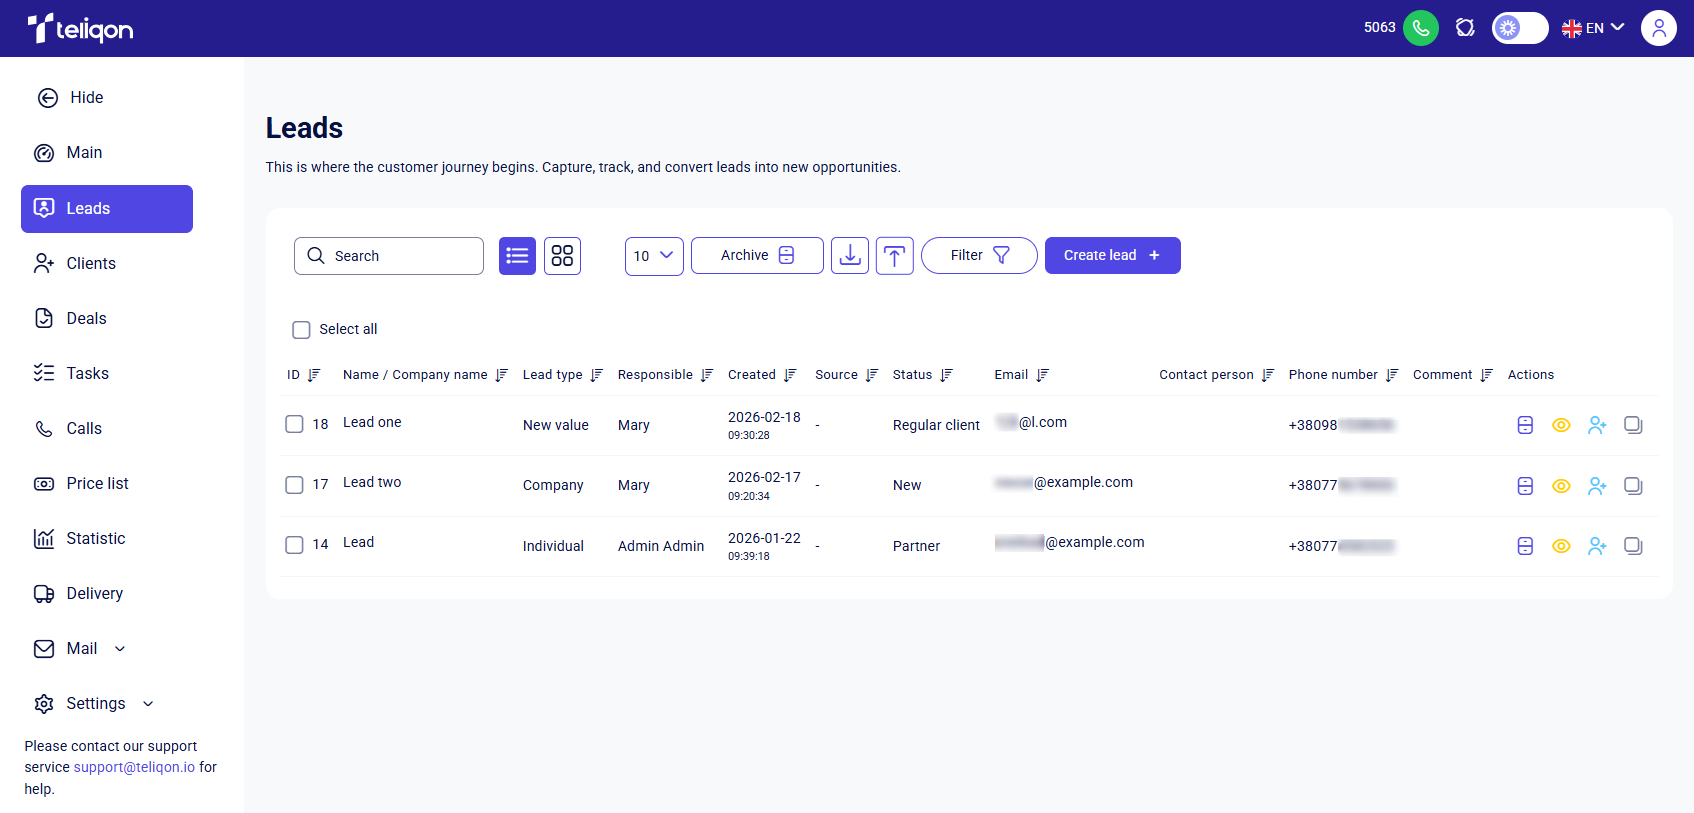
How to Work with the Leads Page
Toolbar for managing leads
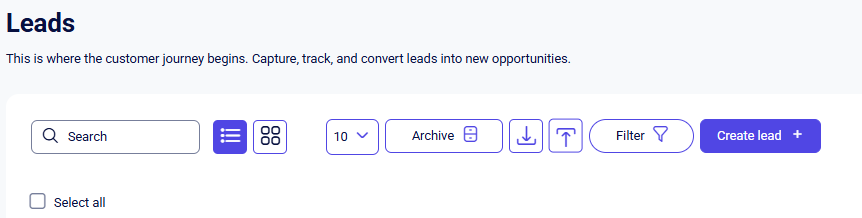
Using the toolbar on the Leads page, you can quickly and conveniently perform various actions with your leads.
The toolbar includes the following options:
-
Search bar - provides a convenient way to find leads by entering full or partial matches across any field. Simply click the field and start typing
- the search begins automatically as soon as you enter the first characters.
-
Toggle lead view mode - switch between the List view and Board view display formats by clicking the corresponding icon.
The icons represent the following modes:
a. List View;
b. Board View.
-
The button to limit the number of records displayed on the page.
It has the following options:
a. 5;
b. 10;
c. 25;
d. 50;
e. 100.
-
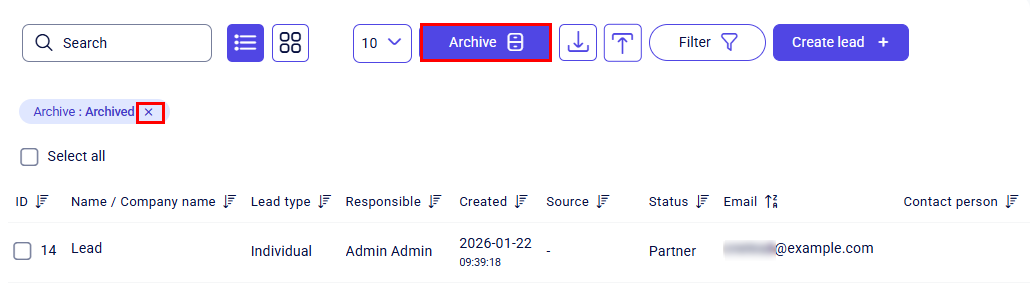
Archive button - lets you switch between active and archived leads in your project. The first click navigates to archived leads. To return to active leads, click the button again or press the X next to the automatically created filter:
To restore a lead from the archive to the active list, select it using the checkbox and click Unarchive on the bulk actions toolbar:
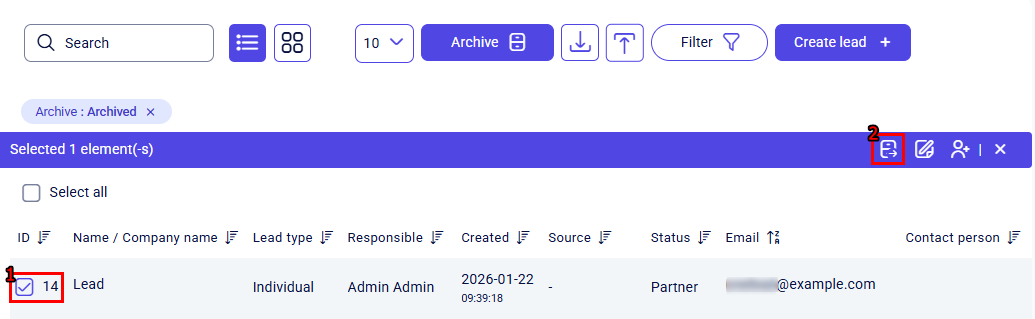
Or use the separate button next to the item in the Actions column.

-
Import leads button - allows you to import leads into the system. For more details, see below.
-
Export leads button - allows you to export lead data from the system. For more details, see below.
-
Filter button - enables you to filter leads using a combination of filters across various fields. For more details, see below .
-
Create lead button - allows you to add a new lead to the system. Detailed description available here .
-
Select all button - this allows you to select every lead on the current page with a single click. The first click will mark all empty checkboxes on the page. Clicking the button again will deselect all checkboxes.
Client list and Board Management
You can choose between two display modes for your leads - List View or Board View. Each of these formats has its own advantages.
List view
The list view is more convenient for quick data sorting, as it allows you to use inline filters located next to the column titles.
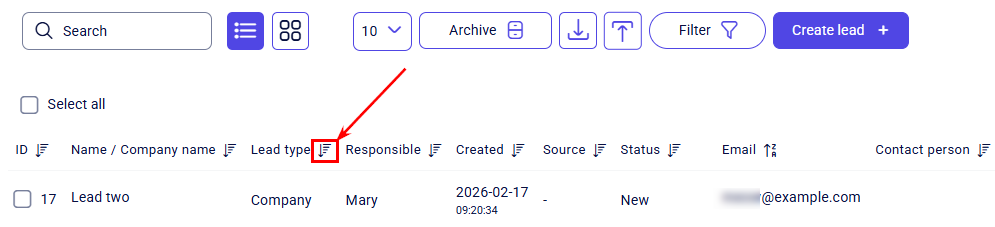
Only one quick filter can be active at a time. Each quick filter has three states, which you can switch between by clicking on it:
-
No sorting
-
Sort descending
-
Sort ascending.
Clicking on a different quick filter will reset the previously selected one back to its default state (no sorting).
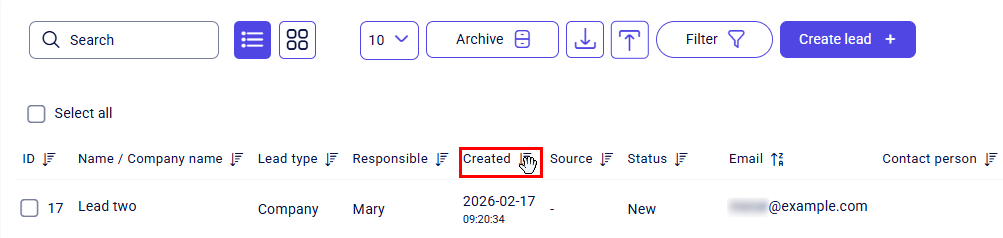
Additionally, the system supports free column movement in almost every section or block. Simply click and hold the desired column with your left mouse button and move it into your preferred sequence. This allows you to instantly adapt the interface layout to suit your tasks.
To the left of each record, there is an empty checkbox. Clicking the checkbox allows you to select or deselect a lead.
Once you select at least one lead, an additional toolbar will appear. This toolbar displays the number of selected items and provides available actions that can be performed with them:
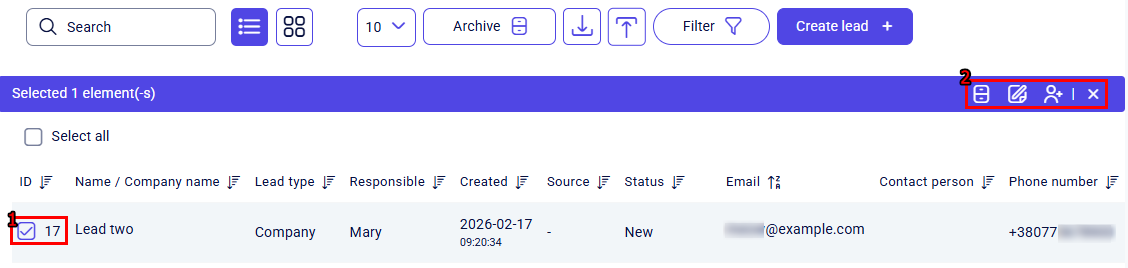
List of elements on the additional toolbar (from left to right):
-
Archive all selected items. This button allows you to bulk move selected leads to the Archived state. The leads will not be deleted from Teliqon CRM - they will simply be transferred to the Archived Leads page. You can learn how to access the archived leads page in this section .
-
Edit selected items. This button enables you to bulk edit all selected leads. After clicking this button, a popup window will appear with the available bulk actions:
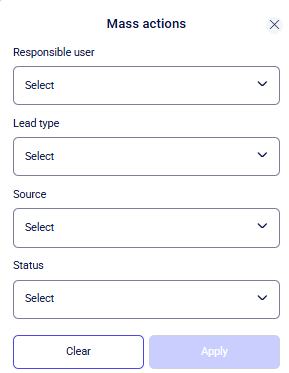
a. Bulk assignment of the 'Responsible user' manager to selected leads.
b. Bulk assignment of the 'Lead type' to selected leads.
c. Bulk assignment of the 'Source' to selected leads.
d. Bulk assignment of the 'Status' to selected leads..
Only default fields can be modified in this way.
The available values for these fields are limited to the options provided in the dropdown lists.
Clear button: cancels bulk actions, closes the popup window, and clears previously selected settings.
Apply button: saves the selected settings and applies them to the previously selected leads.
Close (X) button: closes the bulk actions popup.
-
Convert selected leads into clients. Clicking this button transfers selected leads to the Clients tab. The system performs a mandatory check for unique fields prior to conversion. In case of potential data loss, a warning message will be displayed, providing options to either proceed or cancel to prevent information loss
-
Cancel selection. Clicking the X button will clear all selections and reset all checkboxes to their default (unchecked) state.
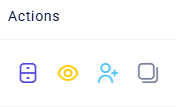
To the right of each lead, there are four action buttons:
-
Archive lead. This button allows you to move a lead from Active to Archived with a single click. You can view archived leads in your project using the Archived leads button .
-
View lead card. Opens the lead’s personal profile card. Instructions on how to work with a lead’s profile card are provided here .
-
Convert Lead to Client. Clicking this button moves the lead to the Clients section. If the lead contains unique fields that may be lost during the conversion, the system will issue a warning. You can either confirm the conversion or cancel it.
-
Copy lead card link. Copies a direct link to the selected lead.
Board view
When the Board view mode is enabled, leads are displayed as cards, visually grouped by their status. This mode provides a convenient way to move leads between statuses using drag-and-drop.
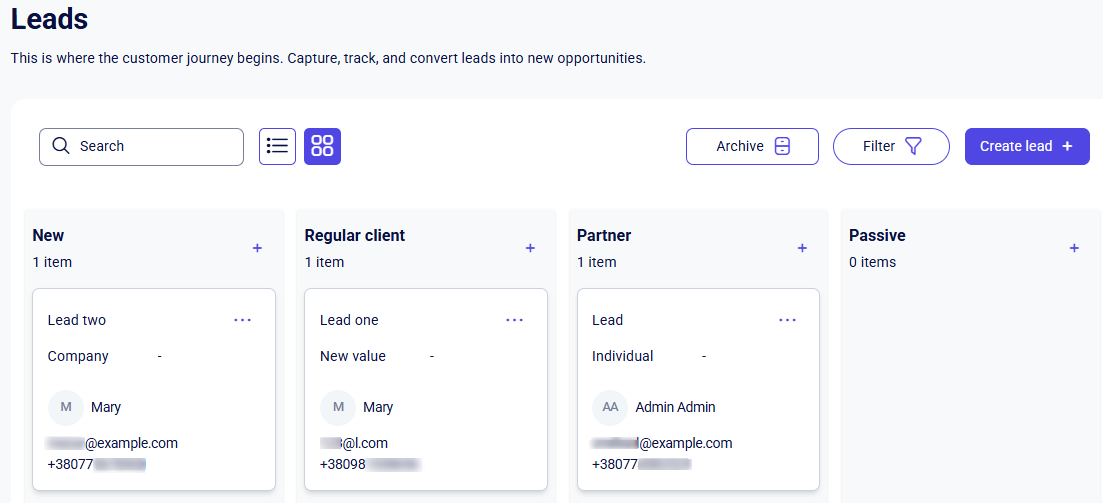
To change the lead’s status, press and hold the card with the left mouse button and drag it to the desired column. Once a blank space appears in the new status, release the mouse button.
Unlike the Lead list, the Lead board doesn’t include buttons for exporting, importing, limiting the number of records per page, or bulk selecting leads.
On the Lead board, you can create a new lead using any of the three lead creation buttons:
-
On the toolbar, as described in this section;
-
At the top of a status column, using the '+' button;
-
At the bottom of a status column.
The first button creates a lead without an assigned status, requiring manual selection. In contrast, using the second or third options within a specific column automatically preselect the status in the Create a lead popup. This status can still be modified later within the lead's profile.
To edit a lead on the Board, click anywhere on the lead card, except the '...' menu. Detailed instructions on working with the lead’s profile card are provided here.
By clicking on the '...' menu on a lead card, you can select one of three options:
-
Copy lead link. Copies a direct link to the selected lead.
-
Convert to client. Clicking this button moves the lead to the Clients section. If the lead contains unique fields that may be lost during the conversion, the system will issue a warning. You can either confirm the conversion or cancel it.
-
Archive lead. This button allows you to move a lead from Active to Archived with a single click. You can view archived leads in your project using the Archived leads button.
Leads filters
On the Lead toolbar, there is a Filter button. This feature allows you to quickly and conveniently filter leads based on specific criteria.
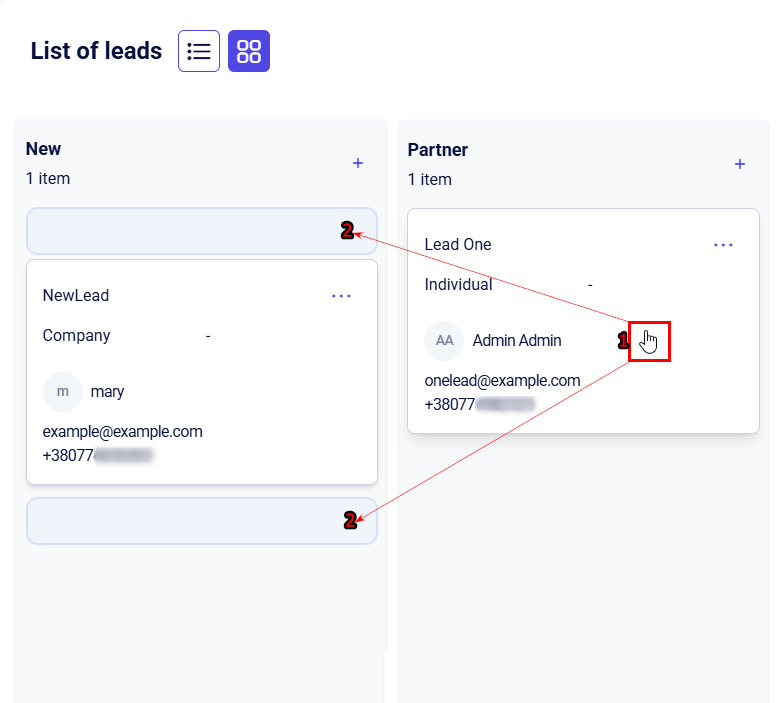
After clicking the Filter button, a popup window will appear with the available filtering options. By default, you can filter leads by the following parameters:
-
Lead type;
-
Responsible user;
-
Created from -> Created to;
-
Source;
-
Status.
To filter by Lead type, Responsible user, Source, or Status, click on the corresponding input field and select an option from the dropdown list.
You can set dates in the Created from/to fields using two methods:
-
Manually: enter the date using your keyboard in the day/month/year format (e.g., 15/06/2024).
-
Via Calendar: click the input field to open the calendar, then select a date by hovering over the desired day and clicking.
Please note that the Created to date cannot be earlier than the Created from date.
After selecting the filter parameters, click Apply to apply the filter. To reset the selected filter parameters, click Clear. To close the popup window without applying any changes, click the X button.
Create a new lead
When you click the Create lead + button, a popup window will appear where you need to fill in the fields for the new lead. Required fields are marked with an asterisk (*).
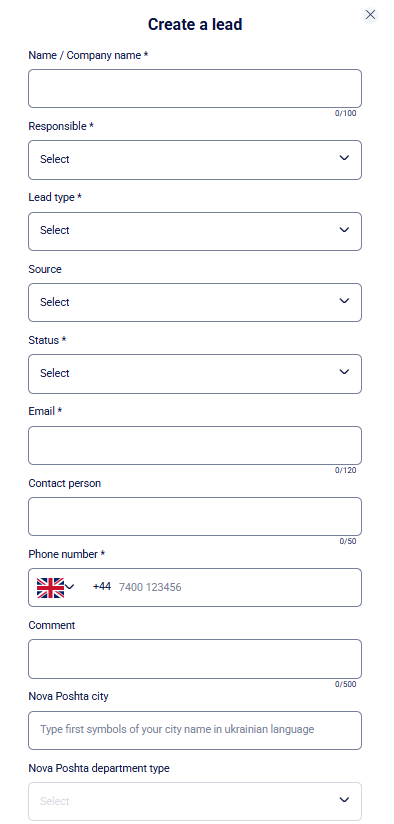
Required fields for Leads:
-
Name / Company name*;
-
Responsible*;
-
Lead type*;
-
Status*;
-
Email*;
-
Phone Number*.
Optional fields for Leads:
-
Source;
-
Contact person;
-
Comment;
-
Nova Poshta city;
-
Nova Poshta department type;
-
Nova Poshta department.
Fields can be configured in Settings → Leads. Based on their input method, fields are divided into two types:
-
Dropdown fields – select values from a predefined list.
-
Text input fields – enter information manually using the keyboard.
After filling in the lead fields with the required information, click the Create button located at the bottom of the lead creation form. If you decide not to create a lead, click the X button at the top of the form.
Once the lead is created, it will appear in the List view or on the Board view.
Lead import
To import leads, click the Import data button located to the left of the Export data button. A popup window will appear for importing leads:
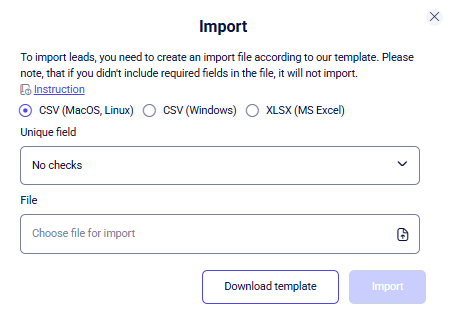
In the import popup, you can upload a lead file based on the provided template using the File field (represented by a file icon with an arrow in the 'Choose file to import' field). Clicking this field will open a file browser, where you must select the specific file containing the leads you wish to upload.
You can also follow the upload instructions by clicking the Instruction link.
Two file formats are supported: CSV and XLSX. Depending on your operating system, select the appropriate option by ticking one of the three available checkboxes:
-
CSV (MacOS, Linux)
-
CSV (Windows)
-
XLSX (MS Excel)
You can choose one of the following four unique fields:
-
No checks;
-
Id;
-
Name / Company name;
-
Contact person.
To create the required import file, click Download Template, fill it in with your lead data, and then select it using the Choose file to import field.
Important: The template includes the 'ID' parameter, which must be filled in manually before import. You can find the last used lead ID on the Leads page by sorting the list by 'ID' using the quick filter. Once identified, add 1 to the last lead ID - subsequent lead should be numbered with an increment of +1. If an entered ID already exists in the system, all other records will be imported except the conflicting one.
Once all import settings are configured, click Import. The leads will be uploaded to the system and will appear in the list view or board view.
If you decide not to import the file, click the X in the upper-right corner of the pop-up window to return to the clients list or board view.
Lead export
To export leads, click the Export data button on the toolbar. A popup window will then appear to configure the export settings:
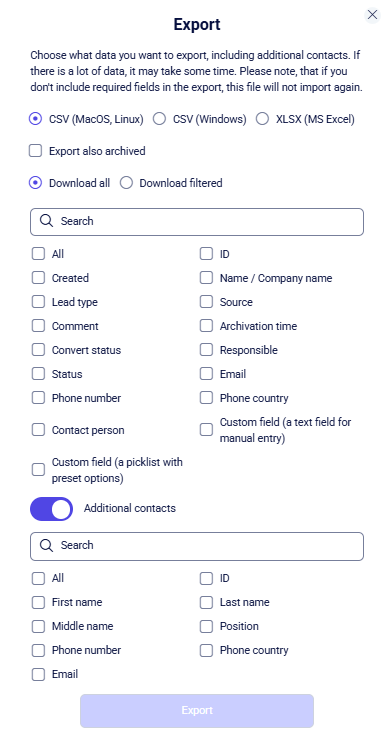
In the export pop-up window, you can configure the following export settings:
-
Select one of the available file formats: CSV or XLSX. Depending on your operating system, choose one of the following checkboxes:
a. CSV (MacOS, Linux);
b. CSV (Windows);
c. XLSX (MS Excel).
-
Select this option to include archived entities in your export file;
-
Choose whether to export all leads or only previously filtered leads;
-
Select the list of lead fields that will be included in the exported .csv or .xlsx file;
-
Enable or disable the export of Additional Contacts;
-
Select the list of fields for additional contacts that will be included in the file.
For convenience, use the search bar to quickly find fields by full or partial text match.
After clicking the Export button, a file containing the list of leads with the selected parameters will be downloaded to your computer.
If you decide not to proceed with exporting leads, you can return to the lead list or board view by clicking the Close (X) button in the top-right corner of the pop-up window.
View an existing lead’s card
Each lead in the system has its own individual profile.
Click on the lead's name or the view button to open the editing page, which looks like this:
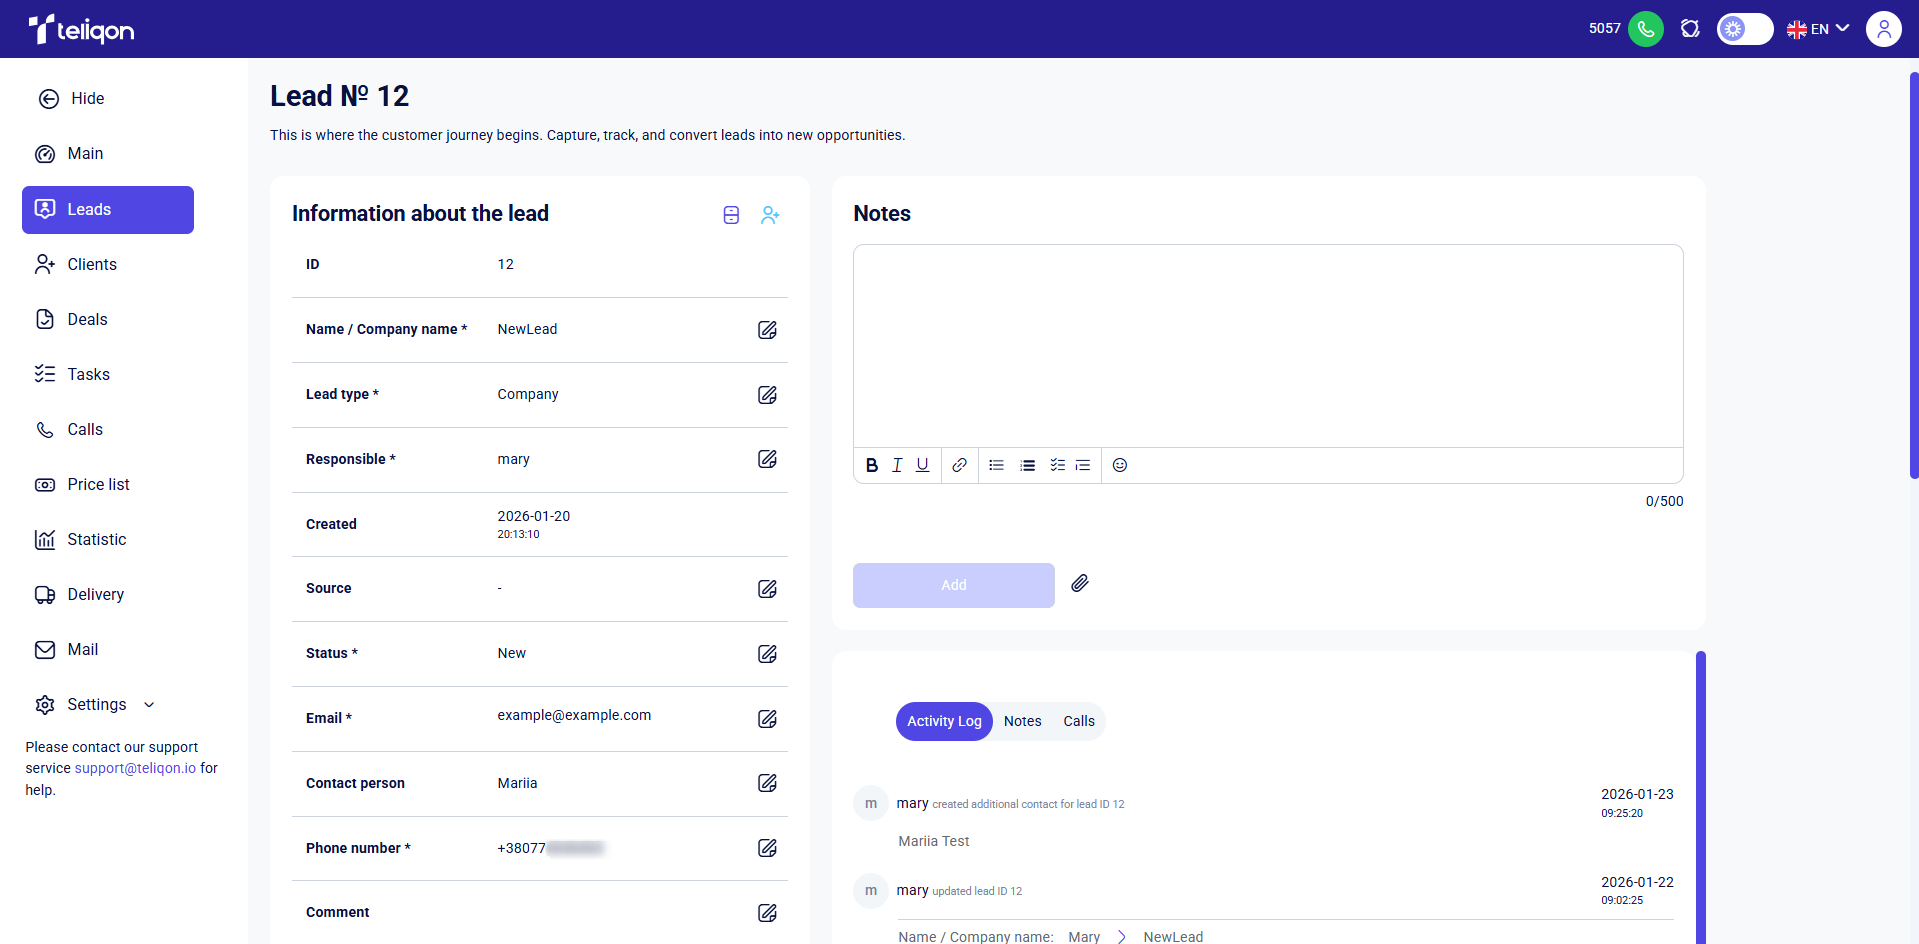
On the Lead profile page, you can see the following sections:
-
Information about the lead;
-
Notes;
-
Block with Activity Log, Notes, Calls;
-
Delivery;
-
Additional contacts;
-
Tasks.
To close the card and return to the main leads overview, click the Leads tab again when in
List view:
In Board view, click the X in the top-right corner of the modal window to close it.
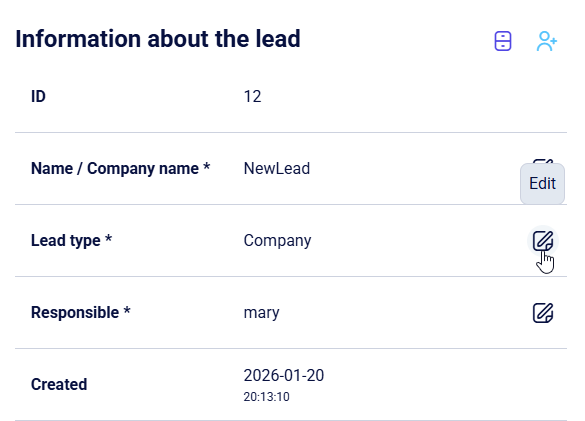
Information about the lead
In addition to the editable parameters, there are two buttons at the top of this block:

-
Archive lead. When you click this button, the lead will become 'archived' and will be displayed on the Archived leads page.
-
Convert Lead to Client. After clicking this button, the lead will be moved to the Clients tab. If the lead you are converting contains unique fields that might be lost during conversion, the system will notify you. You can confirm the conversion or cancel the action. After the conversion, you will be redirected back to the Leads page.
Below these buttons, you will find the lead’s parameters. They include both default parameters and custom parameters configured by you.
Parameters can be managed in the section Settings → Leads.
The following parameters are considered default system parameters:
-
ID;
-
Name / Company name *;
-
Lead type *;
-
Responsible *;
-
Created;
-
Source;
-
Status *;
-
Email *;
-
Contact person;
-
Phone number *;
-
Comment;
-
Nova Poshta city;
-
Nova Poshta department type;
-
Nova Poshta department.
You can modify any of the system or custom parameters, except for 'ID' and 'Created'. These two parameters are automatically assigned at the time a lead is created and cannot be edited.
To make changes to a parameter, click the Edit icon located to the right of the selected parameter. For example:
Next, click on the desired field and make your changes. Once editing is complete, scroll to the bottom of the section and click Save to apply the updates, or Cancel to discard them.
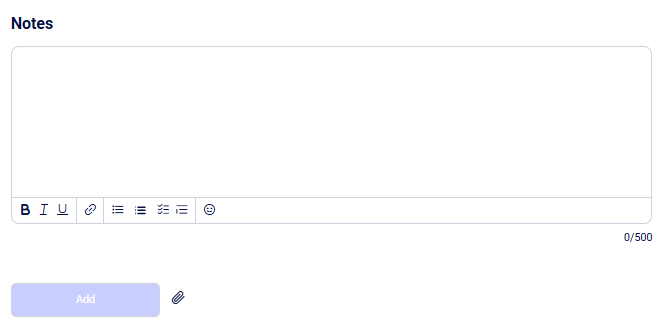
Notes
In the note creation field, you can enter text of up to 500 characters.
For convenient note formatting, you can use the tools available on the bottom toolbar:
List of tools (from left to right)
-
Bold text;
-
Italic text;
-
Underlined text;
-
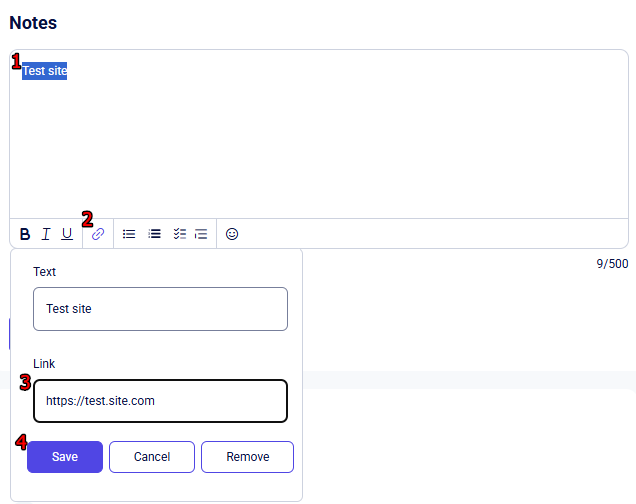
Insert a link;
To do this, enter your text, highlight it with your cursor by holding down the left mouse button, and click the Link button.
A pop-up window will appear where you should enter the URL in the format "https://test.site.com".
Then, click Save if you have entered the correct link, Cancel or Delete if you change your mind.
-
Format text as a List view;
-
Format text as an Ordered List;
-
Format text as a Task List;
-
Format text as a Blockquote;
-
Add an Emoji.
Additionally, you can attach a file to the note.
To do this, click the 'paperclip' icon located to the right of the 'Add' button. In the window that appears, select the required document from your device.

After creating a note, you need to click the Add button.
Block with Activity Log, Notes, Calls
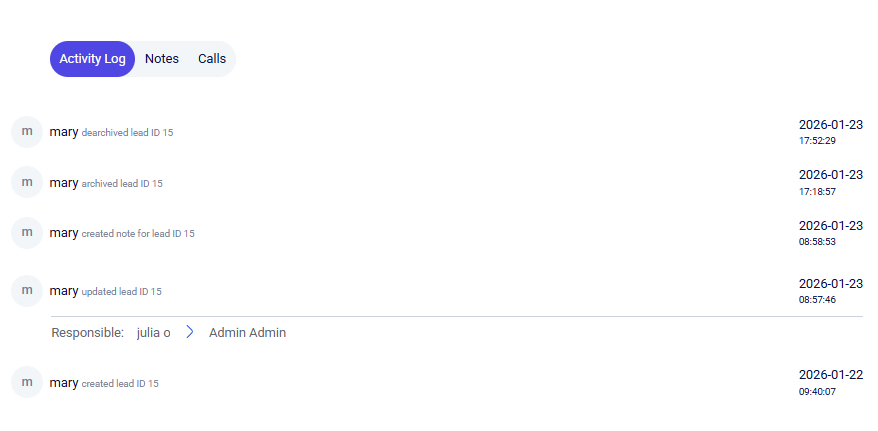
The 'Activity Log,' 'Notes,' and 'Calls' section contains three tabs that allow you to view the following information:
-
Activity Log.
This tab displays all changes made to the lead by managers. For example, reassignment of a responsible manager or manual updates to any field.
-
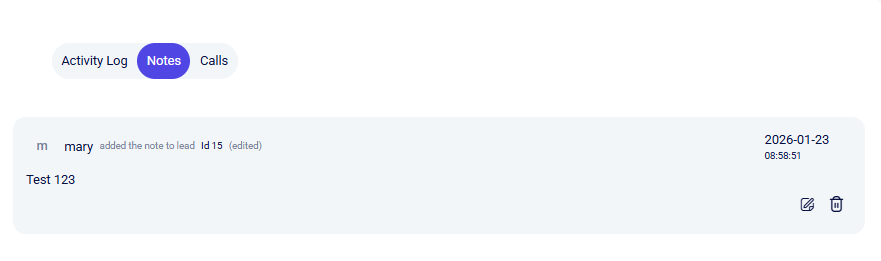
Notes.
Shows all notes added to the lead.
-
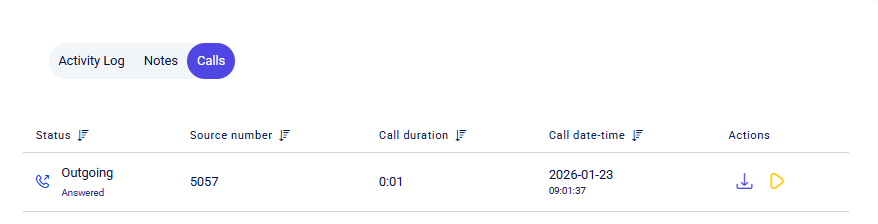
Calls.
Displays incoming, outgoing, and missed calls associated with this lead’s phone number.
Delivery
The Delivery block features a toolbar with the following functions:

-
Search field for finding records by TTN number;
-
Display limit button, which allows you to set the number of records shown per page;
-
Filter button;
-
Create a new TTN button;
-
Add TTN button.
If your project doesn't have an active integration with Nova Poshta, clicking on the first two buttons will open a pop-up window prompting you to configure the integration first.
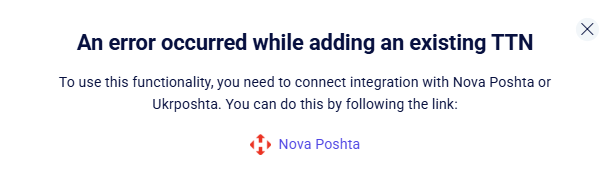
Once the integration is successfully configured, you will be able to use all the features of this section.
You can find detailed instructions on how to set up the Nova Poshta integration in the following documentation section.
Additionally, this block includes a Select all checkbox, which allows you to select all deliveries scheduled for the current client and perform the following bulk actions on them:
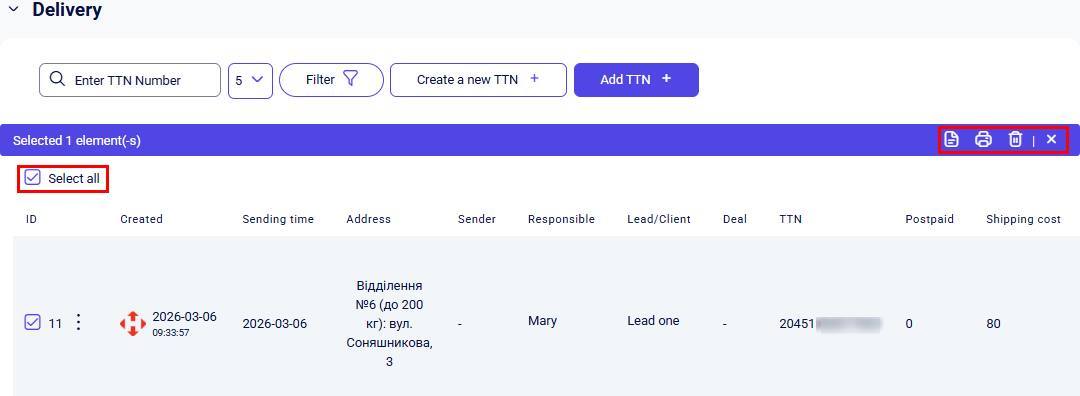
-
Print selected delivery registry.
This action generates a delivery list for the courier's convenience. Clicking this button downloads a .pdf file to your computer containing the following delivery details: ID, Tracking Number (TTN), Shipment Information, Delivery Cost, Recipient Details, Additional Information, and Payment Method.
-
Print selected invoices.
This action generates a list of deliveries for convenient use by the courier. Printing is available in the following three formats:
-
Labeling;
-
Zebra type making;
-
Making 100×100 type Zebra.
-
Delete TTN;
-
Deselect all.
To cancel the bulk selection of tracking numbers, click the Select all checkbox again or click the X on the bulk actions toolbar
Create a new TTN
Once you have configured the integration with Nova Poshta, you can start creating TTNs for a lead.
To do this, click the Create a new TTN + button in the Delivery block.
After clicking the button, you will be redirected to the New TTN Creation page, which appears as follows:
The Create New TTN page consists of the following sections:
-
Shipping Options;
-
The size of the shipment;
-
Sender data;
-
Recipient data.
Once all mandatory fields are completed, click the Save button at the bottom of the page to create the new TTN.
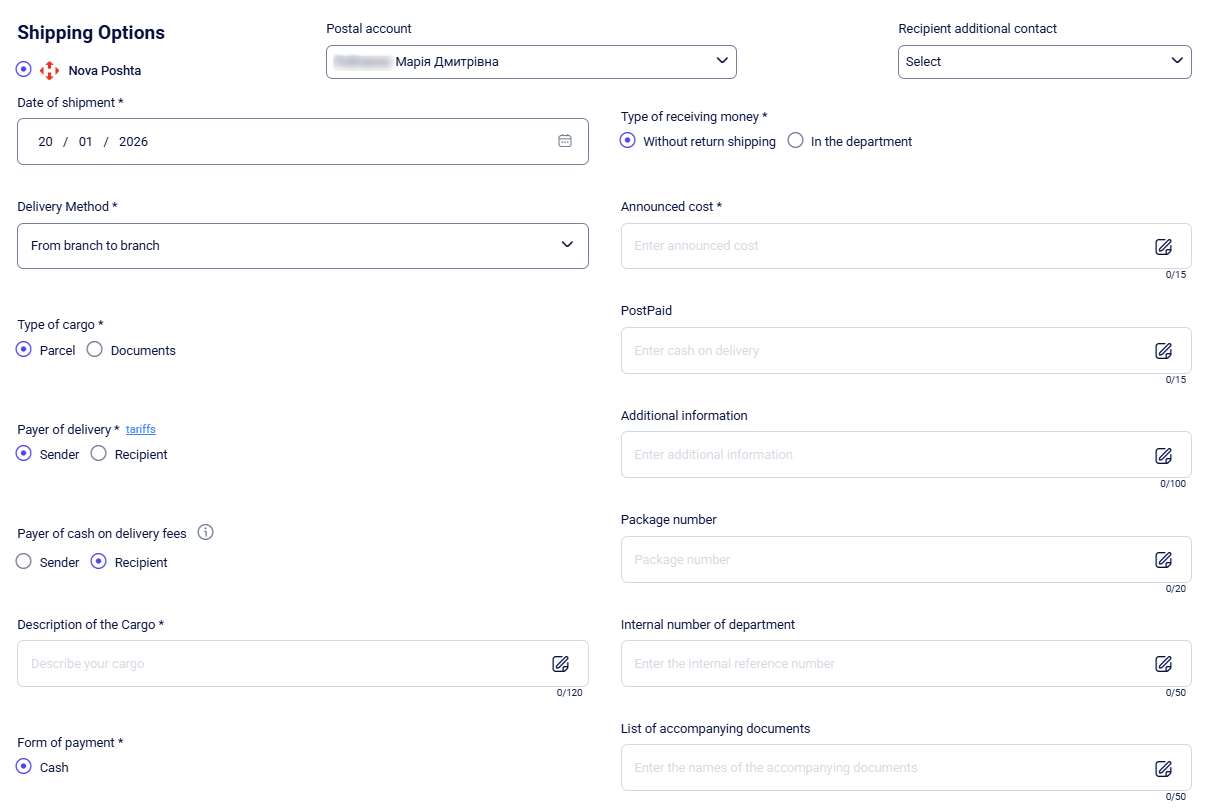
Shipping Options
In the Shipping options block, the following fields are available for completion:
-
Checkbox to select the desired postal service: Nova Poshta;
-
Postal account. If you have integrated multiple accounts, you can choose the one you need at any given moment here;
-
Recipient additional contact. This option is enabled only when multiple contact numbers are detected in the lead's card, providing a dropdown to select the primary recipient for this action;
-
Date of shipment * - must be filled in the day/month/year format, e.g., 15/06/2024, or you can select the desired date using the calendar icon located to the right of the field;
-
Delivery method *;
-
Type of cargo *;
-
Payer of delivery *;
-
Payer of cash on delivery fees *;
-
Description of the Cargo * ;
-
Form of payment *;
-
Type of receiving money *;
-
Announced cost *;
-
PostPaid;
-
Additional information;
-
Package number;
-
Internal shipment number;
-
List of accompanying documents.
The following fields must be filled in manually using the keyboard:
-
Description of the Cargo *;
-
Announced cost *;
-
PostPaid;
-
Additional information;
-
Package number;
-
Internal number of department;
-
List of accompanying documents.
To unlock a field for editing, click the Edit icon to the right of it.
For the following fields ‘Postal account’, ‘Recipient additional contact’ and ‘Delivery method' select one of the available options from the dropdown list.
Once you’ve chosen all the necessary parameters, you can proceed to configure the next block.
The size of the shipment
The size of the shipment block has two modes that can be switched using the General parameters checkbox.
When the General parameters checkbox is selected, you need to fill in the following three required fields:
-
Total weight (kg) *;
-
Number of seats *;
-
Total volume of shipment *.

The ‘Number of seats’ field indicates the actual number of individual cargo items ready for shipping.
If you uncheck the General parameters box, the following four required fields will become available for editing:
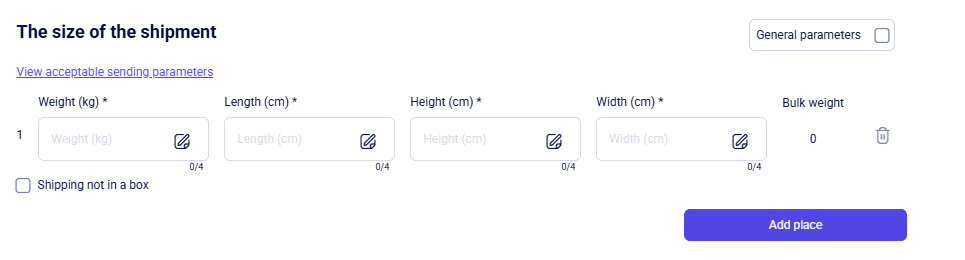
-
Weight (kg) *;
-
Length (cm) *;
-
Height (cm *;
-
Width (cm) *.
In addition, you can mark the Shipping not in a box checkbox for each added item individually.
If you need to add another item, click the Add place button. After clicking, a new row will appear in the list, where you can enter the details of the next object for shipment.
Depending on how many items you add, after saving The size of the shipment, the system will automatically suggest the appropriate Nova Poshta branch in the Sender data and Recipient data settings.
The ‘Bulk weight will’ be calculated automatically once you fill in the first four parameters.
You can delete any item by clicking the Delete icon located to the right of the row containing the shipment size information. After that, the entry will be removed from The size of the shipment block.
Sender data
In this block, the following parameters are available for you to fill in:
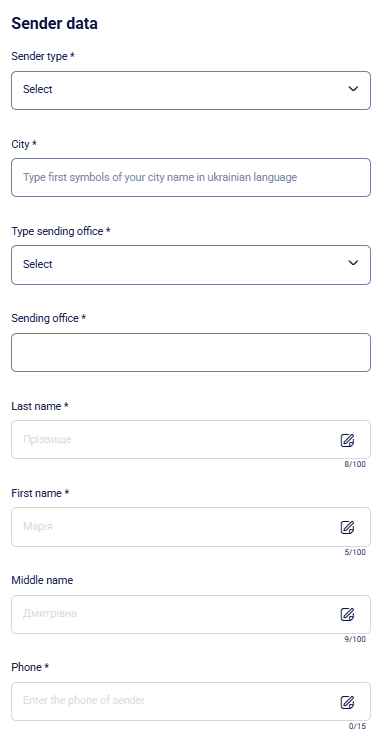
-
Sender type *;
-
City *;
-
Type sending office *;
-
Sending office *;
-
Last name *;
-
First name *;
-
Middle name;
-
Phone *.
To fill in the 'City' and 'Sender office' fields, start typing the data in Ukrainian. For example, if you type 'Одеса' in the 'City' field, a dropdown list will suggest options like 'Одеса' and 'Нова Одеса', which you can then select by clicking.
The 'Last Name', 'First Name', 'Middle Name', and 'Phone *' parameters can be filled in manually using your keyboard.
Please note: The 'Last Name', 'First Name', and 'Middle Name' fields are automatically populated using data from your selected Postal account,
After completing the Sender data block, it is important to fill out the Recipient data block.
Recipient Data
In this block, the following parameters are available for you to fill in:
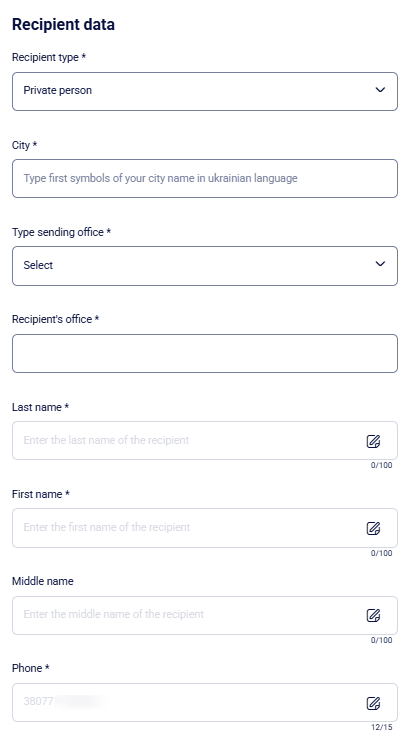
-
Recipient type *;
-
City *;
-
Type sending office *;
-
Recipient's office *;
-
Last name *;
-
First name *;
-
Middle name;
-
Phone *.
All parameters, except for ‘Middle name’, are mandatory when creating a new TTN.
To fill in the 'City' and 'Recipient's office' fields, start typing the data in Ukrainian. For example, if you type 'Одеса' in the 'City' field, a dropdown list will suggest options like 'Одеса' and 'Нова Одеса', which you can then select by clicking.
The 'Last Name', 'First Name', 'Middle Name', and 'Phone *' parameters can be filled in manually using your keyboard.
Note: The 'Phone' field is automatically populated with data from the selected lead's profile, but you can still edit it manually if needed.
All other parameters have to be selected from the dropdown list of available values.
To save your changes, click the Save button at the bottom of the page. If any mandatory fields in other sections remain empty, the changes will not be saved until all required fields are completed.
If you decide not to create a new TTN, click the Cancel button at the bottom of the page to discard all changes and return to the client’s personal card view.
Add TTN
After clicking the Add TTN button, a pop-up window will appear where you can add an existing TTN:
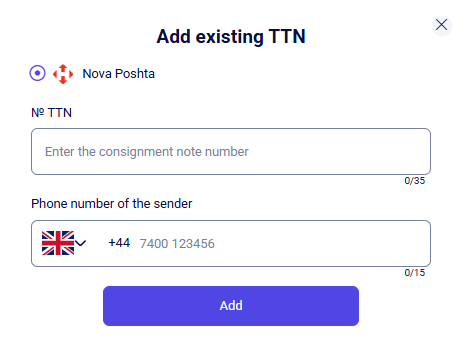
To do this, fill in the following fields:
-
Select the postal service to which the TTN belongs. (Currently, only Nova Poshta is available.);
-
№ TTN.
This field can be filled in if you already have a shipment created on Nova Poshta, for example. Once the TTN is added to the lead, the corresponding delivery details will automatically appear in the Delivery block of the lead’s personal card.
- Sender’s phone number.
After these three fields are filled out, click Add in the pop-up window to attach the existing TTN.
If you decide to cancel the process, click the X in the top-right corner of the pop-up window.
Filter
When you click the Filter button, a pop-up window will appear where you can configure filtering using the following default parameters:
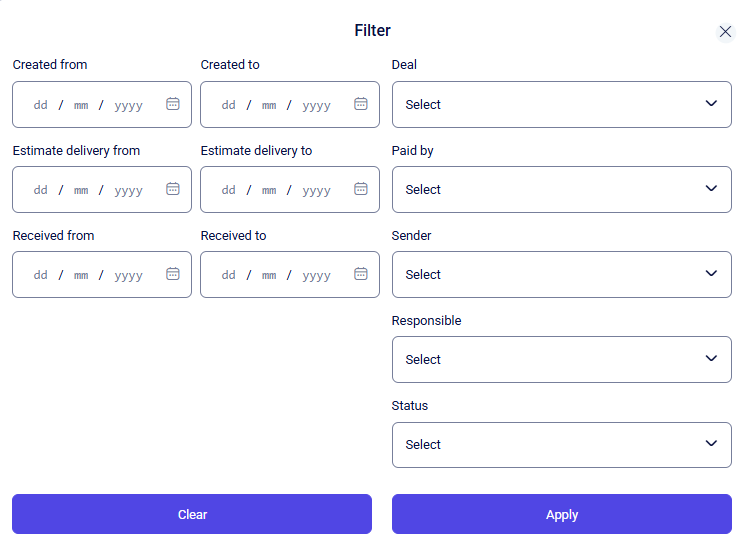
-
Created from – Created to;
-
Estimate delivery from – Estimate delivery to;
-
Received from – Received to;
-
Deal;
-
Paid by;
-
Sender;
-
Responsible;
-
Status.
The following parameters: ‘Created from/to’, ‘Estimate delivery from/to’, ‘Received from/to’ can be configured in two ways: manually or via the calendar. More detailed instructions on using the calendar are provided in the main Filter section.
All other parameters for filtering delivery information can be configured using a drop-down list.
Once you have selected the necessary filtering parameters and want to apply the changes, click the Apply button.
To reset the fields to their default values, click the Reset button.
To close the filter window, click the X in the top-right corner.
Additional Contacts
In this block, additional contact information is displayed as a list of entries. Each additional contact appears as a row in the list, with two available actions on the right side:

-
Edit Additional Contact
-
Delete Additional Contact.
By default, 5 contacts are displayed, but you can expand this list. To do this, click the dropdown menu and select the desired number of entries:
-
5;
-
10;
-
25;
-
50;
-
100
Your selection will be saved automatically.
To the right above the list is the Add button; clicking it will open the Create additional contact form. Required Fields:
-
First name*;
-
Last name*;
-
Phone number*.
The following fields are optional:
-
Middle name;
-
Position;
-
Email;
-
Nova Poshta city;
-
Nova Poshta department type;
-
Nova Poshta department.
After filling in the required fields, click the Create button at the bottom of the form.
If you decide not to create this additional contact, click the Close (X) button in the top-right corner of the form.
Once created, the additional contact will appear in the list and can later be used when creating tasks.
Task
This section displays information about tasks associated with the Lead itself or with the lead’s Additional Contacts.
The task information block is structured as follows:
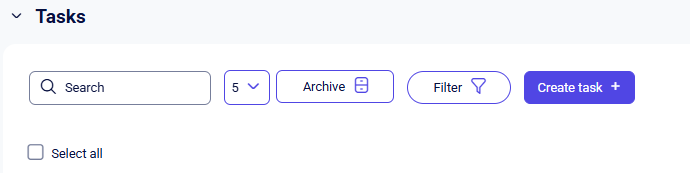
The toolbar contains the following buttons:
-
Search field: provides a flexible way to find tasks by matching any string of characters. By clicking the bar and typing, the system will instantly filter and display relevant tasks in real-time.
-
The button to limit the number of records displayed on the page.
It has the following options:
a. 5;
b. 10;
c. 25;
d. 50;
e. 100.
-
Archive button: enables switching between active and archived tasks for the lead. The first click on this button navigates to archived tasks. To return to active tasks, click the button again.
-
Filter button: enables filtering tasks based on a combination of filters across different fields.
-
Create task button: allows you to add a new task to the system.
-
Select all button: allows you to select all tasks on the page with a single click. The first click selects all checkboxes on the page. A second click deselects all checkboxes.
Create Task
Clicking this button opens the Create task popup window.
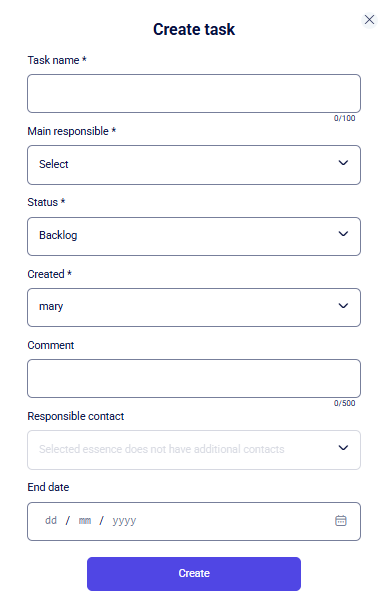
To create a task, the following mandatory fields must be completed:
-
Task name *;
-
Main responsible *;
-
Status *;
-
Created *.
The following fields are optional:
-
Comment;
-
Responsible contact;
-
End date.
Important: If you need to add an additional contact, you can select it in the Responsible contact field.
Additionally, the list of task creation fields can be extended with custom fields, which can be configured in the task settings.
Once the required fields are filled in, click the Create button at the bottom of the form.
After the task is created, it will appear in the task list.
If you decide not to create the task, click the X in the top-right corner of the form
Filter
When you click the Filter button, a pop-up window will appear where you can configure filtering using the following default parameters:

-
Responsible;
-
Status;
-
Creator;
-
Created at from – Created at to;
-
Date of the task end from – Date of the task end to;
-
Deal.
The parameters ‘Created at from/to’ and ‘Date of the task end from/to’ fields can be set in two ways:
-
Manually: enter the date using your keyboard in the day/month/year format (e.g., 15/06/2024).
-
Via the calendar: click on the field and select the desired date from the calendar window that appears.
The parameters ‘Responsible’, ‘Status’, ‘Creator’, and ‘Deal’ can be configured using a dropdown list of values.
To activate your selected filters, click the Apply button..
To reset all fields to their default values, click the Clear button.
To close the filter window, click the X in the top-right corner.
Task List
In the task list, there is an empty square (checkbox) next to each entry.
Click it to select a specific item, or click it again to deselect it. Once a checkbox is selected, an additional panel will appear, displaying the number of selected items and the available actions for them:
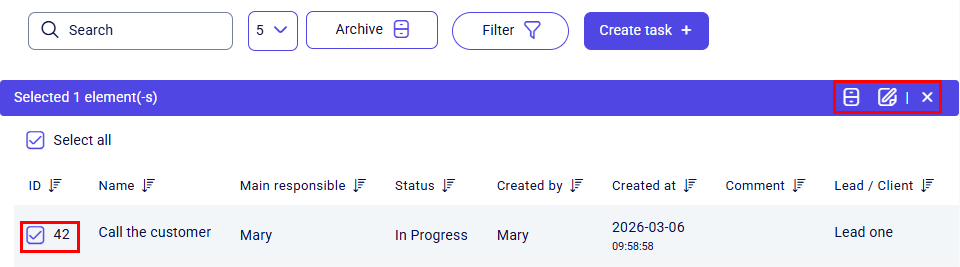
Additional panel actions (left to right):
-
Archive selected items: this button allows you to move all selected tasks to the archived state. Tasks will not be deleted from Teliqon CRM; they will simply appear on the Archived tasks page.
-
Edit selected items: this button enables bulk editing of all selected tasks. Clicking Edit selected items opens a popup with available bulk actions
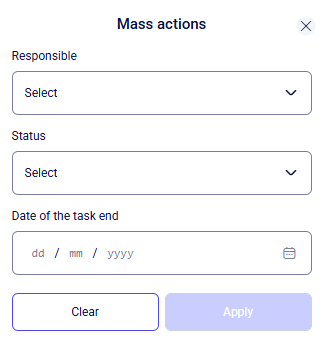
a. Bulk set of ‘Responsible’;
b. Bulk set of ‘Status’;
c. Bulk set of ‘Due of the task end’.
Only default fields can be modified in bulk.
The available values for these fields are limited to the options provided in dropdown lists.
The Due of the task end parameter can be set either by using the calendar - which opens upon clicking the field to let you pick a specific day, or by manually typing the date in the day/month/year format (e.g., 15/06/2024).
Clear: cancels bulk actions, closes the popup, and clears previously selected settings.
Apply: saves the selected settings and applies them to the previously selected tasks.
Close (X): closes the bulk actions popup.
To the right of each task, there are three available actions:
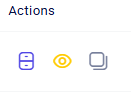
-
Archive task: moves the individual task to the archived state. Tasks remain in Teliqon CRM and appear on the Archived tasks page.
-
View task card: opens the personal task card.
-
Copy task card link: copies the link to the personal task card.
Personal Task Card
By selecting the Personal task card, you will be redirected to the specific record inside the Tasks module.
Main
This document describes the Main dashboard in Teliqon CRM and explains the statistical charts available on the page. It covers how to configure date ranges for all charts and how to work with Sales activity, Activity distribution, and Calls count widgets.
Clients
This document explains how to work with clients in the Teliqon CRM system, including page navigation, list and board views, client filters, import and export operations, and client card management. It also describes related sections such as notes, activity, deliveries, tasks, and deals associated with a client profile. The guide preserves the original structure and interface descriptions from the source document.
