Account
This guide explains how to use the personal Account section in Teliqon CRM. It covers profile details, password changes, personal notes, contacts, import options, and one-click calling.
General Information
In this block, you can:
- Manage personal data - update basic user information;
- Configure security - change the password for your account;
- Update avatar - upload or change your profile picture;
- Create notes - save important work information directly in your account;
- Add contacts - create a private contact list for quick communication;
- Log out - securely end your current session.
To open your personal account, click the profile icon in the user menu at the top right.

Clicking on the avatar opens a menu with available actions:
- View the interface of the current service and quickly switch between others if you have multiple services connected;
- Go to account settings;
- Manage and view the history of your notes;
- Add and configure contacts for quick communication;
- End session (log out).
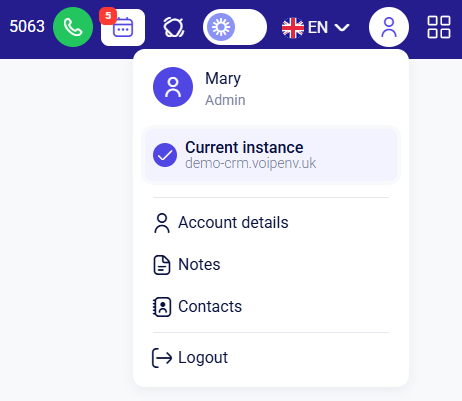
Personal Cabinet
Click Account details to configure your profile, which consists of two blocks:
- Profile Details;
- Password Settings.
The Profile Details section
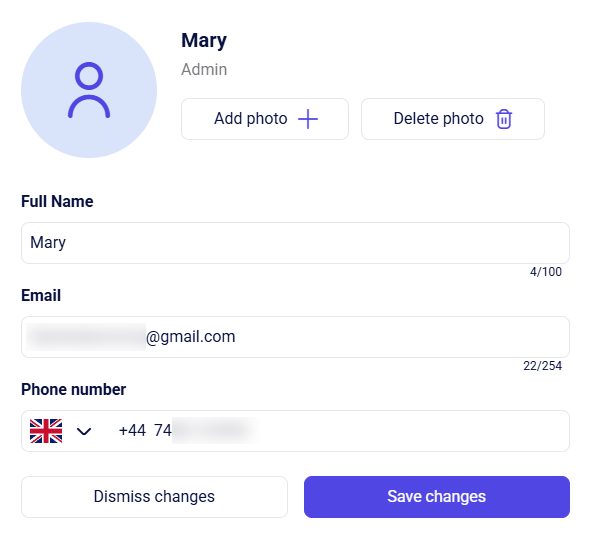
The following editable fields are located in this block:
- Full name;
- Your email;
- Your phone number.
Additionally, you have the option to select, change, or delete the profile avatar:

Click the Add photo button to open the file selection window for your operating system. Ubuntu example shown below:
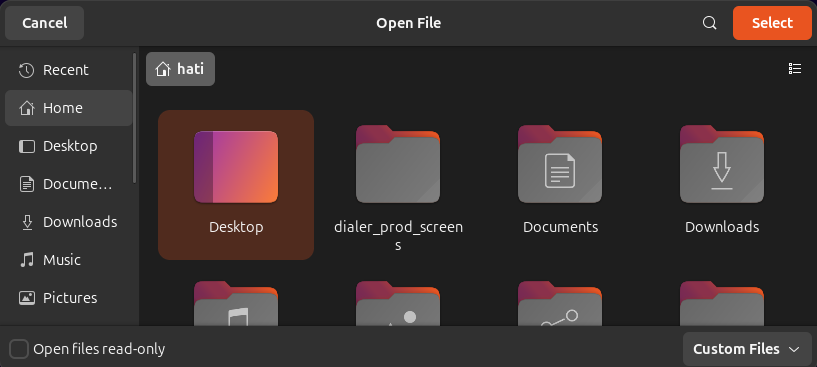
After selecting an image for your avatar, click Select (or the corresponding button based on your operating system's interface). The chosen image will be set as your profile icon in Teliqon CRM.
Once you have made changes to your profile, you can either save or cancel them using the following buttons:

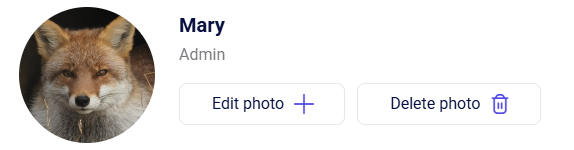
After your photo is uploaded to the Teliqon portal, use the control buttons to modify or remove your profile avatar:
The Password Settings section
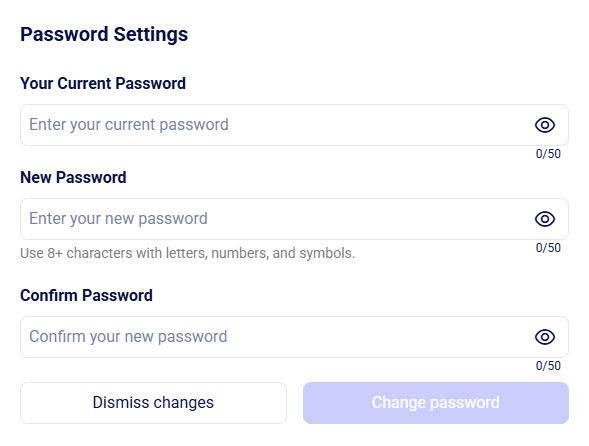
This block contains three fields required to change your current password in Teliqon CRM:
- Your Current Password;
- New Password;
- Confirm Password.
Enter your existing password in the Your Current Password field, and your desired new password in both the New Password and Confirm Password fields.
If you haven't set up a password in your Profile yet, you will see the following fields in this section:
- New password: create a password (minimum 8 characters).
- Repeat new password: type the exact same password to confirm.
To finish, click the Change password button to apply your changes or Cancel to keep your current password:

Notes
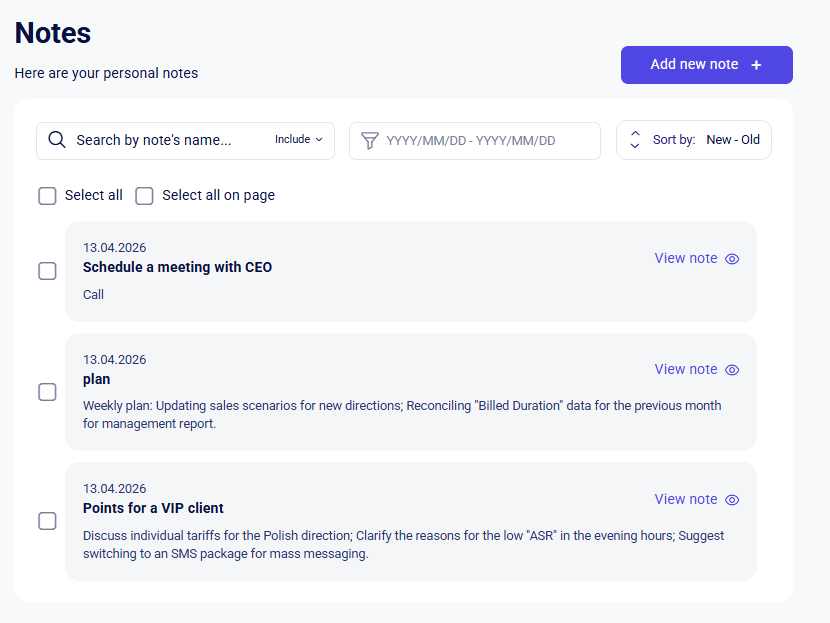
Click Notes to open your private workspace for entries. This data is not synchronized with entities (such as leads or deals) and is accessible only to you. It is your personal work tool that allows you to record drafts and ideas:
Toolbar
This section includes the following features:
- Add new note + button. Allows you to quickly create an entry in the system. In the window that opens, specify the name and content of the note:
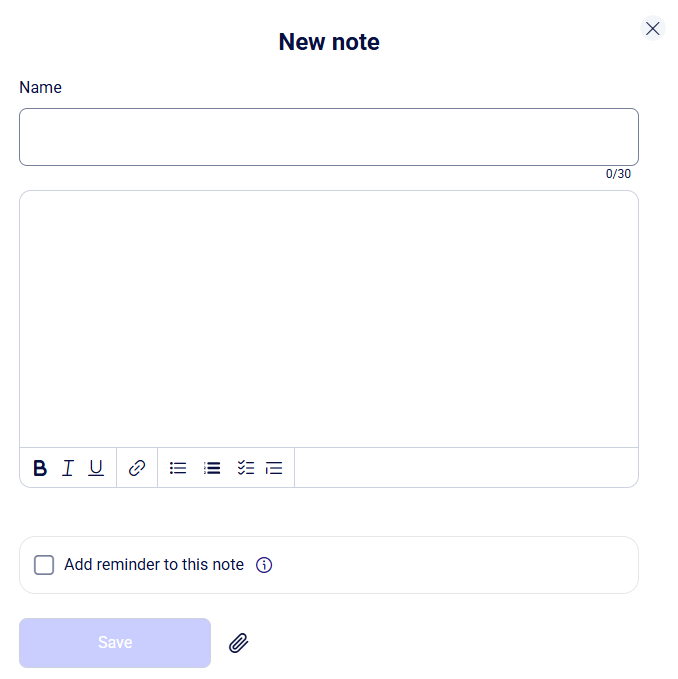
To format the text, you can use additional formatting tools that work similarly to other sections of the CRM:
- Bold text;
- Italic text;
- Underlined text;
- Insert a link;
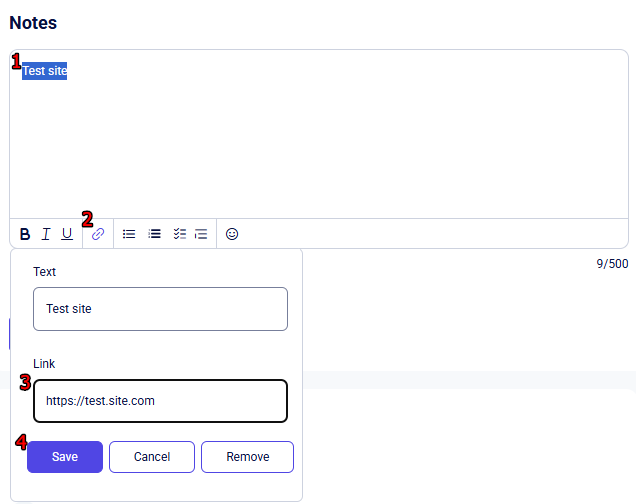
To do this, enter your text, highlight it with your cursor by holding down the left mouse button, and click the Link button.
A pop-up window will appear where you should enter the URL in the format "https://test.site.com".
Then, click Save if you have entered the correct link, Cancel or Delete if you change your mind.
- Format text as a List view;
- Format text as an Ordered List;
- Format text as a Task List;
- Format text as a Blockquote.
You can also add a reminder to a note. To do this, check the box below the note text and fill in all the required fields. The reminder will be linked to the created note and will automatically appear on the Reminders page. Read more about this feature in the Reminders section.

Additionally, you can attach a file to the note.
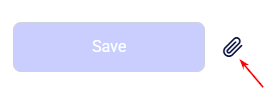
To do this, click the “paperclip” icon to the right of the Save button. In the window that appears, select the required document from your device.
Important: There is a limit of up to 5 files, with a maximum size of 5 MB each. If necessary, these parameters can be increased - please contact our support team for assistance.
- Search field by note name. Enter the full or partial name of a note, and the system will automatically display the corresponding results. The search begins instantly as you type, allowing you to quickly find the required entry. The search bar also features “Include” and “Exclude” filters, giving you the flexibility to include or exclude results based on specific keywords.
- Date selection field. Allows you to quickly filter notes created during a specific period. A calendar will open where you can:
- Select a range – click on the start and end dates of the period in the calendar;
- Navigation – use the “<” and “>” arrows to switch between months;
- Manual entry – enter the dates yourself in the field above the calendar in the “year/month/day” format;
- Reset – click “Clear date” to see all notes again.
- Sorting field. Allows you to change the display order of the notes. You can choose to sort from newest to oldest or vice versa – from oldest to newest.
- The Select all button allows you to select all notes in the system for bulk actions with a single click, while the Select all on page button selects only the notes currently displayed on the active page. Clicking the button once marks all the checkboxes, and clicking it again clears the selection.
Note card
To view a note in more detail, click the View note button next to the note:

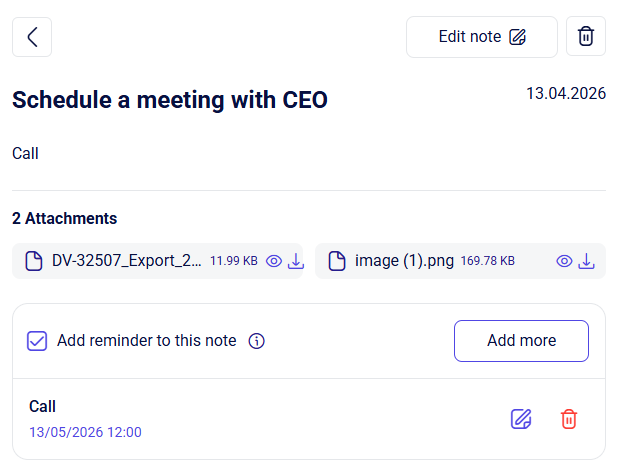
When a specific note is selected, a window opens showing its full content. In this section, you can:
- View and download attachments - if files are attached to the note, they are displayed in the “Attachments” block. You can preview attached images or videos directly in the system or save any file from the note to your device;
- Manage reminders - allows you to add new reminders to a note, as well as edit or delete existing ones. To add another reminder, click the Add more button. To modify or remove existing reminders, use the corresponding control buttons;
- Edit note - click this button to make changes to the text or title;
- Delete the entry – use the “trash” icon if the note is no longer relevant;
- Return to the list – click the “back” arrow in the upper-left corner to return to the general list of all notes.
Contacts
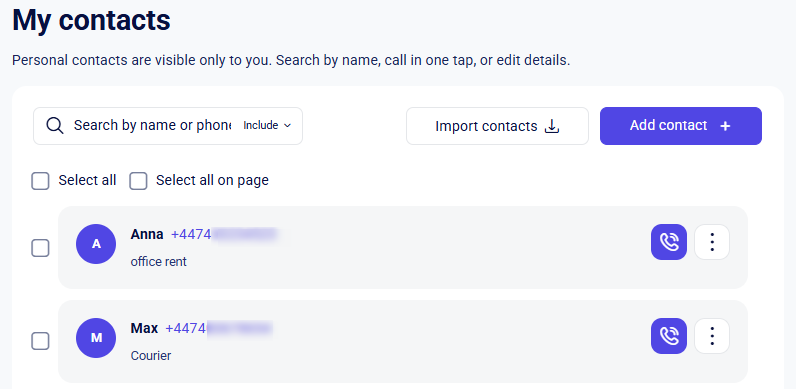
Click on the Contacts section to open your private notebook for saving contacts that are not part of the sales funnel (for example, technical support or personal partners). This section ensures complete confidentiality, as only you can see this data, and allows you to make quick one-click calls directly from the CRM interface, without mixing personal connections with the general database.
Adding contacts
Click the Add contact + button to open the creation window for a new contact. Fill in the following fields:
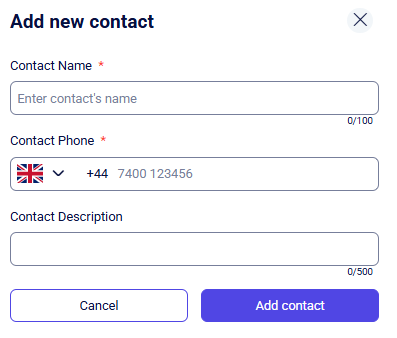
- Contact Name * – required field (only letters and numbers are allowed);
- Contact Phone * – required field for entering the number;
- Contact Description – optional field for additional information.
To save the entered contact, click the Add contact button. The new entry will immediately appear in the general list – you will be able to edit or delete it through the additional menu next to the contact:
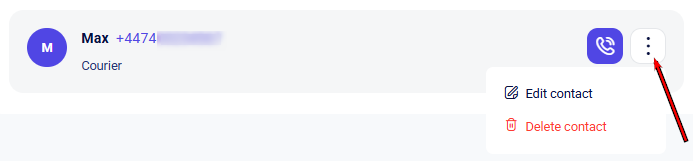
If you change your mind about creating a new contact and want to exit without saving changes – use the Cancel button or click the X in the upper-right corner of the window.
Contact search
For your convenience, the Contacts section includes a quick search field. Simply enter a full or partial name or phone number, and the system will instantly display the matching record, saving you from scrolling through the list.
The search bar also features “Include” / “Exclude” options, allowing you to filter your results by adding or removing specific keywords.
Bulk actions with contacts
You can perform bulk actions on records in three ways:
- Select individual records by clicking the checkbox next to a specific entry;
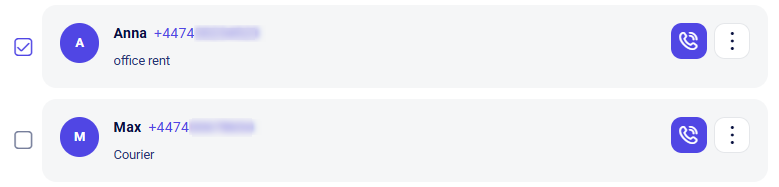
- Select all contacts across the entire system by clicking the Select all checkbox;
- Select only current records by clicking the Select all on page checkbox (this selects only the entries displayed on the active page).

Once you select a checkbox, a bulk actions panel will appear, displaying the number of selected records and the available actions you can perform:
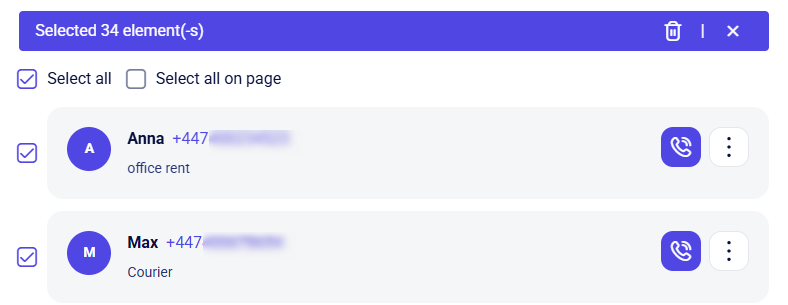
Currently, only one bulk operation is available - Delete contacts.
Importing Contacts
To import your contact database into the system, click the Import contacts button. The following window will open:
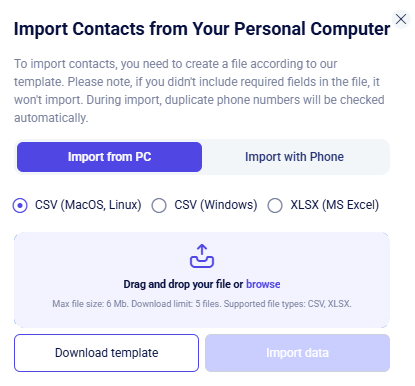
You can choose your preferred import method:
- From PC (Computer);
- From Phone.
Import from PC
If you choose to import from your computer, first select your file format: CSV (MacOS, Linux), CSV (Windows), or XLSX (MS Excel).
To prepare your data, click the Download template button and fill it out according to the requirements listed in the window. If you already have a file ready, drag and drop it into the upload area or click the browse button to select it from your device.
Once the file is uploaded, click the Import button.
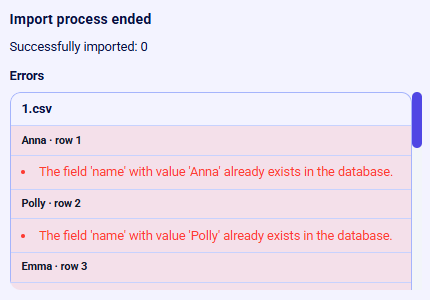
- If duplicates are detected in the system, an error message will appear:
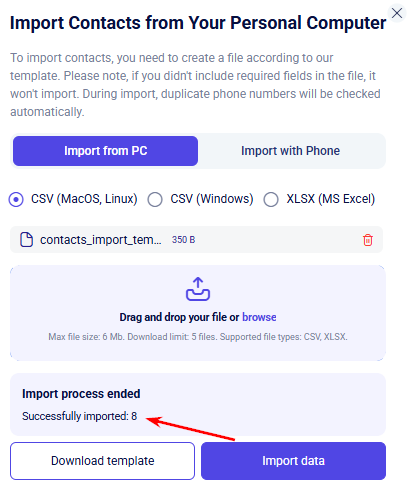
- If there are no duplicates, the contacts will be successfully added, and the system will display the exact number of imported records in the “Import completed” block:
Import from Phone
To import contacts from a mobile phone, you first need to create a .VCF file on your device. Detailed instructions for both iOS and Android are available via the respective links in the interface.
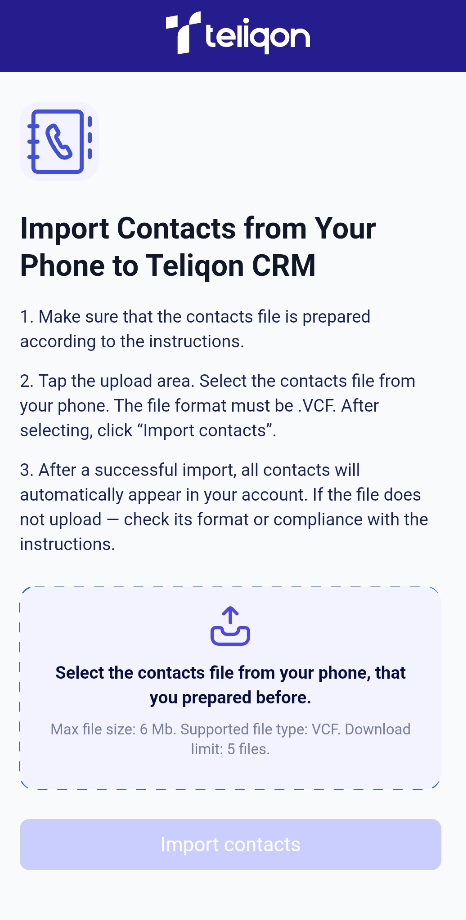
After that, scan the QR code on the screen. If the .VCF file is already saved on your smartphone, follow the link that appears after scanning. A window with further instructions will open on your phone screen:
One-Click Calling
You can also quickly call a contact directly through the CRM - simply click on the phone number or the phone icon

The system will automatically open the built-in dialer window, with the number already entered for an instant call.
Login
This document describes the Login page in Teliqon CRM and explains how users can sign in, use Google authentication, recover a forgotten password, and change their password. It covers the authorization form, required fields, password recovery flow, verification code entry, and password requirements.
User Menu
This document describes the User Menu in Teliqon CRM, including call controls, reminders, notifications, language/theme switching, SSO services, and personal account access.


