Agent’s Dashboard Overview
This document describes the agent dashboard overview in the Teliqon Autodialer Software personal account. It explains how agents log in, pass health checks, manage statuses, handle calls, use feedback, change passwords, and run a voice test.
General Information
In the Teliqon Autodialer software personal account, you, as an agent, can work with calls initiated by the dialer as part of an active campaign.
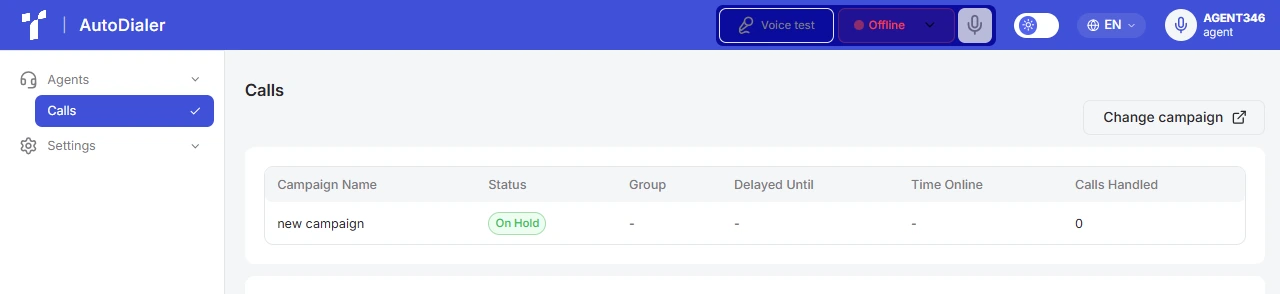
To access the Teliqon Autodialer software personal account as an Agent, you first need to obtain access credentials from your Account Manager in the dialer system. The Manager can grant you access by following the documentation here.
If you already have access to the personal account, you can log in using the login form. The link to the personal account should be provided by your Account Manager in the dialer system.
Workplace Setup for Calls
The system supports two call handling methods:
-
WebRTC (browser-based calls): working directly within the web interface without installing third-party software. Audio is transmitted via the browser, and call controls (hang up, mute microphone) are handled using on-screen buttons.
-
SIP connection (softphone or IP phone): working via an external application (e.g., Zoiper, MicroSIP, Telephone) or a hardware phone. Calls are received on a separate device where audio management takes place, while the web interface displays the lead card and call details.
WebRTC
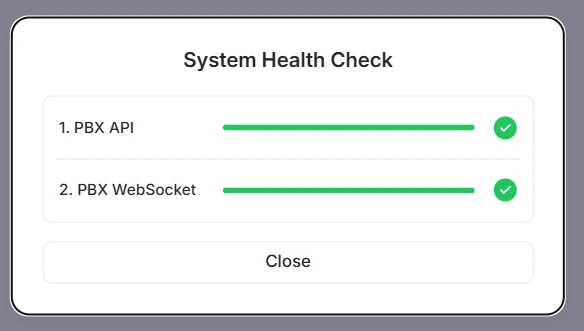
For WebRTC, there is no need to install or configure any third-party software. Simply log into your system account and grant the browser permission to use the microphone and speakers. Immediately after this, a quick readiness check will automatically start to ensure your computer is ready to receive calls:
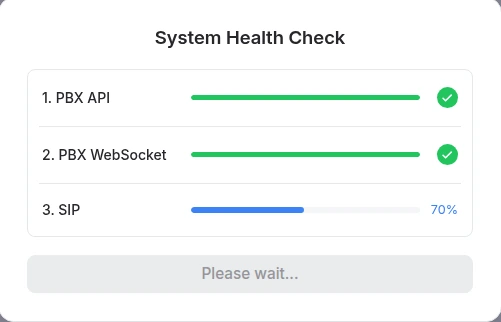
If any of the checks fail, you will have the option to retry the test:
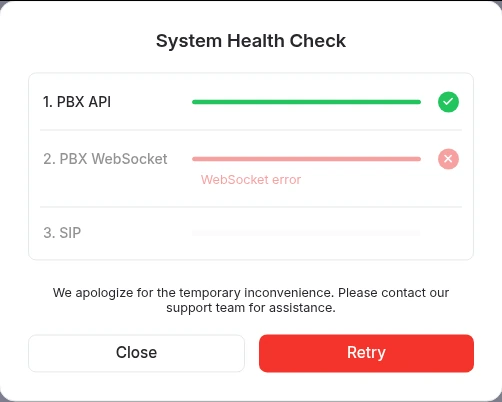
Or proceed to your dashboard regardless of the result. However, in this case, your status will remain Offline, and you won't be able to change it.
SIP
For SIP, before getting started, you need to configure a third-party softphone or IP phone using the provided connection credentials:
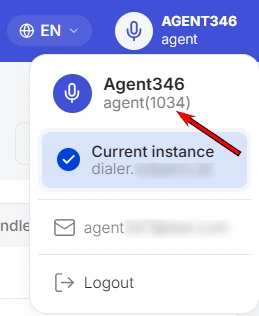
- Username: your internal extension number. It is provided by an administrator or manager, or you can check the number yourself by clicking the profile icon in your account menu:
-
Password: provided by your system administrator.
-
Transport/Protocol: UDP.
-
Domain/Host: provided by your system administrator.
Below is an example of configuration and successful connection in the Zoiper application:
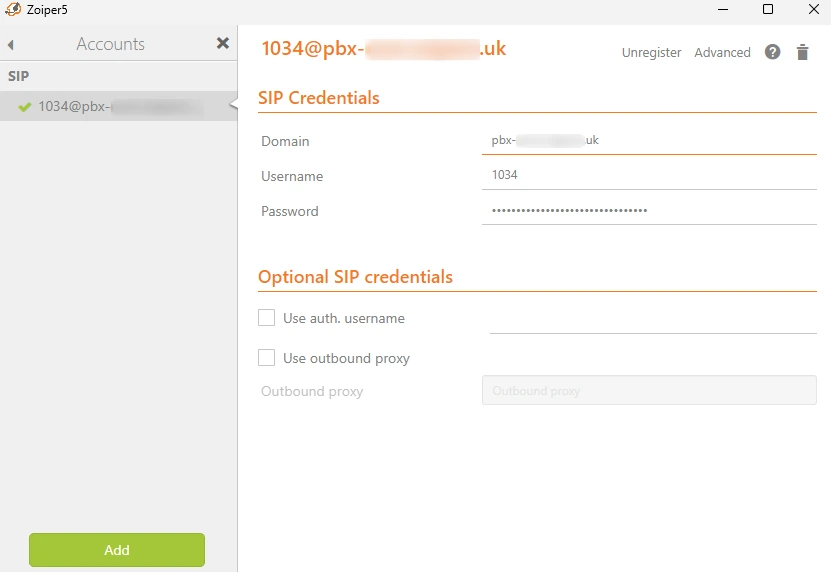
Important: To prevent call disruptions, use your SIP account on only one active device or softphone at a time. If you encounter errors or fail to register, please reach out to our support team.
After configuring your SIP account, log into your agent dashboard in the browser. Right after logging in, an automatic parameter check will run - just like with WebRTC - to verify that your workplace is ready to receive calls:
Campaign Setup
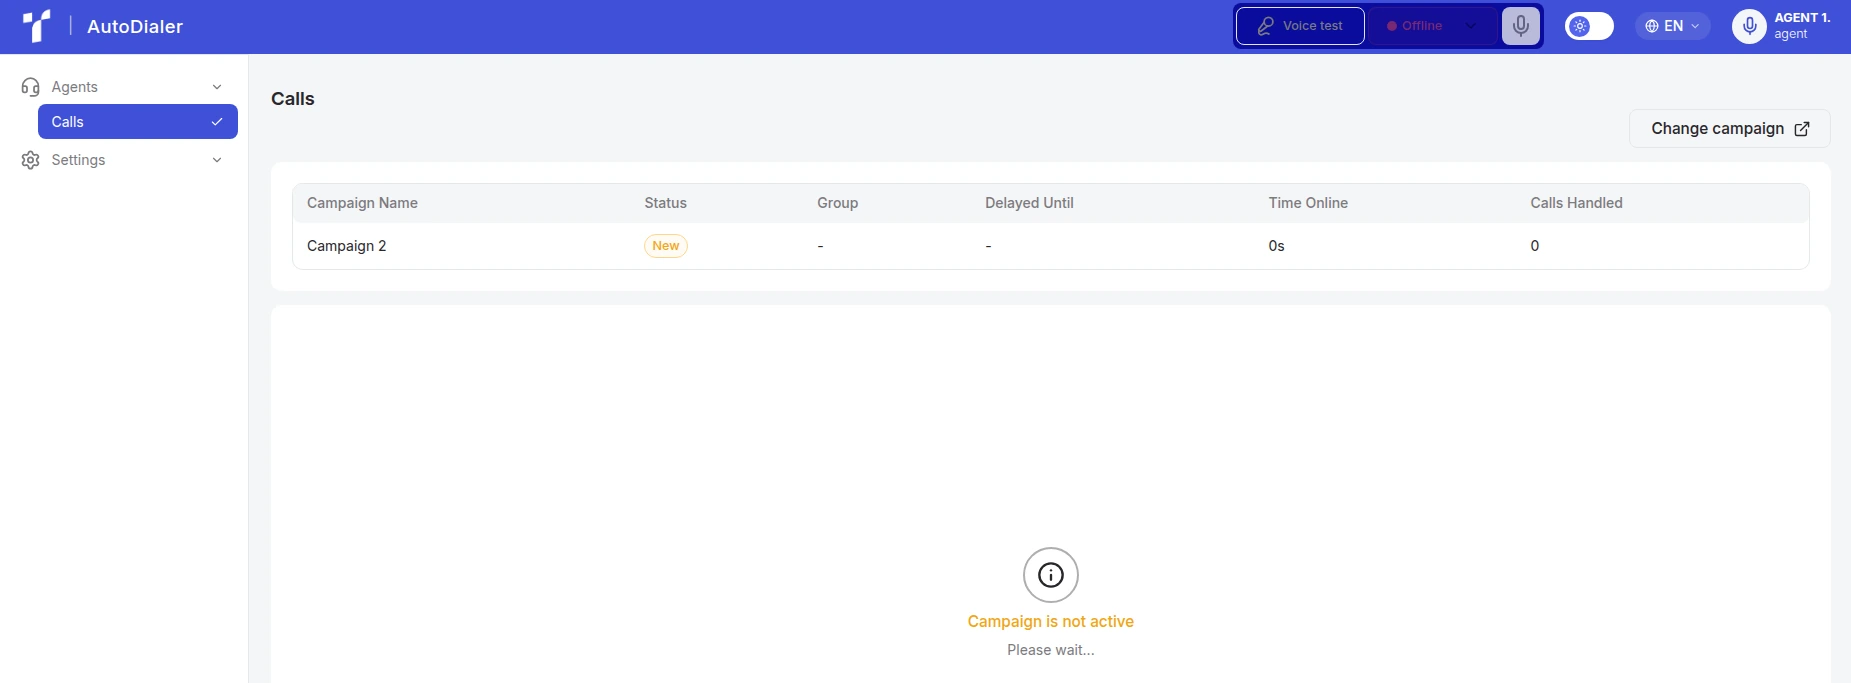
After the system check, you will be taken to the following page if you have been assigned as an agent to only one campaign:
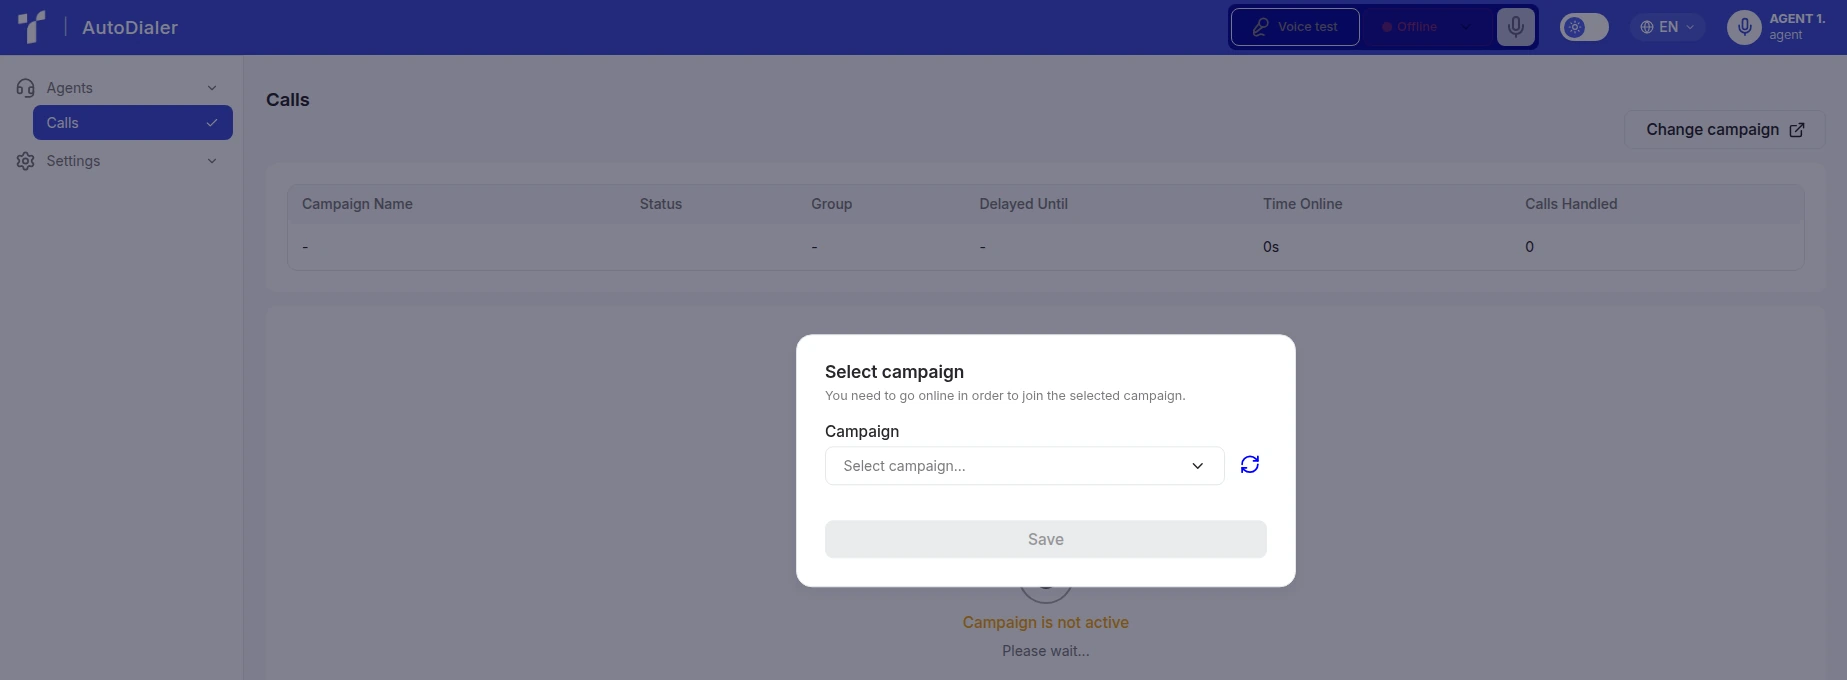
If you have been assigned to multiple campaigns, the system will prompt you to select a campaign during login:
Status Management
On the top panel, you can manage your status:

The status can have the following default values:
-
Offline;
-
Online;
-
Pause;
-
On hold;
-
Feedback.
The list does not include additional user statuses that may be configured by your project administrators.
When in Offline status, you can switch to Online if you are ready to receive calls.
When in Online status, the default option and any additional custom statuses configured for your account will be available:
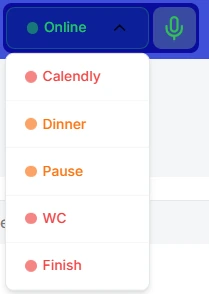
-
Finish - ends your work session and changes your status to Offline;
-
Custom (pause) - switches your agent status to a state in which the system will not route calls to you.
These options can be used even during an active call; however, any status changes will take effect only after the current call ends and a feedback status is selected for that call. Selecting Pause will place the agent in a state where the system will not route new calls to them.
After completing a call, you will enter the Feedback status, where you must evaluate the outcome of the conversation. Once the feedback is submitted, your status will change to On Hold for the duration specified in the corresponding campaign. After the hold period ends, your status will automatically switch to Online, and the next call will be routed to you.
Microphone Control
Microphone control during a call depends on the selected call type:
- WebRTC: you can mute or unmute your microphone at any time using the dedicated button on the control panel in your browser.

- SIP connection: the microphone button is not available in the web interface - audio management is handled strictly within your softphone or hardware phone.
Workflow
Before starting your session, we recommend checking your audio setup: make sure you can clearly hear the caller and they can clearly hear you.
To check how clients will hear you, while in Offline status you can use the Voice Test option, which is described in detail in the following section.
When the Manager activates a campaign in which you are assigned as an Agent, you will start receiving calls.
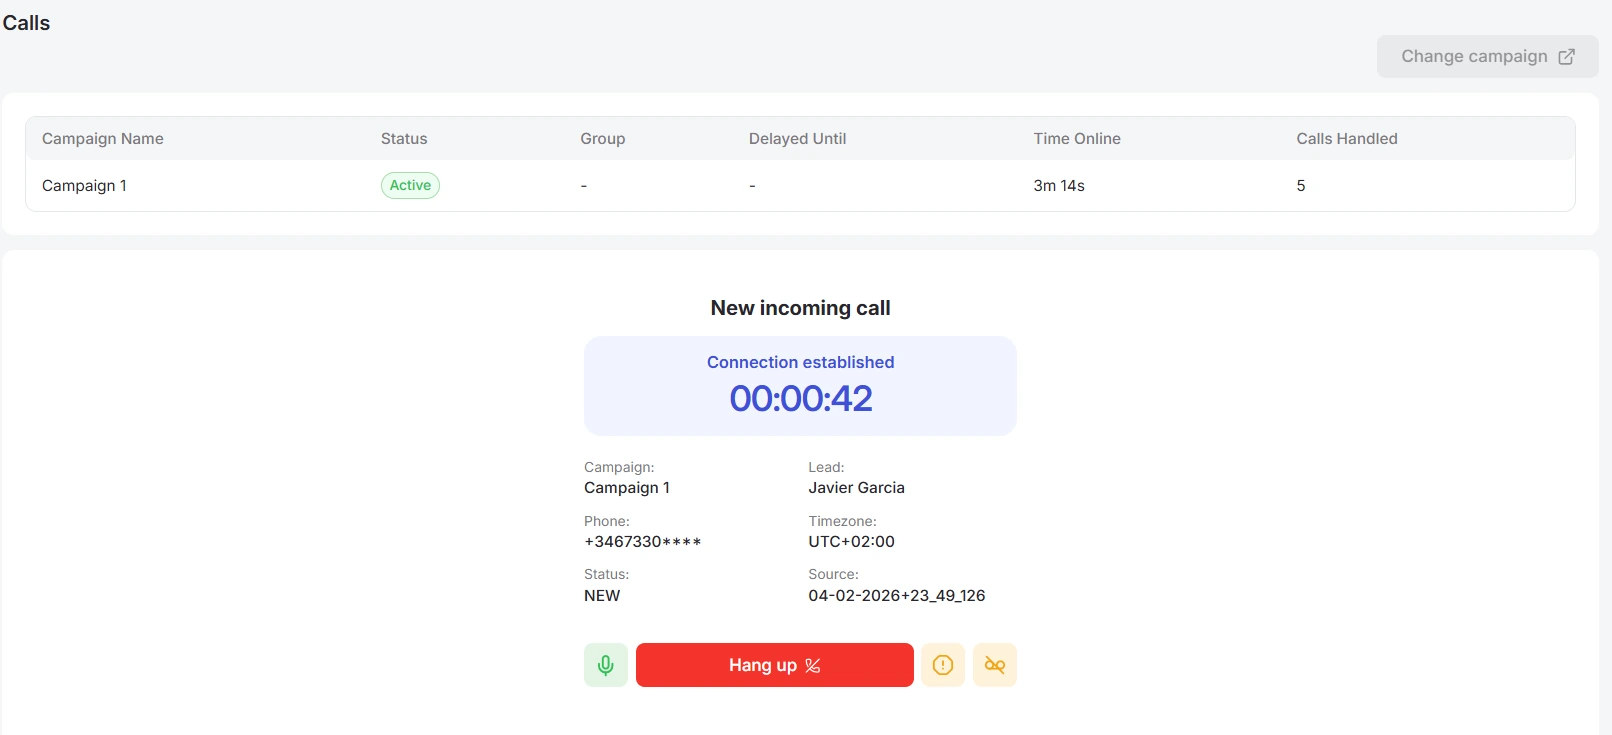
In WebRTC mode: the call is answered automatically and enters a hold state with background music. As soon as the dialer connects you with a lead who picked up the phone, the customer card opens in your browser, and the conversation starts immediately:
In SIP mode: an initial incoming call from the system will arrive on your app (e.g., Zoiper), which you need to answer. The call will then enter a hold state with background music while the system connects to a client. As soon as the connection is established, the lead card will automatically open in the browser window (example of a call in Zoiper):
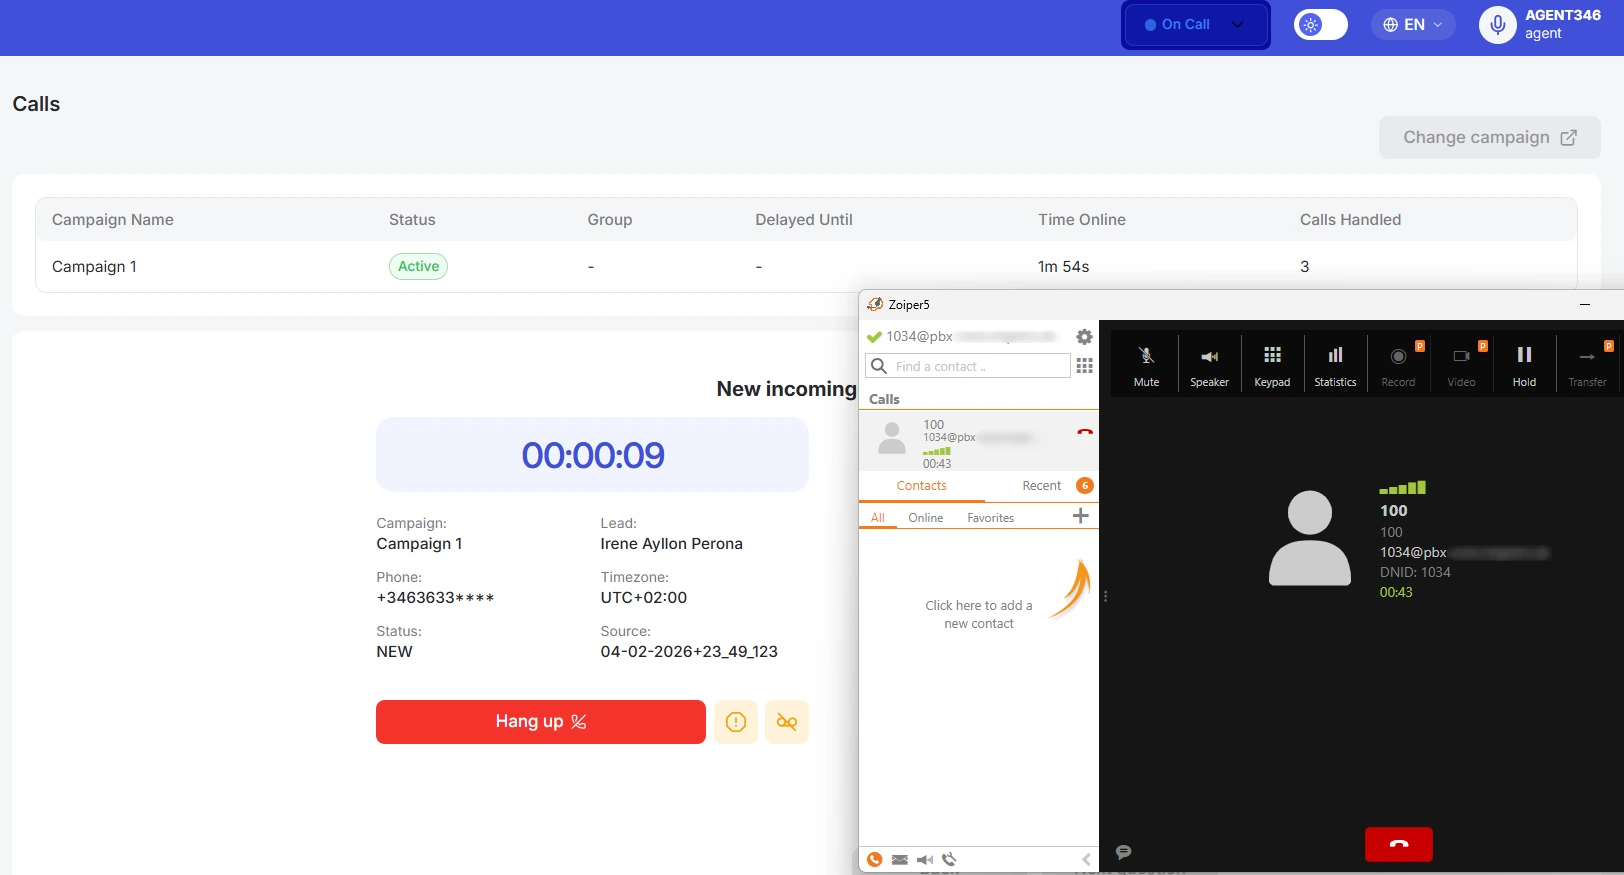
Note on SIP operations: to ensure a continuous flow of incoming calls via SIP, always end the call using the button in the web interface (lead card) or wait for the client to hang up first. If you end the call directly in your softphone/IP device, the system will register that the agent hung up, automatically change your status to “Offline”, and stop routing calls to you.
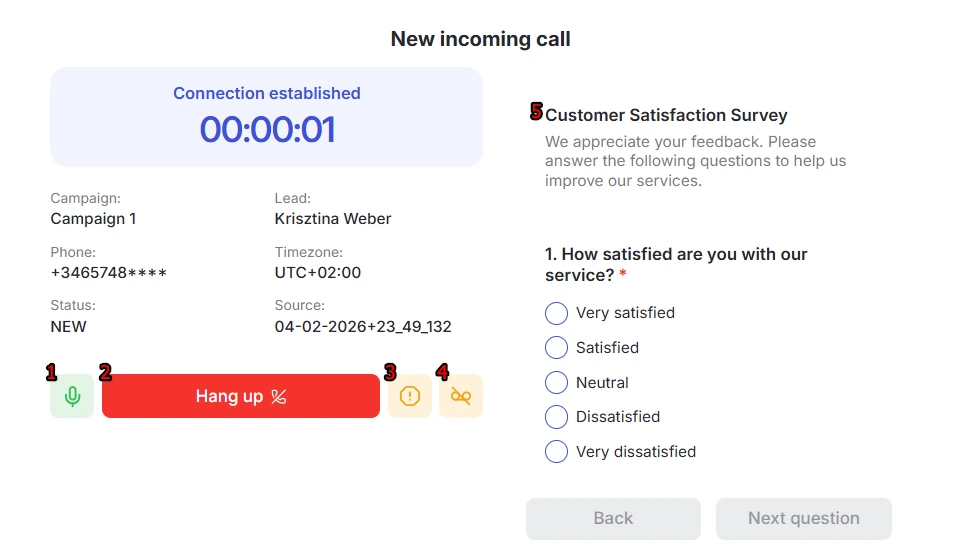
During a call, the following options are available in the client's web card:
-
Mute microphone: available in the interface only for WebRTC (with a SIP connection, audio is muted directly within your softphone or on your device panel);
-
Hang up: ends the current call;
-
Report poor connection: used when audio quality issues occur;
-
Report unrecognized voicemail: submit a one-click report if an answering machine or bot answered instead of a client (this helps train the system for more accurate automatic detection in the future).
-
Fill out survey: allows you to enter the client's answers directly during the conversation (if a survey is enabled for the campaign).
After the conversation ends, you have to evaluate the call outcome. The available rating options depend on the lead status settings in the dialer:
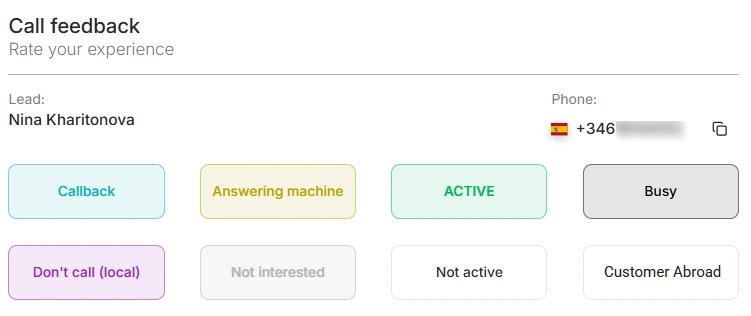
The available evaluation options are configured by the Manager in the personal account.
Once you select an evaluation, your status will change to On Hold. The hold duration depends on the campaign settings. When the hold period ends, the next call will be initiated immediately.
It is important to note that when selecting the Callback feedback for a call, this lead will follow the callback logic. You will need to complete the following form to ensure that this lead can be called again at a later time:
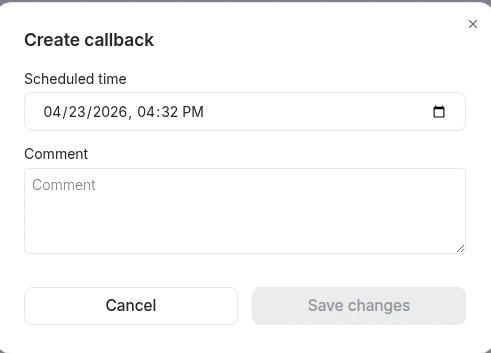
After you select an evaluation, the next call will begin.
Additional settings
On the Account Management page, there is a Change Password section:
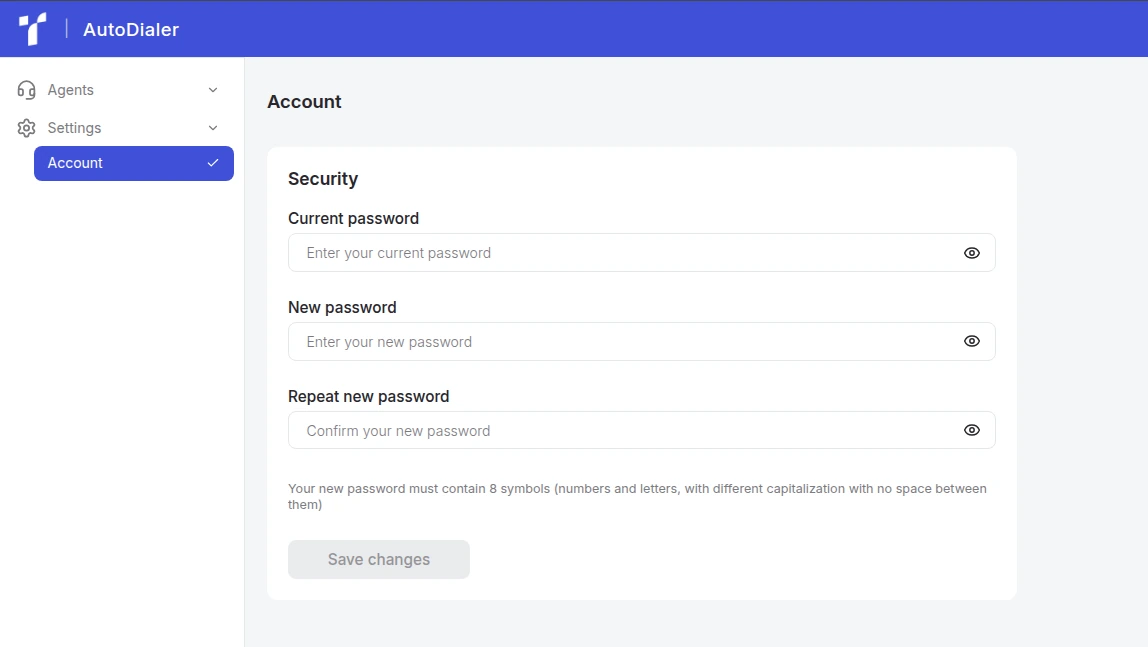
In the Change Password section, you can update the password for your user account.
To do this, click inside the input field with the left mouse button and start typing using your keyboard.
In the Current Password field, enter your existing personal account password. In the New Password and Confirm New Password fields, enter your desired new password.
Please note that the new password must contain at least 8 characters, including numbers, uppercase letters, and lowercase letters, with no spaces.
Once you have entered the required information, click Save changes to apply the changes.
Voice test
To ensure that clients can hear you clearly, you can use the Voice Test function, located in the upper-right corner of the screen:

To start the test, click Voice test in the top menu. The testing process depends on your connection type:
- For WebRTC: the test starts immediately in the browser. A muted microphone icon and a countdown timer will appear on the panel. You will hear an audio recording with instructions followed by a pause - speak a few phrases into your microphone to assess your voice quality.

- For SIP (softphone or other device): after clicking the button on the panel, you will receive an incoming call on your softphone or hardware phone. Answer the call, listen to the voice instructions, and test your microphone during the pause:
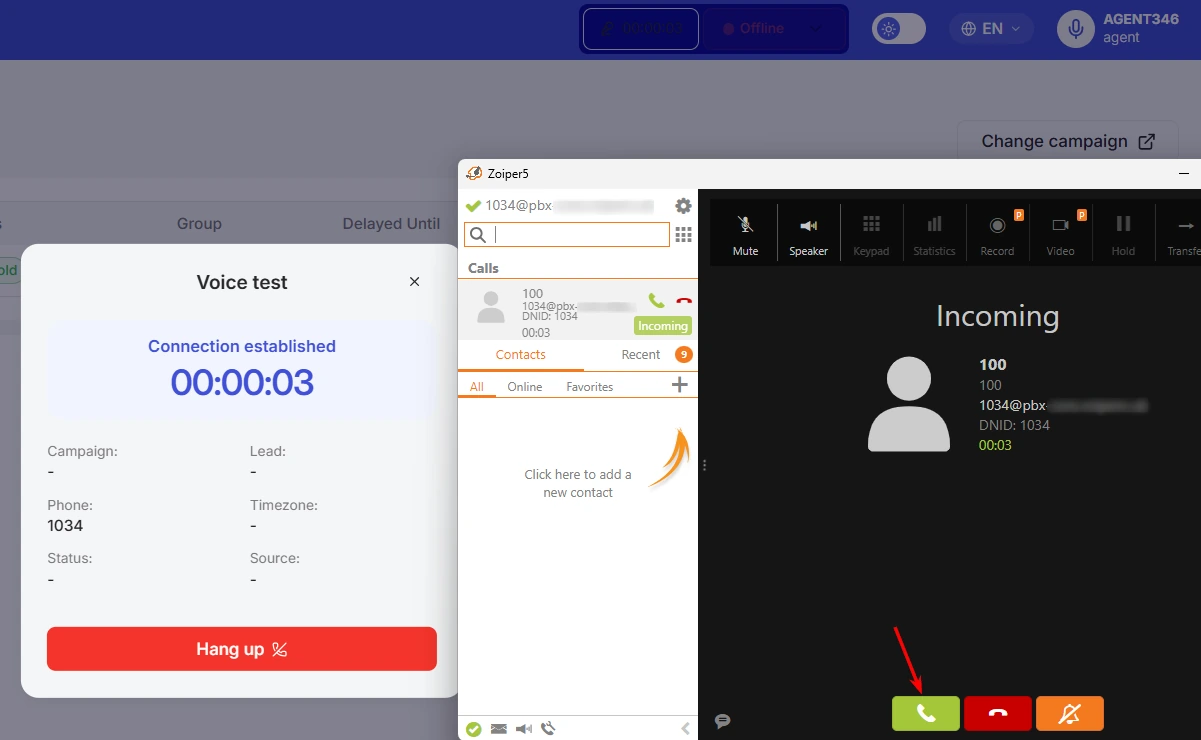
When you are confident that your audio is clear, click the red handset icon to stop the test.
Admin's Dashboard Overview
Administrator capabilities in the Teliqon Autodialer Software dashboard, managers, settings, roles, and activity log.
User menu
This document describes the User menu in the Teliqon Autodialer dashboard. It explains the menu elements available for Admin, Manager, and Agent accounts, including theme and language controls, service switching, phone and microphone controls, profile actions, and logout.


