Admin's Dashboard Overview
This document describes the administrator dashboard overview in the Teliqon Autodialer Software personal account. It explains the additional administrator capabilities in the Dashboard, Managers, and Settings sections. It also covers adding, editing, deleting managers, and configuring hidden phone numbers.
General information
In the Teliqon Autodialer Software personal account, an administrator can perform all operations available to project managers.
A detailed description of these capabilities, organized by the specific pages of the account, is provided in the following documents:
The significant difference between the manager and administrator personal accounts lies in these three pages:
-
Dashboard;
-
Managers;
-
Settings.
Let’s take a closer look at the additional capabilities available to project administrators.
Dashboard Section
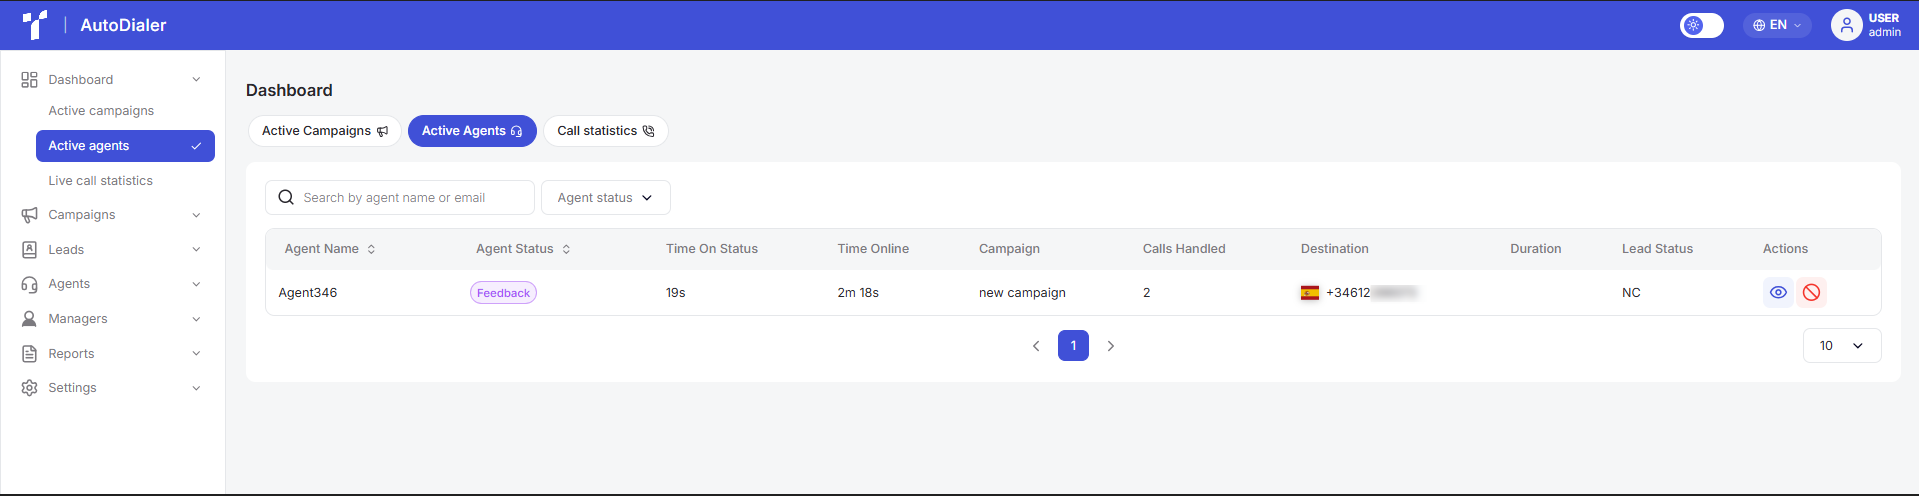
In this section, under the Active agents tab, unlike project managers, project administrators do not have access to the “Spy”, “Whisper” and “Barge” options.
To use these features, log in to the Teliqon Autodialer Software system using a project manager account.
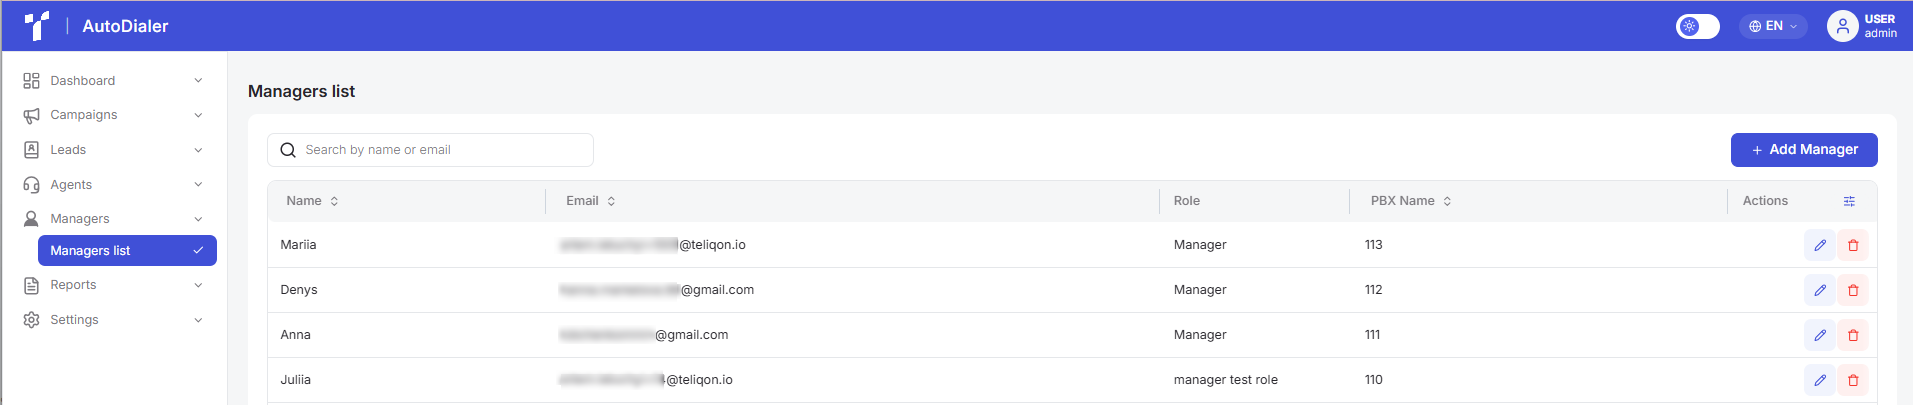
Managers Section
In addition to the functions described in the Managers document, project administrators have access to the following additional capabilities in this section:
-
Add a new manager to the system;
-
Edit a manager’s account;
-
Remove a manager from the system.
Add Manager button
When you click the button to add managers to the system, the following pop-up window will appear:
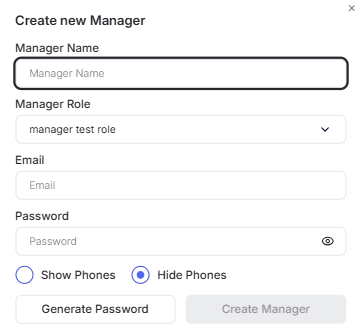
In the window that opens, enter the manager's name, select a role, provide an email address, and set the password the manager will use to log in to their personal account. You can also generate a password automatically by clicking the Generate Password button.
Additionally, select one of the options for how the manager interacts with the system:
-
Show all phone numbers to the manager;
-
Hide phone numbers from the manager (fully or partially, configured in Settings).
Once you have completed the fields, click Create Manager to finalize the creation, or click the X icon to cancel the changes.
Edit Manager
To edit manager settings, double-click the corresponding row or click the Edit button in the “Action” column. This will open a page with specific details:
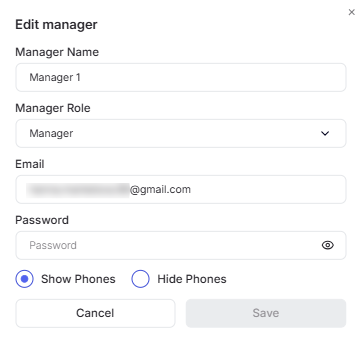
In this window, you can edit any field.
To save your changes, click the Save button. If you decide not to keep the changes, simply click Cancel.
Once saved, the updated information will be visible in the manager list table.
Delete Manager
Clicking the Delete icon in the manager’s row opens the following window:
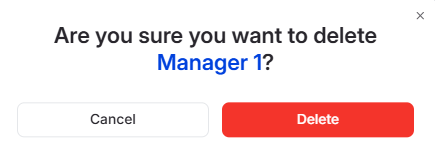
In this window, confirm the action by clicking the Delete button, or cancel the deletion by clicking Cancel or the X icon.
After being removed from the system, the manager loses the ability to log in using their email address and password.
Settings Section
In addition to the functions specified in the Settings document, project administrators have one additional option available on the Campaigns page:
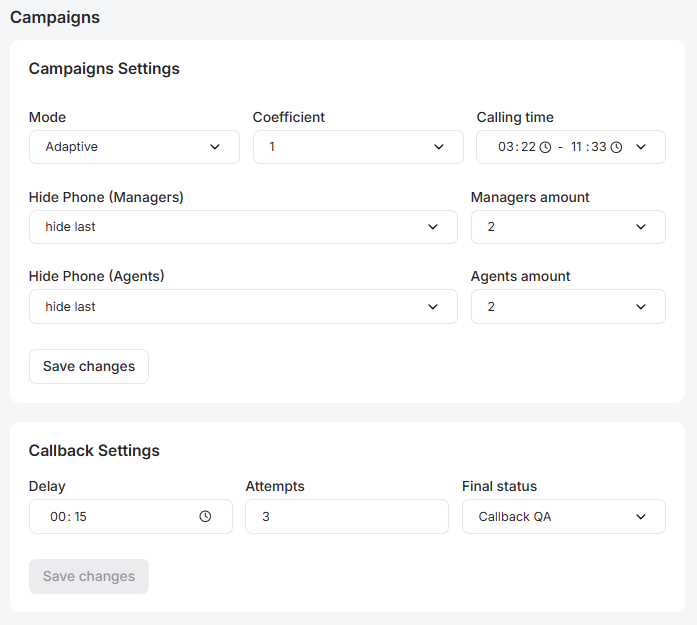
The Hide Phone feature masks phone numbers in the managers' personal accounts. While this parameter is configured once during general system setup, the hiding option is activated individually for each manager in their specific settings.
Configuration details:
-
Masking Type: Allows you to hide the phone number either partially or completely.
-
Managers amount field: Determines how many digits in the phone number will be hidden.
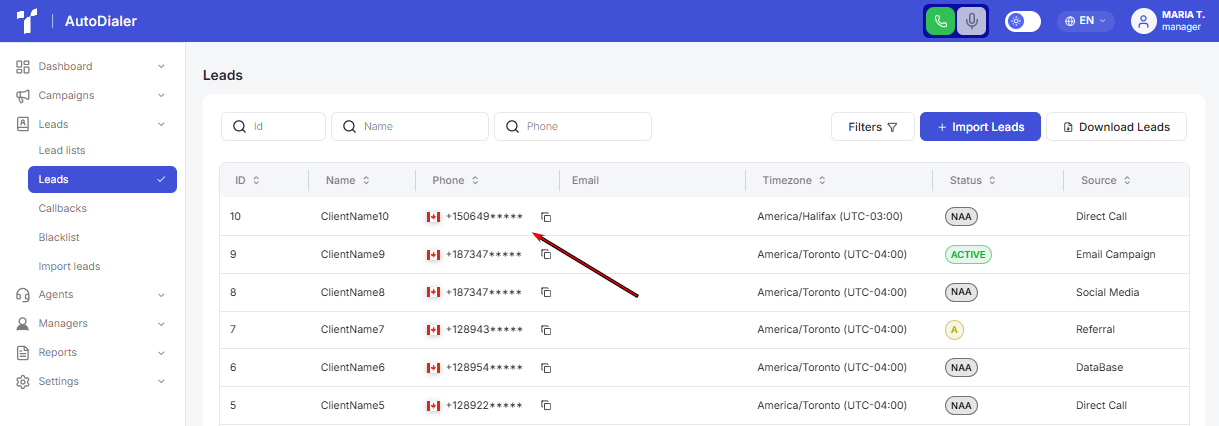
Here is how the dashboard appears to a manager when the last 4 digits of a number are masked:
Login
This document describes the login process in the Teliqon Autodialer Software system. It explains how registered users can access the system and how password recovery works. It also covers the password reset flow and the required password security criteria.
Agent’s Dashboard Overview
This document describes the agent dashboard overview in the Teliqon Autodialer Software personal account. It explains how agents log in, pass health checks, manage statuses, handle calls, use feedback, change passwords, and run a voice test.
