Google Workspace Integration Guide
This document explains how to integrate Google Workspace with Teliqon Cloud PBX, configure Google OAuth resources, synchronize users and contacts, and enable Google Single Sign-On (SSO).
General Information
You can integrate Google Workspace with the Teliqon Cloud PBX system.
Before beginning the integration process, ensure that you have an active subscription to Teliqon Cloud PBX under the Business, or Ultimate plan, as well as a Google Workspace subscription under the Business or Enterprise edition. These requirements are mandatory for enabling the integration.
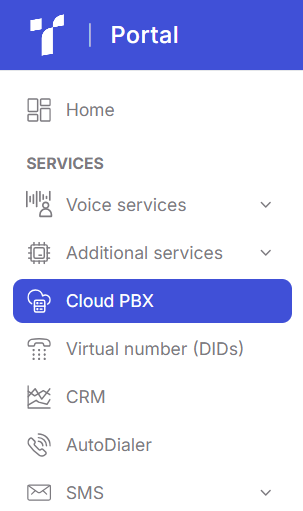
You can verify Cloud PBX subscription status in your Teliqon Portal account.
To do so, log in to the system and navigate to the Cloud PBX section.
If you already have an active Cloud PBX subscription, it will be displayed on the page:

If Cloud PBX is not yet connected to your Teliqon Portal, you will see a list of available Cloud PBX plans. You can select any of them (Teliqon Business or Teliqon Ultimate) yourself, or contact Teliqon Portal Technical Support for assistance with activation, connection, and further configuration.

Next, to access Cloud PBX system Management Console, click the pencil icon in the “Actions” column:

Then, use the domain of Teliqon Cloud PBX account in the settings:

When you open this domain, if Cloud PBX subscription is properly configured, you will be redirected to Cloud PBX dashboard:

If you encounter any issues at any of the previous steps, please contact Teliqon Portal Technical Support for assistance.
Why Integrate Google Workspace
Before discussing the benefits of integration, it is important to clarify the meaning of the term “Extension”.
In Cloud PBX, an Extension represents an entity that simultaneously serves as an employee’s Contact and assigns them an internal number through which the employee can receive calls.
By integrating Google Workspace, you gain the following benefits:
- Single Sign-On (SSO) - allows your Google users to log in to Teliqon Cloud PBX using their Google credentials. This simplifies user access to the system and enhances security by eliminating the need to enter separate passwords.
- Google Workspace User Synchronization - provides one-way synchronization of user Google Workspace accounts to Teliqon Cloud PBX. This means that any updates made to user information in Google Workspace are automatically synchronized in Cloud PBX, simplifying user management and reducing the need for manual configuration.
- Automatic Creation of Extensions - enables the system to automatically create extensions to synchronized Google Workspace users. This allows users to immediately access and engage in business communications using their office extensions within the Cloud PBX system.
How to Integrate Google Workspace
To begin integrating Google Workspace with Teliqon Cloud PBX, please ensure that both systems meet the requirements outlined in the General Information section.
To access Cloud PBX personal account page, refer to the “General Information” section, which explains where to find the link in your Teliqon Portal personal account.
If all configurations are correct, you can proceed directly to the connection process:
Step 1
To proceed with setting up the Google Workspace integration, you need to locate and save the redirect URIs from Teliqon Cloud PBX:
-
You can do this by logging in to the Cloud PBX personal account and clicking the button that opens the portal management system:

-
On the page that appears, navigate to the menu and select “Integrations” → “Collaboration”:

-
There, you will see the Google SSO Integration option. Click “Integrate”:

-
In the window that opens, copy the values from the following fields - Redirect URI and Client SSO Redirect URI:

Where:
- Redirect URI - the address to which you will be redirected after the authentication process for the integration is completed.
- Client SSO Redirect URI - the address that allows users to sign in to Cloud PBX using their Google credentials.
Step 2
Next, you need to create the required resources and credentials using a Super Administrator account for your Google Workspace:
-
First, sign in to Google Cloud as a Super Administrator and go to https://console.cloud.google.com/. In the search bar, type “Create a project” and select the corresponding option from the dropdown list:

-
Fill in your project details and click “Create”:

-
Project name - enter a name that will help you identify your project.
-
Location - specify the organization you want to associate with the newly created project.
-
Once your project has been created, you need to enable the Admin SDK API in your cloud project to allow access to organizational user data via API. In the search bar, enter “Admin SDK API”

-
In the window that appears, click “Enable”:

-
After the page loads, configure the OAuth consent screen to set up branding information that will appear when users grant access to the application (which you will create later). In the search bar, find “Branding” and select it from the search results:

-
On the page that opens, click “Get Started”:

-
Complete the form in full and click “Create”. Important: Under the Audience section, select “Internal” (this means the app will only be available to users within your organization):

- After that, you need to create a web application and obtain the authentication credentials that will allow Teliqon Cloud PBX to access organizational user data. Click “Create OAuth Client”.

-
Fill in the fields in the form that appears. Add the two redirect URIs you saved during Step 1, and then click “Create”:

-
In the resulting window, you will see your Client ID and Client Secret. Save these credentials securely.

Step 3
The final step in integrating Cloud PBX with Google Workspace. Go to Teliqon Cloud PBX personal account (see the General Information section for instructions on how to access it) and enter the Client Secret and Client ID obtained in the previous step.
-
In Cloud PBX account, click the button to open the portal management system:

-
On the page that appears, navigate to the menu and select “Integrations” → “Collaboration”:

-
There, you will see the Google SSO Integration option. Click “Integrate”:

-
In the window that opens, fill in the Client Secret and Client ID fields in the “Certificates & Secrets” section:

-
Click “Save.” You will be redirected to the Google authorization page, where you need to select your Google account and grant the application access to your account.

-
Once authorization is complete, the integration will be successfully connected:

How to Synchronize Contacts with Google Workspace
After successfully connecting Teliqon Cloud PBX with Google Workspace, the next step is to synchronize Google user accounts with the PBX and assign them extensions. This will allow synchronized users to log in to the system using their Google credentials and communicate using their extensions (internal phone numbers).
You can choose to synchronize:
- All users;
- Users within a specific organizational unit;
- Users within a specific group;
- Specific users.
It is important to note that in the first three cases, Extensions will be assigned automatically.
However, in the fourth case (specific users), you will need to assign them manually - and these extensions must be created in advance, before starting the synchronization process.
Synchronizing All Users
To synchronize all contacts from Google Workspace, follow these steps:
-
Log in to Cloud PBX personal account and click the button to open the portal management system:

-
On the page that appears, navigate to the menu and select “Integrations” → “Collaboration”:

-
If you have successfully completed all Google Workspace connection steps, you should see the integration already activated on this page. If not, please repeat Steps 1-3 of the integration process and, if necessary, contact Teliqon Portal Technical Support.

- In the “User Synchronization” section, configure the settings as follows:

First, set “User Range For Extension Auto Creation” to “All Users”.
Next, fill out the remaining parameters according to your needs:
- In the dropdown list “User's Extension Number”, select one of the following options:
- Assign Automatically - automatically assign extensions (internal numbers) starting from a specific initial number. If you choose this option, specify the starting number in the “Start Extension Number from” field.
- Read Specific Property Value - assign internal extensions based on a specific user account property value. If you choose this option, enter the property name in the “Property Name” field (for example: externalIds.#(type=="organization").value)
- In the dropdown list “Delete the Extension when its associated user account is”, choose one of the three available statuses. When a linked user account changes to the selected status, PBX will stop synchronizing that user and delete their associated extension.
- Select the checkbox “Auto associate Extensions with the Users that share the same email address” if you want the system to automatically create extensions for synchronized users.
- Select the checkbox “Send Welcome Email automatically after an extension is created” if you want the system to automatically send a welcome email to each contact after their extension has been created.
- Click “Save”.
- If the synchronization completes successfully, the “User Synchronization” section will display the message: “X users have been synced to the PBX Extension directory.” You can view the synchronized Extensions in the “Extension and Trunk” → “Extension” tab.

Important: Contacts synchronized from Google Workspace have a distinctive “G” icon next to the “Email Address” field. These contacts cannot be deleted from Cloud PBX. Additionally, the following fields can only be modified within Google Workspace:
- First Name;
- Last Name;
- Email Address;
- Mobile Number;
- Job Title.
Synchronize users within a specific organizational unit
To synchronize users within a specific organizational unit from Google Workspace, follow these steps:
-
Log in to Cloud PBX personal account and click the button to open the portal management system:

-
On the page that appears, navigate to the menu and select “Integrations” → “Collaboration”:

-
If you have successfully completed all Google Workspace connection steps, you should see the integration already activated on this page. If not, please repeat Steps 1-3 of the connection process and, if necessary, contact Teliqon Portal Technical Support.

- In the “User Synchronization” section, configure the settings as follows:

First, set “User Range For Extension Auto Creation” to “Users in Specific Organizational Unit”, and then select the units in the “Organizational Units” field.
Next, fill out the remaining parameters according to your needs:
- Select the checkbox “Auto delete the Extensions no longer in sync” if you want extensions to be automatically removed from the PBX when, during synchronization, it is determined that they no longer belong to the specified organizational units.
- In the dropdown list “User's Extension Number”, choose one of the following options:
- Assign Automatically - automatically assign extensions (internal numbers) starting from a specific initial number. If you choose this option, specify the starting number in the “Start Extension Number from” field.
- Read Specific Property Value - assign internal extensions based on the value of a specific user account property. If you select this option, enter the property name in the “Property Name” field. For example: externalIds.#(type=="organization").value
- In the dropdown list “Delete the Extension when its associated user account is”, choose one of the three available statuses. When a linked user account changes to the selected status, PBX will stop synchronizing that user and delete their associated extension.
- Select the checkbox “Auto associate Extensions with the Users that share the same email address” if you want the system to automatically create extensions for synchronized users.
- Select the checkbox “Send Welcome Email automatically after an extension is created” if you want the system to automatically send a welcome email to each contact after their extension has been created.
- Click “Save”.
- If the synchronization completes successfully, the “User Synchronization” section will display the message: “X users have been synced to the PBX Extension directory.” You can view the synchronized Extensions in the “Extension and Trunk” → “Extension” tab.

Important: Contacts synchronized from Google Workspace have a distinctive “G” icon next to the “Email Address” field. These contacts cannot be deleted from Cloud PBX. Additionally, the following fields can only be modified within Google Workspace:
- First Name;
- Last Name;
- Email Address;
- Mobile Number;
- Job Title.
Synchronize users within a specific group
To synchronize users within a specific group from Google Workspace, follow these steps:
-
Log in to Cloud PBX personal account and click the button to open the portal management system:

-
On the page that appears, navigate to the menu and select “Integrations” → “Collaboration”:

-
If you have successfully completed all Google Workspace connection steps, you should see the integration already activated on this page. If not, please repeat Steps 1-3 of the connection process and, if necessary, contact Teliqon Portal Technical Support.

- In the “User Synchronization” section, configure the settings as follows:

First, set “User Range For Extension Auto Creation” to “Users in Specific Group”, and then select the groups in the “Group” field.
Next, fill out the remaining parameters according to your needs:
- Select the checkbox “Auto delete the Extensions no longer in sync” if you want extensions to be automatically removed from the PBX when, during synchronization, it is determined that they no longer belong to the specified organizational units.
- In the dropdown list “User's Extension Number”, choose one of the following options:
- Assign Automatically - automatically assign extensions (internal numbers) starting from a specific initial number. If you choose this option, specify the starting number in the “Start Extension Number from” field.
- Read Specific Property Value - assign internal extensions based on the value of a specific user account property. If you select this option, enter the property name in the “Property Name” field. For example: externalIds.#(type=="organization").value
- In the dropdown list “Delete the Extension when its associated user account is”, choose one of the three available statuses. When a linked user account changes to the selected status, PBX will stop synchronizing that user and delete their associated extension.
- Select the checkbox “Auto associate Extensions with the Users that share the same email address” if you want the system to automatically create extensions for synchronized users.
- Select the checkbox “Send Welcome Email automatically after an extension is created” if you want the system to automatically send a welcome email to each contact after their extension has been created.
- Click “Save”.
- If the synchronization completes successfully, the “User Synchronization” section will display the message: “X users have been synced to the PBX Extension directory.” You can view the synchronized Extensions in the “Extension and Trunk” → “Extension” tab.

Important: Contacts synchronized from Google Workspace have a distinctive “G” icon next to the “Email Address” field. These contacts cannot be deleted from Cloud PBX. Additionally, the following fields can only be modified within Google Workspace:
- First Name;
- Last Name;
- Email Address;
- Mobile Number;
- Job Title.
Synchronize specific users
To synchronize specific users from Google Workspace, follow these steps:
To synchronize users within a specific group from Google Workspace, follow these steps:
-
Log in to Cloud PBX personal account and click the button to open the portal management system:

-
On the page that appears, navigate to the menu and select “Integrations” → “Collaboration”:

-
If you have successfully completed all Google Workspace connection steps, you should see the integration already activated on this page. If not, please repeat Steps 1-3 of the connection process and, if necessary, contact Teliqon Portal Technical Support.

- In the “User Synchronization” section, configure the settings as follows:

First, set “User Range For Extension Auto Creation” to “Specific Users”, then select “Search Criteria” and choose the corresponding groups or organizational units. After that, click “Search Users”.
Next, fill out the remaining parameters according to your needs:
-
Select the checkbox “Auto delete the Extensions no longer in sync” if you want extensions to be automatically removed from the PBX when, during synchronization, it is determined that they no longer belong to the specified organizational units.
-
In the dropdown list “Delete the Extension when its associated user account is”, choose one of the three available statuses. When a linked user account changes to the selected status, PBX will stop synchronizing that user and delete their associated extension.
-
Select the checkbox “Auto associate Extensions with the Users that share the same email address” if you want the system to automatically create extensions for synchronized users.
-
Select the checkbox “Send Welcome Email automatically after an extension is created” if you want the system to automatically send a welcome email to each contact after their extension has been created.
-
After completing the configuration, select the employees you want to synchronize and click “Synchronize to PBX”. You will be redirected to the synchronized list tab, where you where you have to manually assign extensions to each contact:

-
Click “Save”.
-
If the synchronization completes successfully, the “User Synchronization” section will display the message: “X users have been synced to the PBX Extension directory.” You can view the synchronized Extensions in the “Extension and Trunk” → “Extension” tab.

Important: Contacts synchronized from Google Workspace have a distinctive “G” icon next to the “Email Address” field. These contacts cannot be deleted from Cloud PBX. Additionally, the following fields can only be modified within Google Workspace:
- First Name;
- Last Name;
- Email Address;
- Mobile Number;
- Job Title.
How to Enable Google SSO
After synchronizing users from Google Workspace with Teliqon Cloud PBX, you can enable the Single Sign-On (SSO) feature. This will allow synchronized users to log in to Teliqon Cloud PBX personal accounts using their Google credentials.
If you have already connected Google Workspace and synchronized your contacts, no additional configuration is required. On the Cloud PBX login page (the link to which can be found in your Teliqon Portal personal account), you will see a “G” button that allows users to log in via Google.

CRM Integrations
This document explains how to integrate supported CRM systems with Teliqon Cloud PBX, configure each CRM integration, and enable user association, contact synchronization, and call logging.
Amazon S3 Integration
This document explains how to configure Amazon S3 as a remote archive storage for Teliqon Cloud PBX, including prerequisite setup, IAM configuration, archive server creation, and scheduled archiving tasks.
