Amazon S3 Integration
This document explains how to configure Amazon S3 as a remote archive storage for Teliqon Cloud PBX, including prerequisite setup, IAM configuration, archive server creation, and scheduled archiving tasks.
General Information
You can enable data archiving to Amazon S3 from the Teliqon Cloud PBX system.
Before starting the setup, ensure that you have an active Cloud PBX subscription with either the Teliqon Business or Teliqon Ultimate plan, and that a Storage Provider compatible with S3 (for example, Amazon S3) is configured. These are mandatory prerequisites for enabling the integration.
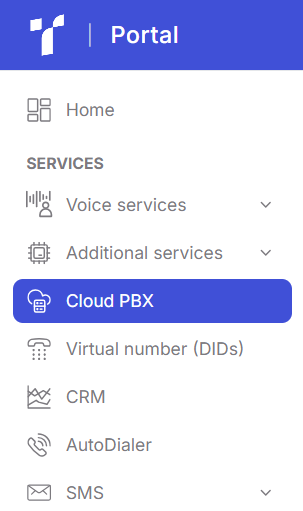
You can verify your Cloud PBX subscription in your Teliqon Portal account. To do so, sign in to the system and navigate to the Cloud PBX section:
If you already have an active Cloud PBX subscription, it will be displayed on this page:

If Cloud PBX has not yet been activated, you will see a list of available Cloud PBX plans. You can select any available plan (Teliqon Business or Teliqon Ultimate) yourself, or contact Teliqon Portal Technical Support for assistance with subscription activation, setup, and further configuration.

Next, to access your Teliqon Cloud PBX management interface, click the pencil icon in the “Actions” column:

Then, use the link to your personal management portal available in the settings:

After following this link, if your Teliqon Cloud PBX subscription is configured correctly, you will be redirected to your Cloud PBX personal dashboard:

If you encounter any issues during any of the previous steps, please contact Teliqon Portal Technical Support for assistance.
Why enable file archiving to Amazon S3
Amazon Simple Storage Service (Amazon S3) is an object storage service designed to store and retrieve any amount of data from anywhere. It is one of the supported remote archiving storage providers available for the Teliqon Cloud PBX system.
The remote archiving feature allows call recordings and system backups to be automatically exported to Amazon S3 by creating scheduled archiving tasks that run at specified times.
By using Amazon S3, you can access your data from anywhere, automate the archiving process, and optimize local storage by offloading data to the cloud, thereby improving overall system performance.
Benefits of Configuring Data Archiving to Amazon S3:
- Reliable Data Storage - The integration provides regular and automated backups of call recordings and system files, minimizing the risk of data loss and increasing overall data reliability.
- PBX Storage Optimization - Moving recordings and backups to Amazon S3 significantly reduces local PBX storage usage, freeing up resources for other system functions and improving performance.
- Efficient File Management - Archived files are automatically structured and named by file type, date, and archive task, simplifying file search, administration, and management of large data volumes.
- Reduced Infrastructure Costs - Using Amazon S3 as external storage helps lower expenses related to local server resources and enables a more cost-effective PBX infrastructure.
- Process Monitoring and Transparency - The system provides archive logs and task status notifications, allowing administrators to easily monitor successful executions or identify errors in the archiving process.
- Business Continuity and Disaster Recovery Support - The integration serves as a reliable disaster recovery solution, ensuring access to critical data in the event of hardware failures, system issues, or emergency situations
How to Enable File Archiving to Amazon S3
Teliqon Cloud PBX supports archiving system call recordings and backup files to Amazon S3, either at regular intervals or at any time convenient for you. This section describes how to add an Amazon S3 bucket as an archive server and schedule tasks to archive the required files.
When enabling data archiving to a remote server, it is important to consider the limitations of Teliqon Cloud PBX:
- A maximum of 10 archive servers.
- A maximum of 200 archive tasks.
To start archiving call recordings and PBX backup files to a specific Amazon S3 bucket, you must complete the following steps:
- Prepare a compatible AWS account and S3 bucket.
- Create an IAM user account that meets the following requirements:
- Full access to Amazon S3 resources for archiving PBX files.
- An access key pair (including an Access Key ID and Secret Access Key) to authenticate file archiving requests from the PBX.
- Create an S3 bucket to store archived PBX files.
- Configure the archive server and archive tasks on the PBX.
- Add the Amazon S3 bucket as an archive server.
- Create archive tasks to upload PBX files to Amazon S3.
When an archive task is executed, the PBX uses the IAM user’s access key pair to send file archiving requests to Amazon S3. If the requests are considered authenticated (authenticated requests are requests sent to a system or service on behalf of a verified and identified user or application and include credentials that confirm access permissions), the specified files will be archived to the designated Amazon S3 bucket.
Step 1
To begin, you need to create an IAM user with full access to an Amazon S3 bucket in AWS:
-
Sign in to the AWS Management Console (https://console.aws.amazon.com/)
-
At the top of the console, locate the IAM service and navigate to this section:

-
In the left-hand navigation menu, select “Users”, then click “Create user” in the upper-right corner:

-
On the “Specify user details” page, enter a name in the “User name” field to identify the IAM user, then click “Next”:

-
On the “Set permissions” page, grant the user full access to Amazon S3 buckets. You can assign permissions by adding the user to an existing group, creating a new group, or attaching permission policies directly to the user. If you already have a suitable group, select it and click “Next”.
Example: Creating a new group with full Amazon S3 access and adding the user to it:
-
Select “Add user to group”, then click “Create group”:

-
Enter a name in the “User group name” field, then in the “Permission policies” section select “AmazonS3FullAccess” and click “Create user group”:

-
The group is now created and can be selected as the user’s group. After selecting it, click “Next”:

-
On the “Review and create” page, click “Create user". The IAM user with full access to the Amazon S3 bucket will be created and displayed in the users list.

-
Create an Access Key for the IAM User:
-
From the users list, click the newly created IAM user to open the user details page:

-
In the “Summary” section, click “Create access key”:

-
On the “Access key best practices & alternatives”page, select “Third-party service”, confirm the operation by selecting the checkbox, and click “Next”:

-
On the “Set description tag - optional” page, enter a description for the access key if required, then click “Create access key”:

-
On the “Retrieve access keys” page, copy and securely store the Access key and Secret access key, then click “Done”:

-
Important: Make sure to securely save the Secret access key, as it is displayed only once. This key will be required in the next configuration steps.
Step 2
As the next step, you need to create an Amazon S3 bucket on AWS. To do this, follow the steps below:
-
Sign in to the AWS Management Consol (https://console.aws.amazon.com/)
-
On the Amazon S3 home page, locate and click “Create bucket”. (If you need to navigate to this page, enter “S3” in the search bar and select the “Buckets” section):

-
Specify the bucket details:

-
AWS Region - Displays the region you selected automatically.
-
Bucket name - Enter a name that will help you identify the bucket.
-
Configure the remaining settings according to your requirements, then click “Create bucket” at the bottom of the page.

-
Done. The Amazon S3 bucket has been successfully created and will appear in the list of buckets.
Step 3
Next, you need to add the Amazon S3 bucket as an archive server in the PBX.
-
First, log in to the Cloud PBX portal. You can do this by accessing Teliqon Cloud PBX personal account and using the link to open the portal management system:

-
In the menu on the opened page, select “System” → “Archive”:

-
On this page, click the “+ Archive Server” button:

-
In the window that opens, click “+ Add”:

-
Enter a name for your server and configure the parameters as follows:

-
Name - Enter a name that will help you identify the archive server.
-
Server Type - Select S3.
-
Region & Endpoint - Enter the AWS region of your S3 bucket and the corresponding Amazon S3 endpoint with the appropriate protocol (e.g., https://). Tip: To view supported regions and their standard Amazon S3 endpoints, refer to “Amazon S3 regular endpoints” ( https://docs.aws.amazon.com/general/latest/gr/s3.html)
-
Access Key ID - Enter the access key provided by AWS.
-
Secret Access Key - Enter the secret access key provided by AWS.
-
Click “Save”, then close the add server window.
-
Done. The archive server has been successfully added.
Step 4
As the final step, you need to create a task to archive files to Amazon S3 in the Teliqon Cloud PBX system.
-
Log in to the Teliqon Cloud PBX portal and use the button to access the PBX management portal:

-
In the menu on the opened page, navigate to “System” → “Archive”:

-
On this page, click “+ Add”:

-
A configuration window will open, where you need to define the archiving process according to your requirements. The task can be created as a one-time or a recurring archive task:

-
Name - Enter a name to identify the archive task.
-
File Type - Select “Recording Files”.
-
Data Range - Specify the time range of files to be archived. You can archive up to 31 days of data at a time, starting from files dated up to “today”.
-
Sync Frequency - Define how often files should be archived to Amazon S3. It is recommended to schedule archiving outside of Cloud PBX business hours to reduce system load.
-
Once - The system archives files immediately after the task is saved.
-
Daily - Select a time from the drop-down list. Files will be archived daily at the specified time.
-
Weekly - Select a day of the week and a time. Files will be archived weekly at the specified day and time.
-
Monthly - Select a day of the month and a time. Files will be archived monthly at the specified date and time.
-
Archive Server - Select the Amazon S3 bucket added in Step 3.
-
Select Folder/Path - Choose the container or folder where the archived files will be stored.
-
Skip archived files - Specify whether files that have already been archived should be skipped. This option is available only for recording files.
-
If enabled, the system will not archive files that have already been archived.
-
If disabled, the system will archive files even if they were previously archived. The storage location will be updated, but the previous copy will not be deleted from the external server.
-
Delete local files after archiving - Specify whether local files should be deleted after archiving. This option is available only for recording files.
-
If enabled, local files will be deleted after archiving. They will still be available for playback and download from the PBX administration portal and Linkus UC clients, but they will not be available for playback or download from the external server or in Dynamics 365.
-
If disabled, local files will be retained after archiving.
-
After completing the configuration, the final task will appear similar to the example shown:

-
Click “Save” to create and activate the archive task.
Results
To view the results of archive task execution, you can use the “Archived Logs” tab.
If the archiving process is completed successfully, the corresponding entry will have the status “Succeeded”.
If the process fails, the entry will be marked with the status “Failed”.
The archived files themselves will be available in your Amazon S3 bucket that was created in Step 2.
Google Workspace Integration Guide
This document explains how to integrate Google Workspace with Teliqon Cloud PBX, configure Google OAuth resources, synchronize users and contacts, and enable Google Single Sign-On (SSO).
Google Cloud Storage Archive
This document explains how to configure automatic archiving of Cloud PBX call recordings to Google Cloud Storage, including service account setup, bucket creation, and archive task configuration.
