Google Cloud Storage Archive
This document explains how to configure automatic archiving of Cloud PBX call recordings to Google Cloud Storage, including service account setup, bucket creation, and archive task configuration.
General Information
You can archive call recordings within your Teliqon Cloud PBX subscription to Google Cloud Storage at any time, or configure automated recurring archiving. To do this, you must add Google Cloud Storage as an archive server and create an archive task for the required files.
Before beginning the integration, ensure that you have an active Teliqon Cloud PBX subscription on the Teliqon Business, or Teliqon Ultimate plan. This is a mandatory requirement for enabling the integration.
You can verify Cloud PBX subscription status in your Teliqon Portal account.
To do so, log in to the system and navigate to the Cloud PBX section.
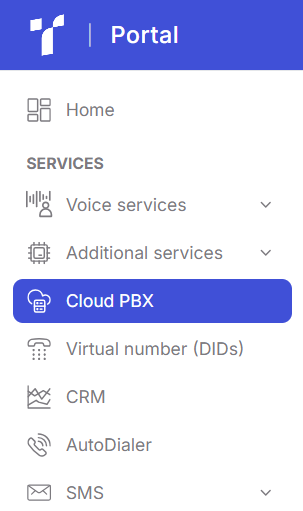
If you already have an active Cloud PBX subscription, it will be displayed on the page:

If Cloud PBX is not yet connected, you will see a list of available Cloud PBX plans. You can select any of them (Enterprise Plan or Ultimate Plan) yourself, or contact Teliqon Portal Technical Support for assistance with activation, connection, and further configuration.

Next, to access Teliqon Cloud PBX Management Console, click the pencil icon in the “Actions” column:

Then, use the domain of your personal Cloud PBX account in the settings:

When you open this domain, if Teliqon Cloud PBX subscription is properly configured, you will be redirected to your personal Cloud PBX dashboard:

If you encounter any issues at any of the previous steps, please contact Teliqon Portal Technical Support for assistance.
How to Enable File Archiving to Google Cloud Storage
To begin connecting Google Cloud Storage to your Teliqon Cloud PBX system, first ensure that Teliqon Cloud PBX subscription meets the requirements outlined in the General Information section. Then, in the same section, refer to the instructions on how to access the Teliqon Cloud PBX management page.
Once all prerequisites have been met, you may proceed with the integration process:
Step 1
To begin, you need to create a service account in Google Cloud.
-
First, sign in to Google Cloud using a super administrator account, and navigate to link https://console.cloud.google.com/.
-
If you already have an existing project (as described in the Google Workspace Integration documentation), select it from the list of available projects:

If you do not have such a project, you can create one by following the instructions provided in the referenced documentation.
- In the search bar, enter “Service Accounts” and select the corresponding option from the dropdown list:

- On the page that opens, click “+ Create service account”:

- In the Create service account section, enter a name (to easily identify this service account later) in the Service account name field, then click “Create and continue”.

- In the Permissions section, assign the role “Storage Admin”, then click “Done”:

- After the service account is created, you will need to generate its access keys. To do this, click the three dots in the Actions column and select “Manage keys”:

- In the window that opens, click “Add key” and select “Create new key”:

- Choose the JSON key type:

- A JSON file containing the key will then be downloaded to your computer. Click “Close” in the informational window:

Step 2
Next, you need to create a bucket in Google Cloud Storage.
-
First, sign in to Google Cloud using a super administrator account, and navigate to link https://console.cloud.google.com/
-
In the search bar, type “Cloud Storage” and select the corresponding option from the dropdown list:

-
On the Cloud Storage page, go to the “Buckets” tab and click “Create”:

Important: If Billing is not enabled (as shown in the screenshot), you must start a free trial. To do this, click “Sign up for a free trial”, complete the required form, and then return to this step.
- A bucket creation window will appear. Enter a Bucket Name (this will help you identify the bucket later), then click “Continue”:

- In the “Choose where to store your data” section, select the region where your bucket will be hosted. Then click “Create” at the bottom of the page, or click “Continue” if you need to modify the default settings for “How to control access to objects” and “How to protect object data”:

- Once the bucket is created, a confirmation window will appear. Click “Confirm”:

- Your bucket is now successfully created.
Step 3
Next, you need to add your Google Cloud Storage bucket as an archive server for storing call recordings from Cloud PBX. Instructions on how to access Teliqon Cloud PBX interface can be found in the General Information section.
- Log in to Cloud PBX account and use the button to open the Portal Management System:

- On the page that opens, navigate to “System” → “Archive”:

- On this page, click “+ Archive Server”:

- In the window that appears, click “+ Add”:

- Enter the server name, set Server Type to Google Cloud Storage, and upload the JSON key file obtained in Step 1. Then click Save:

- Close the window by clicking the Close icon:

- Your archive server has now been successfully added.
Step 4
The final step is to create an archive task that will transfer call recordings to Google Cloud Storage within Teliqon Cloud PBX system.
- Log in to Cloud PBX account and use the button to open the Portal Management System:

- On the page that opens, navigate to “System” → “Archive”:

- On this page, click “+ Add”:

- A configuration window will appear where you can define how your data should be archived. This can be a one-time archive or a recurring schedule:

-
a. Name - Enter a name for the archive task.
-
b. File Type - Select Recording Files.
-
c. Data Range - Specify the time period for which you want to archive files. You can archive up to 31 days at a time, starting from “today”.
-
d. Sync Frequency - Set how often the files should be archived to Google Cloud Storage. It is recommended to schedule archiving outside business hours to reduce overall system load.
i. One Time: Files will be archived immediately after saving the task.
ii. Daily: Select a time for daily archiving.
iii. Weekly: Select a day of the week and a time.
iv. Monthly: Select a day of the month and a time.
-
e. Archive Server - Select the Google Cloud Storage server you added earlier.
-
f. Select Folder/Path - Choose the bucket or folder where the archived files should be stored.
- The final setup of the task will look approximately as follows:

- Once the configuration is complete, click “Save”.
Results
To review the execution status of the archive task, navigate to the Archived Logs tab.
If the task completed successfully, the log will display the status Succeeded.
If it failed, the status will be marked as Failed.
The archived files themselves will be available in your Google Cloud Storage bucket created in Step 2.
Amazon S3 Integration
This document explains how to configure Amazon S3 as a remote archive storage for Teliqon Cloud PBX, including prerequisite setup, IAM configuration, archive server creation, and scheduled archiving tasks.
Microsoft 365 Integration
This document explains how to integrate Microsoft 365 with Teliqon Cloud PBX, configure application permissions, authenticate users, and enable contact synchronization and call logging.
